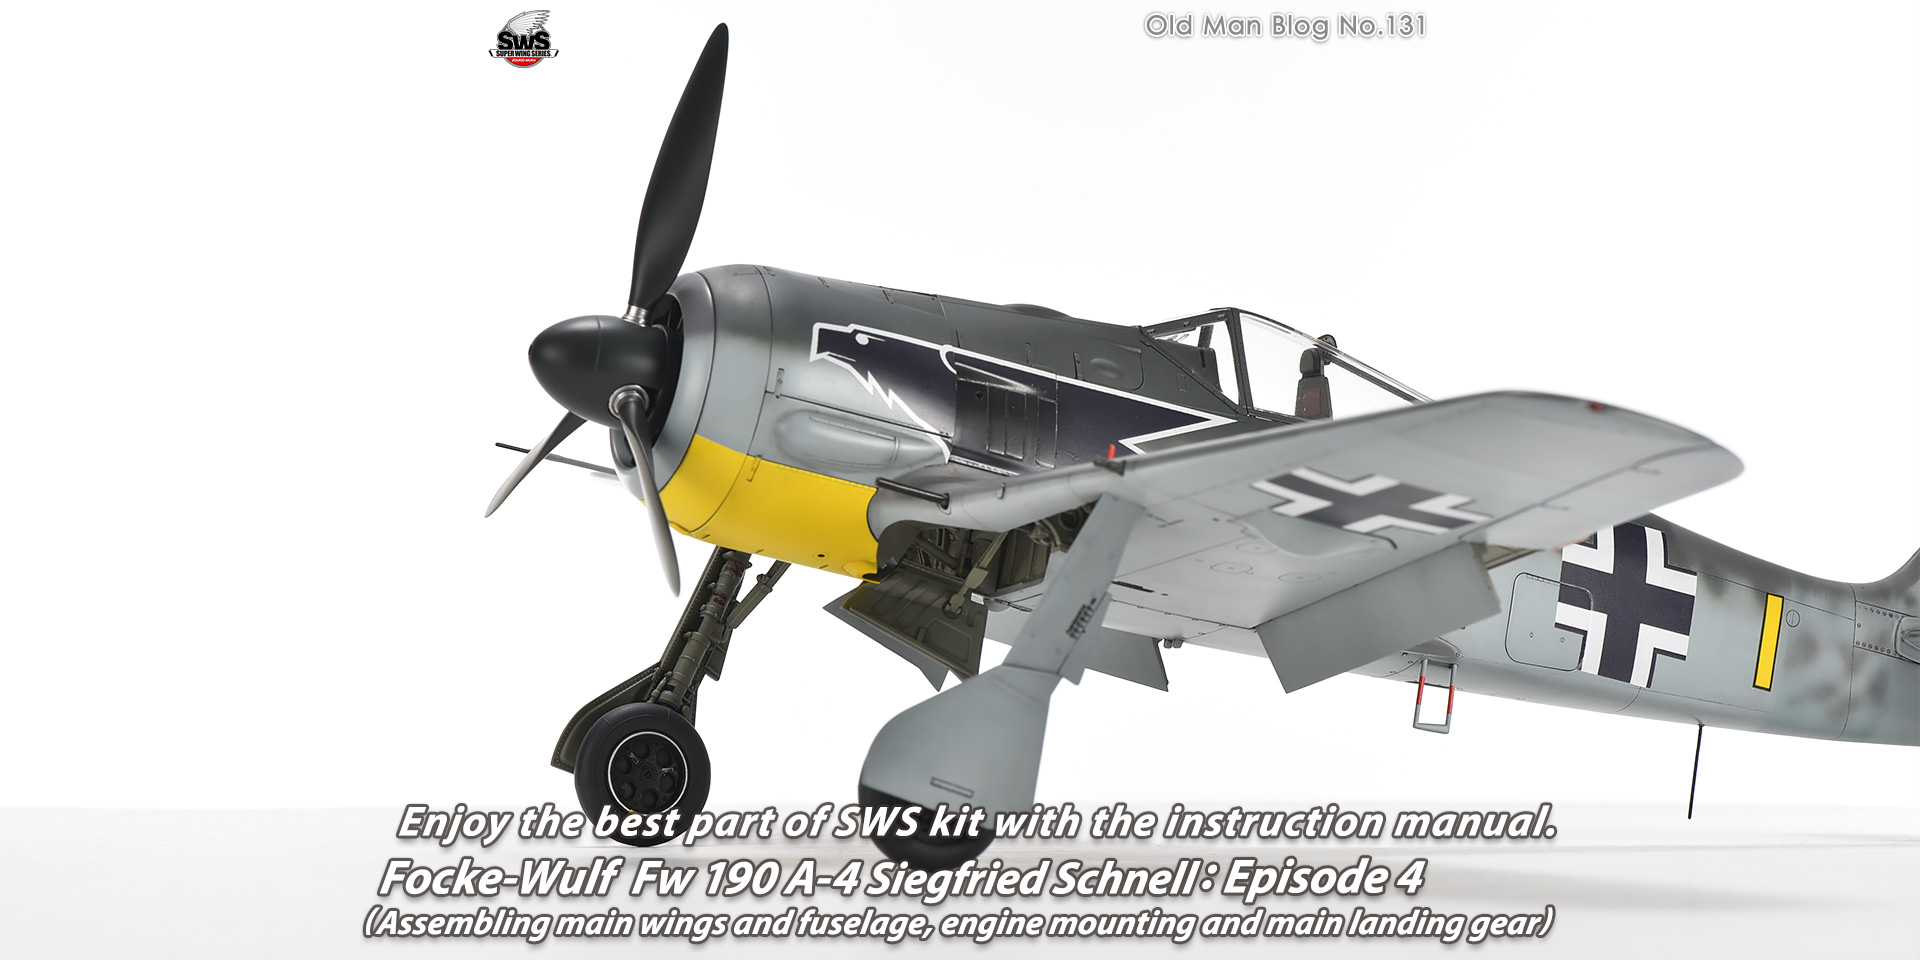
Now, let's move on to the main wings, fuselage, engine mount and main landing gear of the Fw 190.
As always with SWS kits, this kit is packed with a lot of information, including a parts configuration and detailed expressions that are as close to the actual aircraft structure as possible in 1/32 scale.
Experienced modelers may already know, but please read this instruction manual thoroughly once again and memorize what to do in each step very well until you can build it with your eyes closed (this will make a huge difference whether it will be enjoyable or painful.)
Look.
There are some points here and there where you need to choose how you want, and where you need to pay extra caution not to break the parts. It is also important to check the angle from the front of the main wings as well as the left and right mounted machine guns. Without a lot of care, you might end up with an Fw 190 that cannot fly.
However, to build the main wings is not that hard. Simply assemble the parts, making sure to be precise as the instruction manual says, and glue them together. The Fw 190 main wings will be done.
You can add hydraulic pipes, wiring for electrical components, and various auxiliary equipment by referring to your own materials.
It is truly like making a museum model. Good luck~~~!
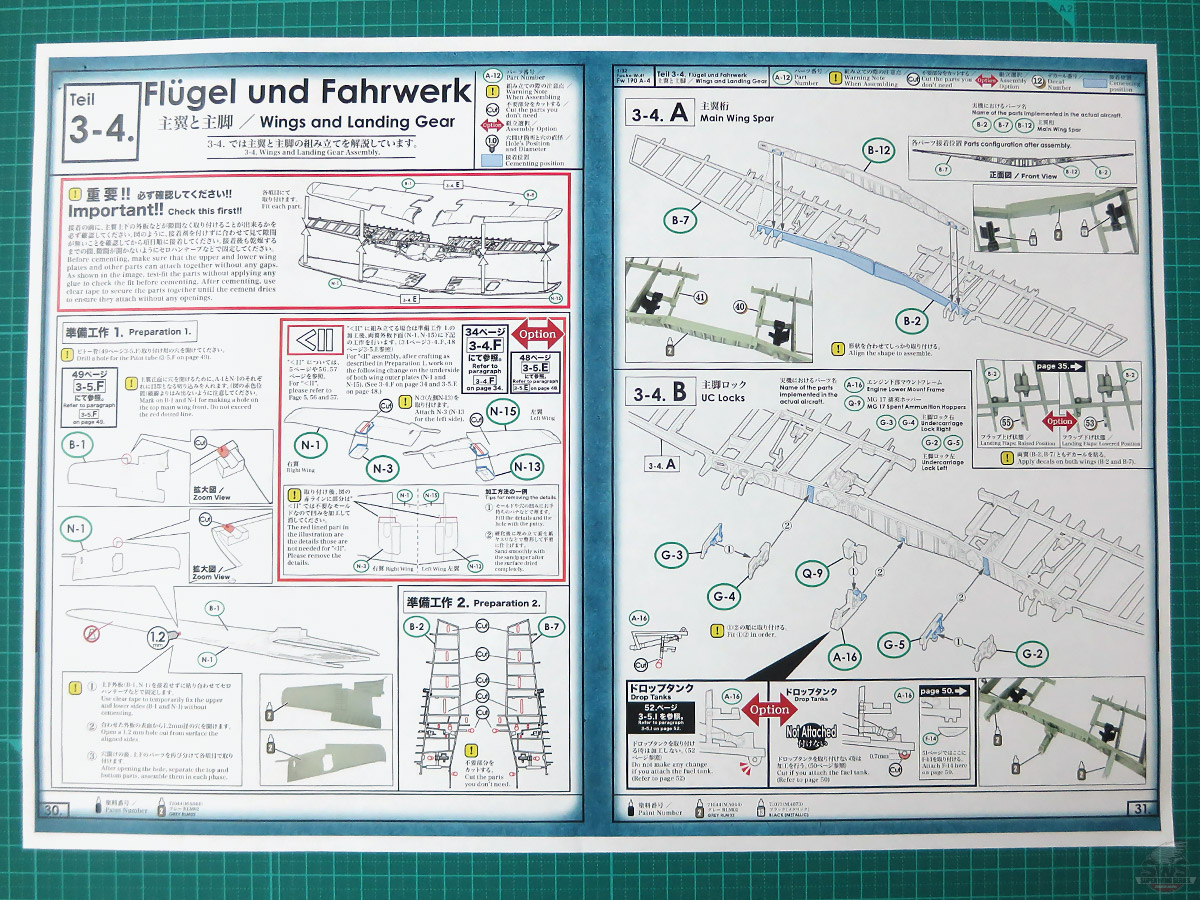
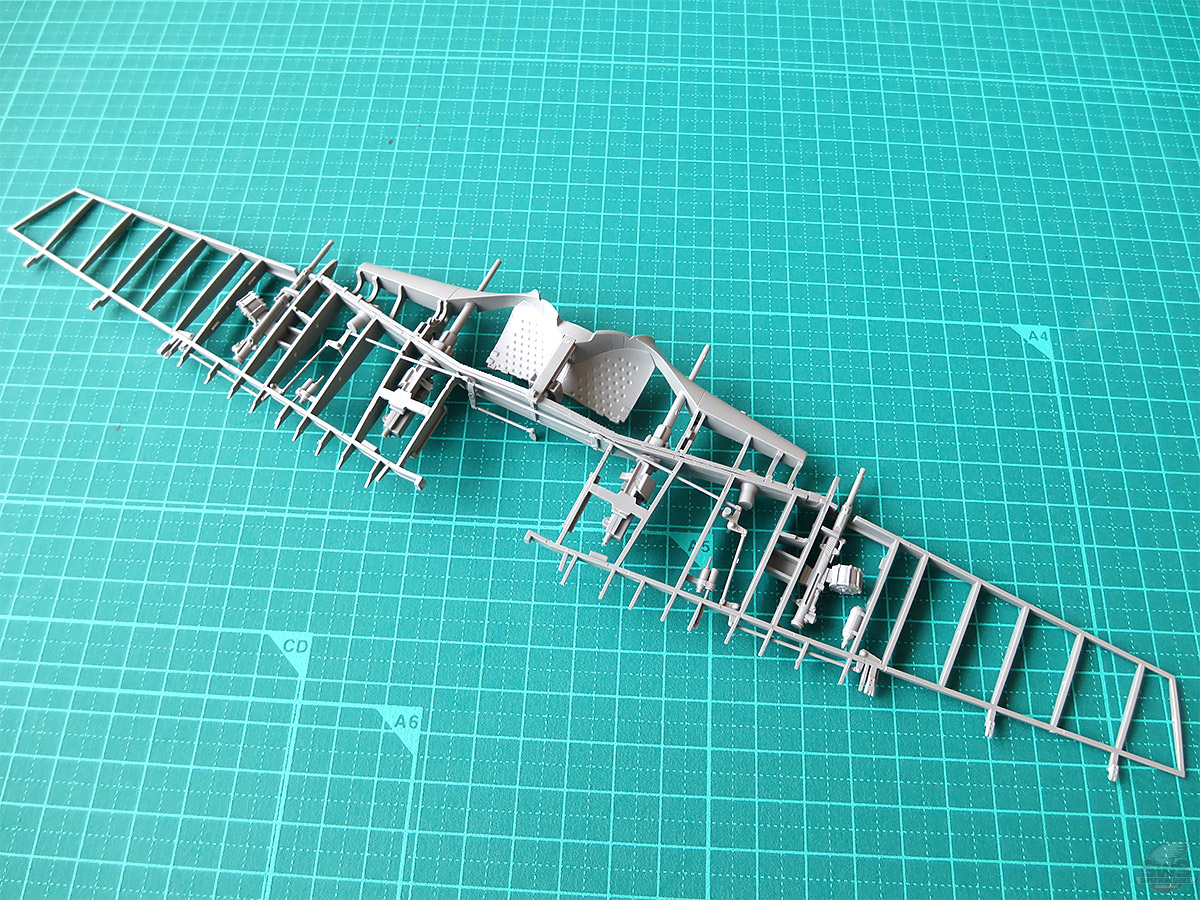
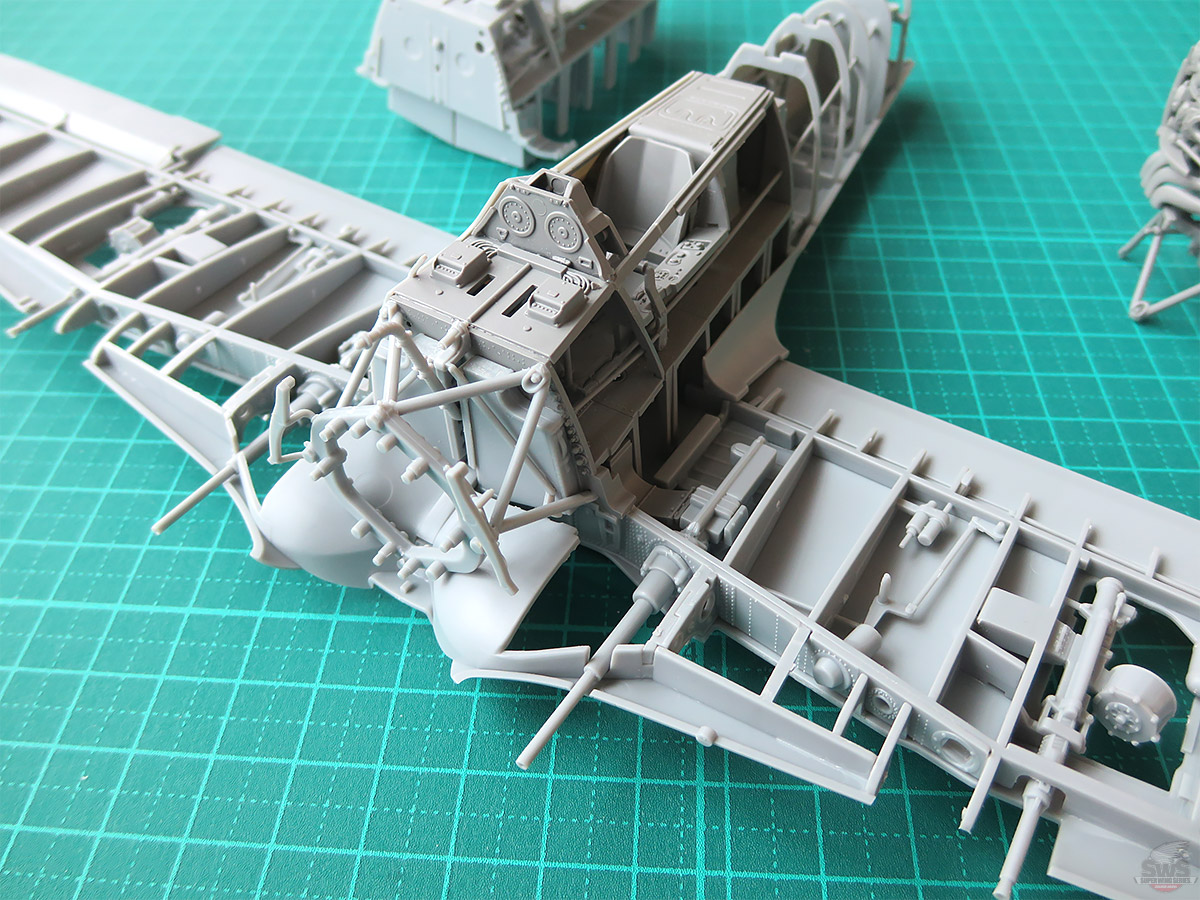
▋Check the structural representation of the main wings.
Numerous Fw 190 kits have been released in the past, but most of the time, the main wing spar is ignored, and modelers can only imagine. With this kit, the main wing spar is re has been reproduced with the best possible expression.
At first glance, this may seem unnecessary. However, Zoukei-mura has faithfully reproduced it as much as possible, believing that the existence of this massive skeleton will determine the success or failure of the accurate upper half angle of the main wing, the expression of the twist down, the secure installation of the landing gear, and the storage of the in-wing machine gun, which is the main armament of the Fw 190.
One of our recommendations is not to glue the outer panel parts and to leave them removable so that the wing spar can be seen at any time. Please give it a try!
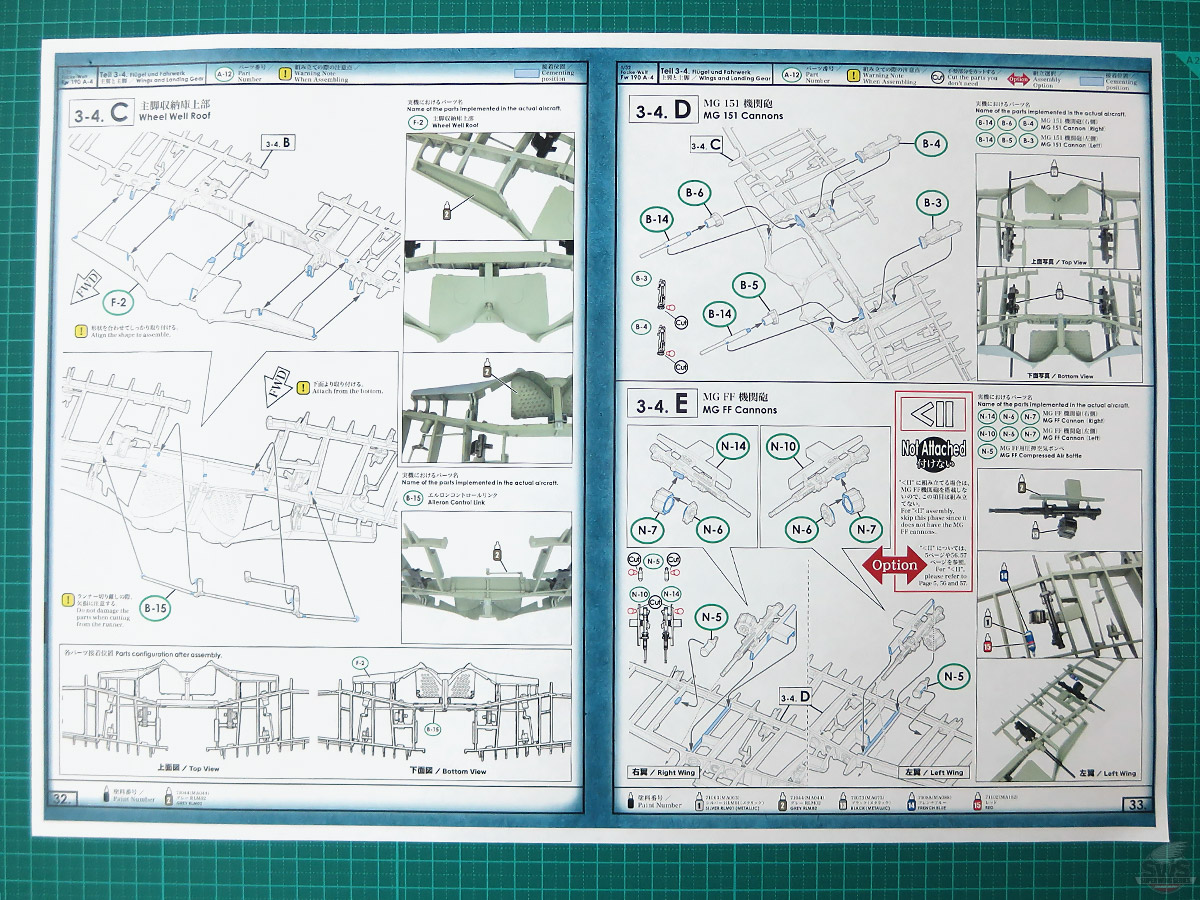
▋The Fw 190 was widely welcomed by army units for its bomb load capacity that is close to that of Stuka dive bomber, and for its ground attack capability that took advantage of its outstanding mobility and climbing ability.
This kit is A-4, so even though it was not yet equipped with many armaments, it went through modifications required by the war situation, and you can see how amazing the wing structure is. Oops! Don't get carried away too much by the heroic appearance of the rugged and reliable MG 151 machine gun and MG FF machine gun because the groundwork for the additional tanks is also important! Pin vice, pin vice!
If you forget the groundwork here, your model will suffer an insufficient flight range, and will be forced to abandon the front line.
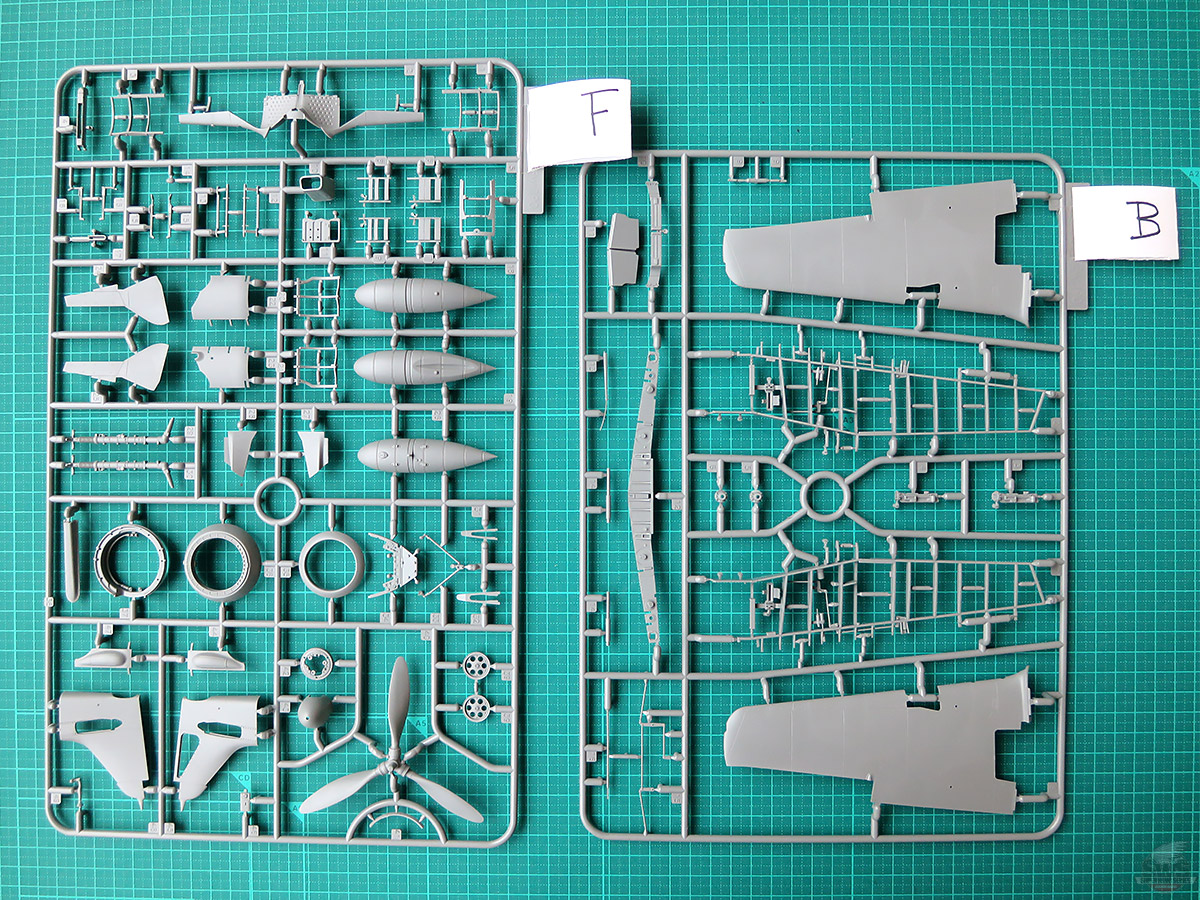
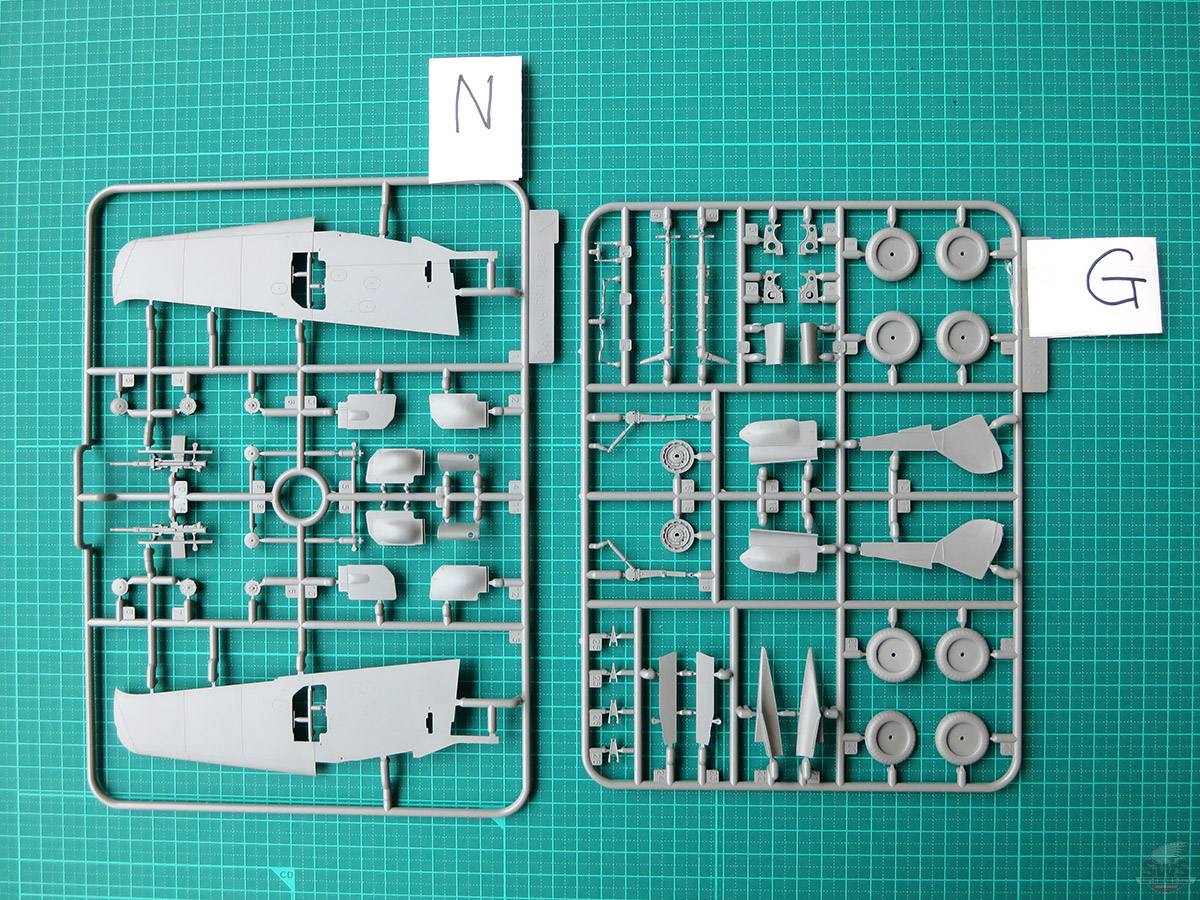
▋How many times have I looked at this part in fascination? One of the highlights is the retractable part of the main landing gears.
Its back side is also molded in detail, just like on the actual aircraft. The same goes for the main landing gear covers. I am grateful to the developing team for having done such a detailed work.
The quality of this propeller is also noteworthy! Its precise shape, thickness, and twist of the propeller were indeed worth the effort of designing it by looking at the real propeller (the real propeller is displayed in the store at the Volks headquarters. Please come and look during the store hours!).
Please check out the reproduction of the bulletproof ring and the shape of the propeller spinner, too~!
▋Now the main wing skeleton has been done. Naturally the number and the shape of the ribs are different from those of the actual aircraft, however, when this aircraft model is completed, you should be able to clearly recall this shape in your mind, and to understand this structure in your mind through the shape of the outer panel.
You can add the cable wires and hydraulic pipes, etc. Please enjoy a real of pleasure that only SWS kits can provide.

▋Let’s see, whether to glue the outer panels of the main wings or to make them detachable in order to enjoy the inner structure.... If you don’t know which, why don’t you just give it a try? That's how you can enjoy the SWS kit to the bone. You also need to choose the raised or lowered position for the flap. Compared to that of the Bf 109, this Fw 190 is quite simple!
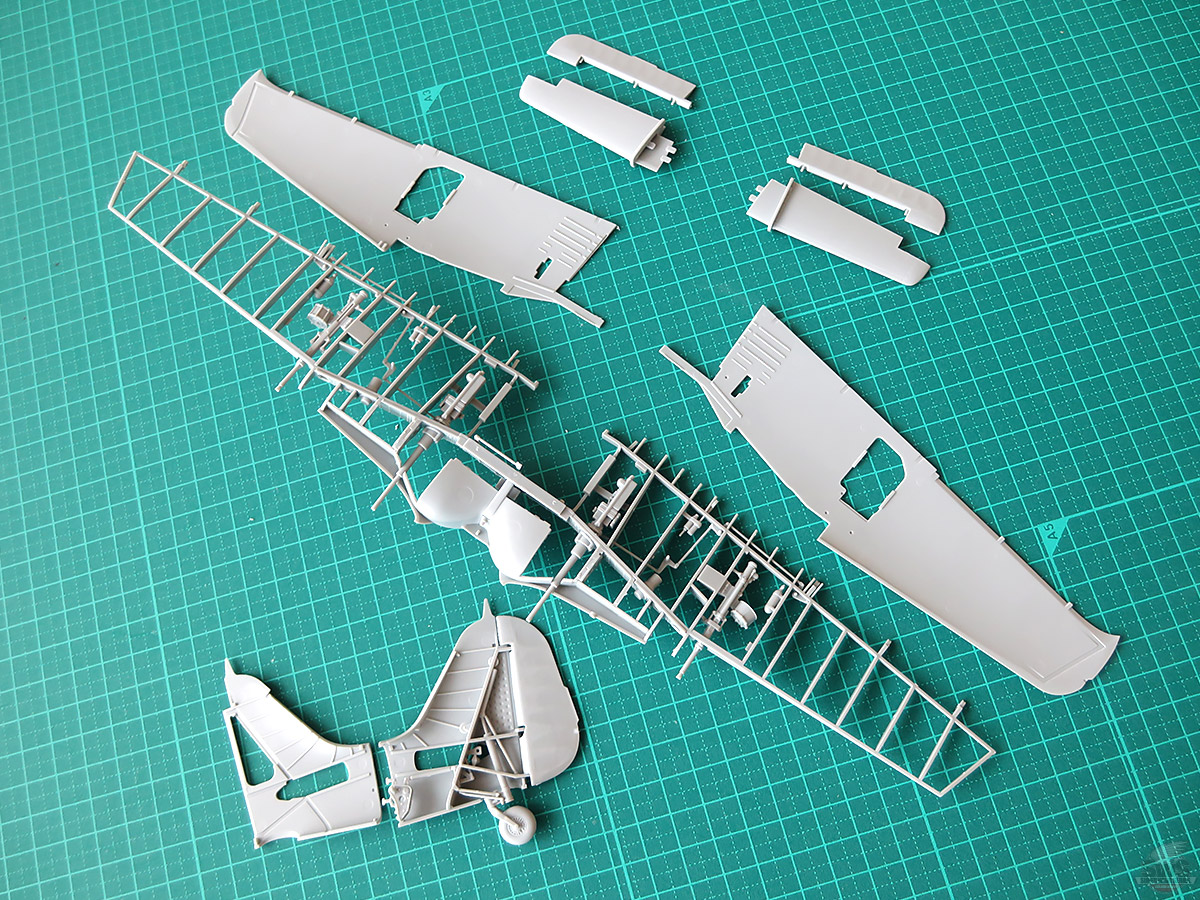
▋This is a photo of the wing panels and wing structure section, the tail wings, directional rudder and the internal structure of the tailwheel.
This shows how heavily armed the Fw 190 A-4 was. So powerful!
This is only A-4.
It will be interesting to see how the armament of the A-5, A-6, A-7, and A-8 (and many other variants are on our list, too) will be developed. Of course, we will develop each variation as a solid scale model, not as a fake version!
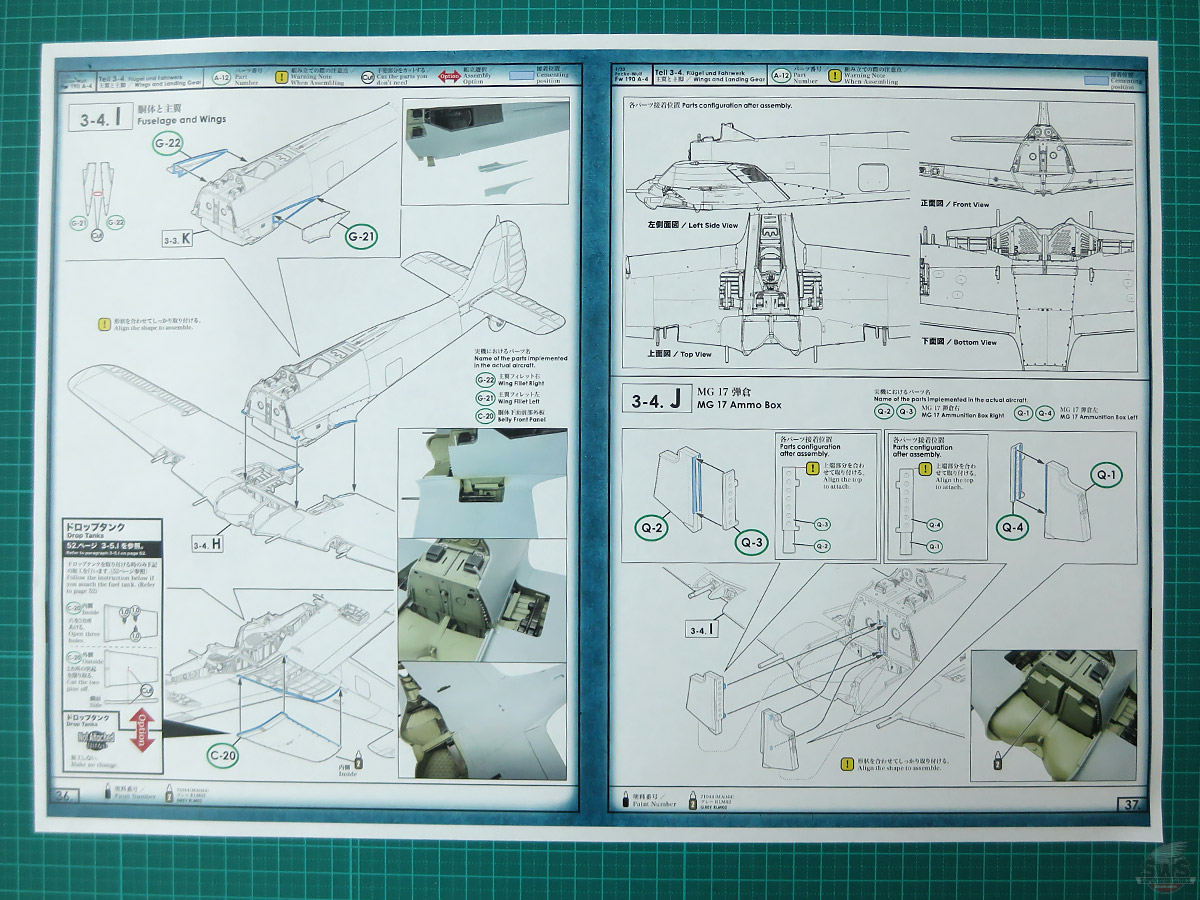
▋Now! Now it is time to combine it with the fuselage. Do not glue the left and right fillet parts at once. Instead, do it carefully by checking how the main wings and the fuselage are joining.
Glue the lower fuselage plate of the "C-20" temporarily so that you can complete the whole construction when you make the final disguise.
After the magazine parts, then attach the engine mounts.
It is said that the magazine was equipped with as many as 400 rounds of ammunition for each side. Fw 190 was incredible~~
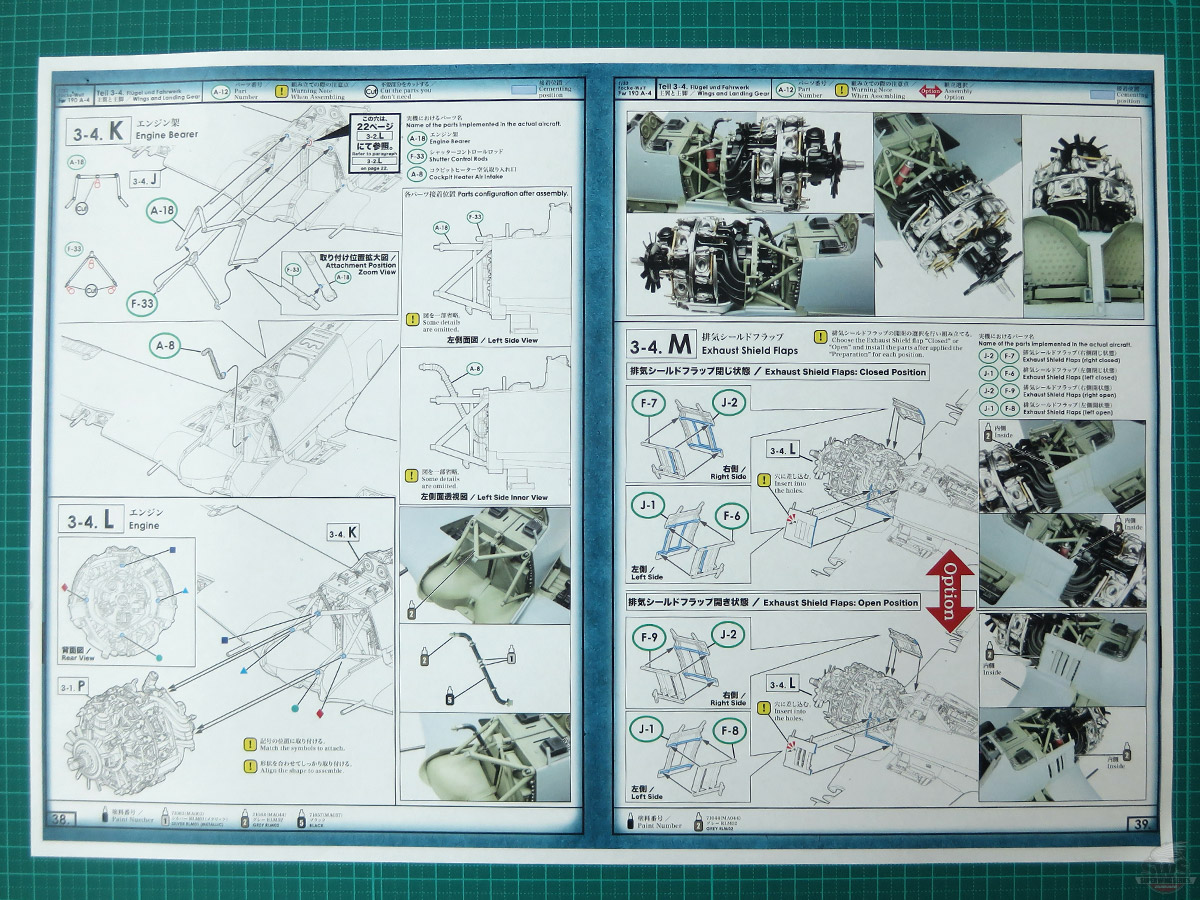
▋We will now move on to “the engine mount" and "BMW engine," and you will need the closest attention. The engine mount parts are made of metal in the actual aircraft, but in the SWS kit, they are thin plastic, which is not as strong as metal. Be careful not to distort or misalign the engine and fuselage mount parts and proceed with accuracy and sturdiness (the engine is also made of plastic, so it should be fine).
Pay close attention to the angle of the engine. Check the angles of the front, rear, top and bottom surfaces.
▋This photo shows how to glue the engine mount on the fuselage side. For another option, you can glue the mount on the engine side. You can do whichever works for you, try some temporary assemblies first.
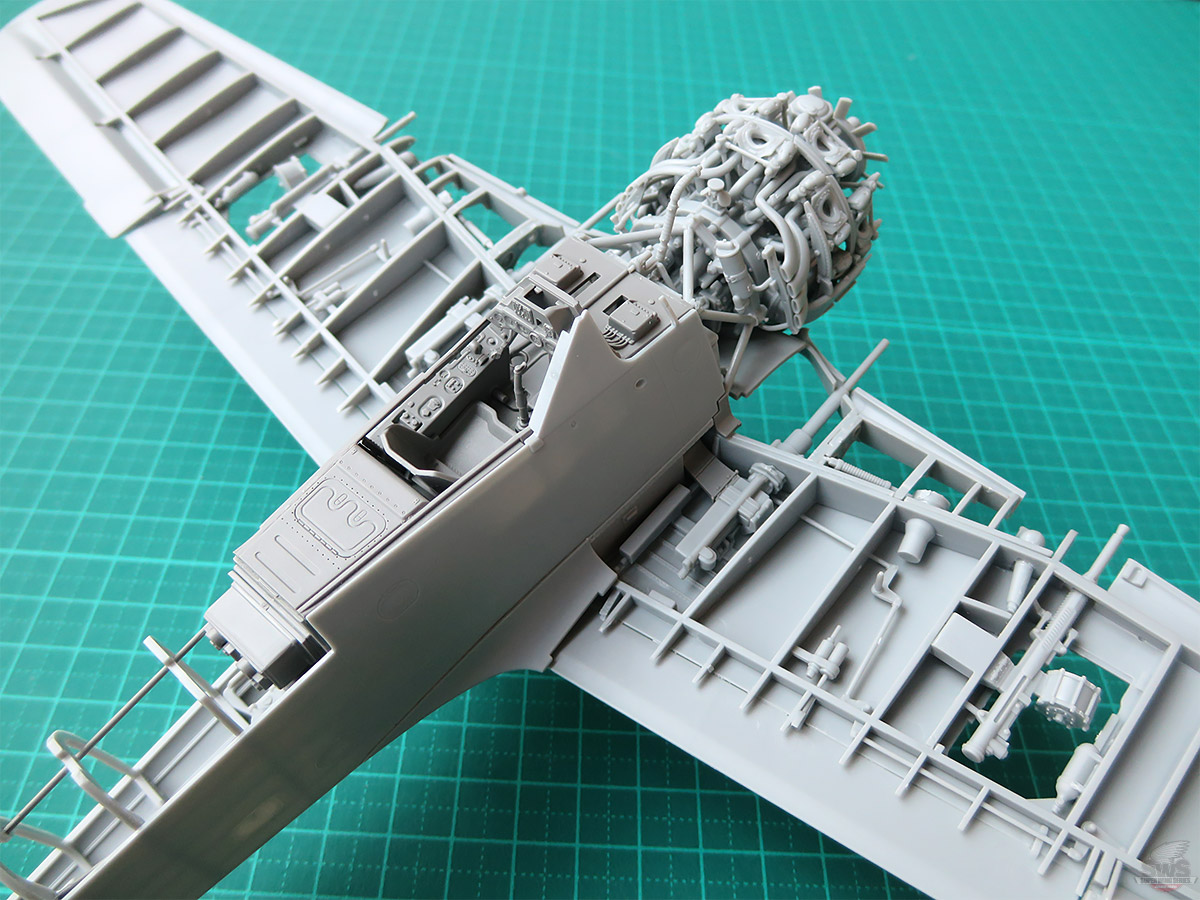
▋The BMW 801 D-2 engine is installed. This photo explains why the Fw 190 was the most powerful aircraft in the world at the time. The Royal Air Force pilots must have been astonished at the appearance of the Fw 190, which was powered by this powerful air-cooled engine weighing one ton.
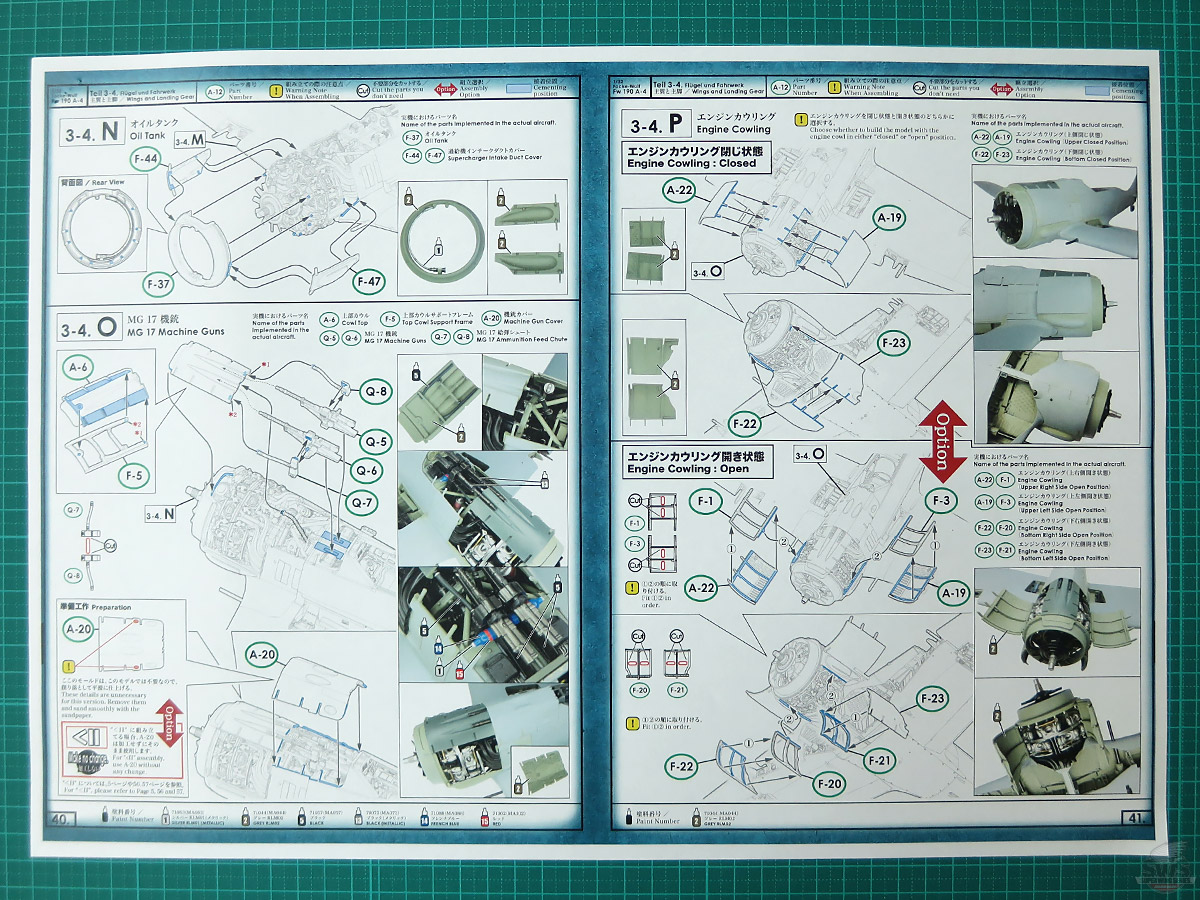
▋The oil tank, MG 17 machine gun, and engine cover are installed one after another.
Whether to "open" or "close" the engine cowling will change how it will be presented.
This is a BMW engine. It would be fun to make a diorama of the engine being repaired with all the covers in the "open" position. Each part was designed on the assumption of that, with detail on both inside and outside. All you need to do is to add the open wires.

▋The bulletproof ring at the front of the fuselage is finished. Next is the landing gear. While attaching the motors and the leg raising arms to the main landing gear, attach them to the main spar precisely in accordance with the leg pillar angle on page 45 of the instruction manual.
It’s better not to attach the main leg covers at this stage, but rather at the point of final outfitting. for a neater finish.
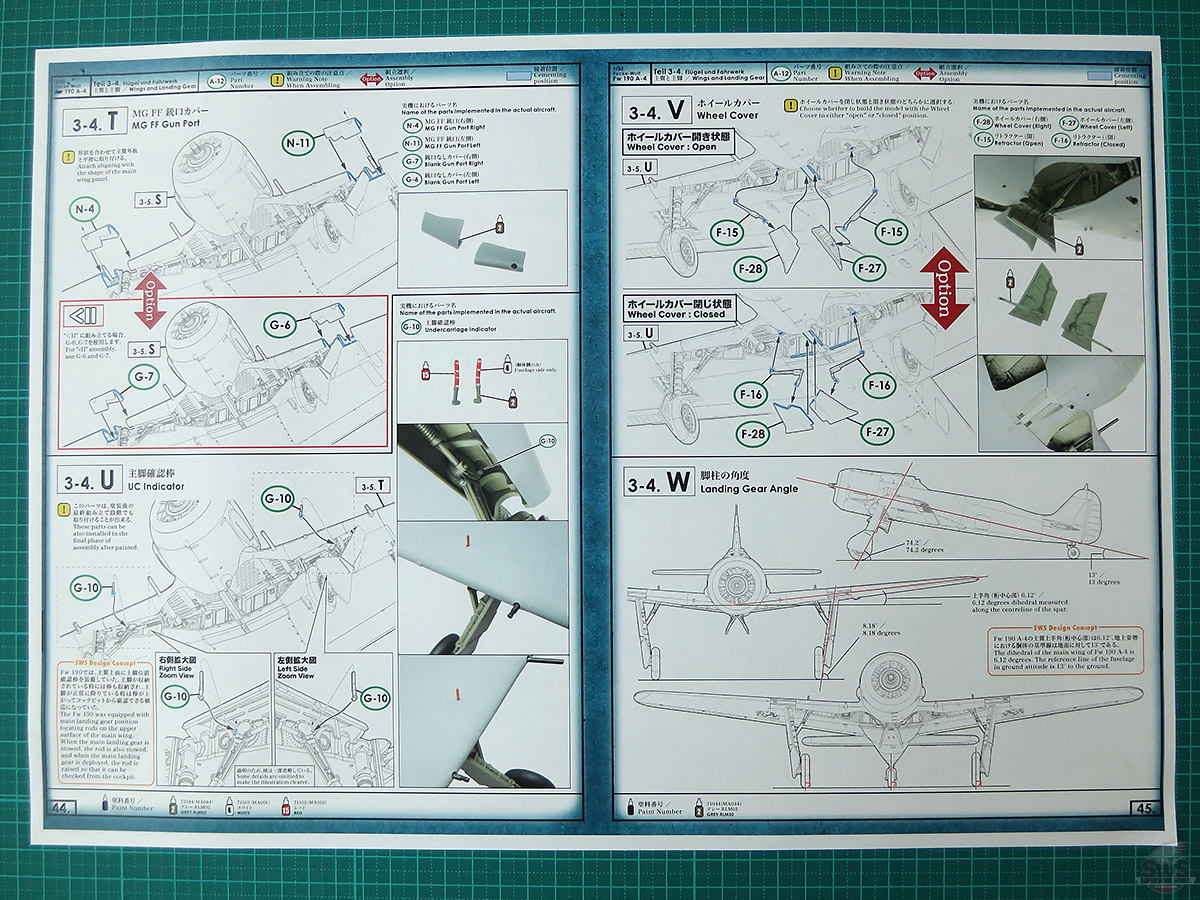
▋Is the angle of the main landing gear accurate? Accuracy of the angle of the landing gear and ground angle of the tires, which is a characteristic of the Fw 190, will greatly affect the finished work. When I started my modeling hobby 60 years ago, the ground angle of the tires was the same angle as that of the landing gear, in other words, the tire wheels were made at an oblique angle.
Later on, I had a chance to see the actual aircrafts from the front at aircraft museums, I realized that this was the way it was supposed to be.
Whew, here we are. One more breath and the SWS32 Fw 190 will be complete.
Did you pay attention to all the details and metalwork on the wing tops and fuselage? There are many parts that I want you to look at carefully, such as the hinges of the engine cowling cover and the backside of the flaps.
The Fw 190 kit is just stunning with its sophisticated Luftwaffe form interweaving the lines and the surfaces, and so it makes you feel you wish you could keep assembling it.
This is a fighter among fighter planes! You are in the middle of assembling such an aircraft as a scale model.
Me, for example.
Every night, afterimages of the progress come back to me in bed and make me feel so happy that I can hardly fall asleep.
I want to keep staring at the aircraft that is in progress and I feel so clearheaded until late at night.
Oh, you too? “I'm always like that, too.” I know, I know, brother?
We are both blessed with good hobbies, aren't we?
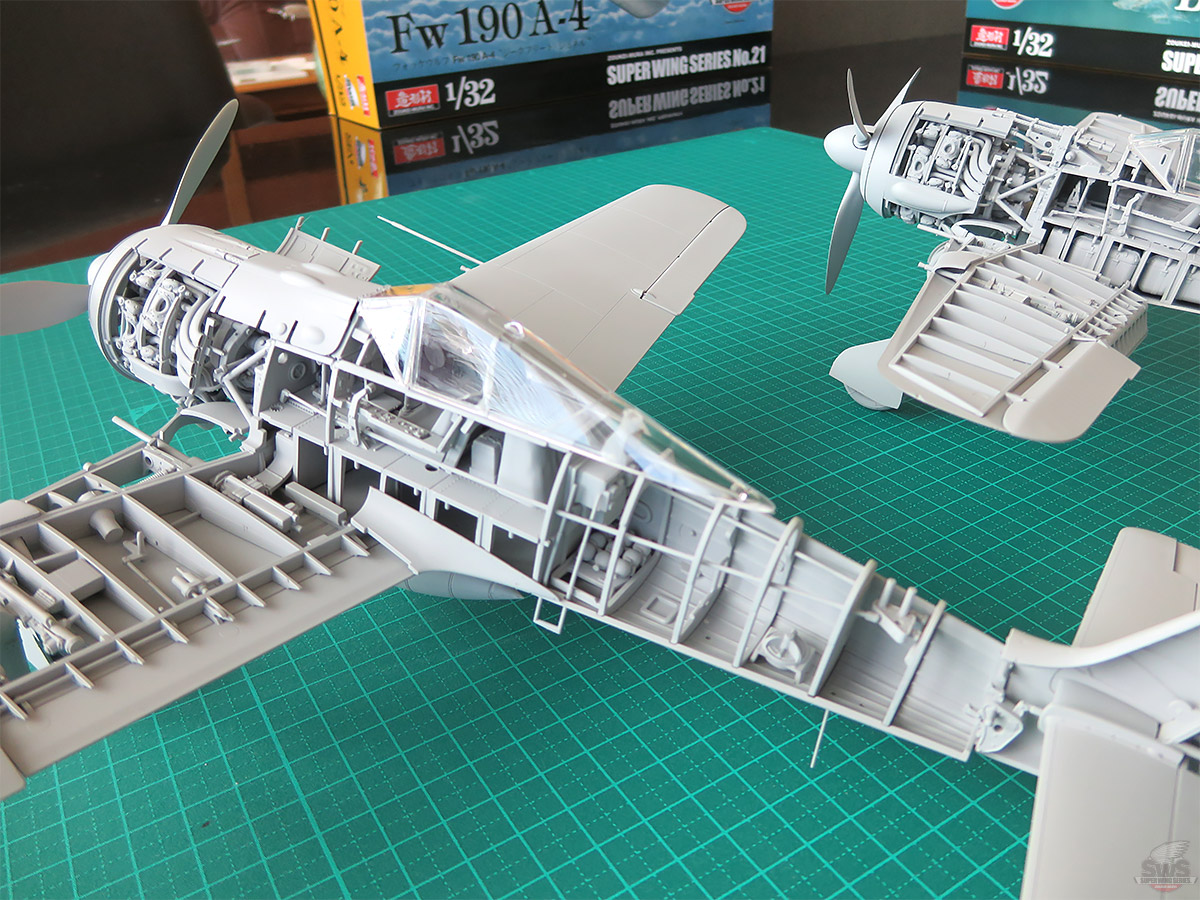
▋Two Fw 190s sitting side by side. The sturdy fuselage structure and the stately appearance of the Luftwaffe's aircraft are very attractive. It is already powerful without any paint. How amazing it is going to look after you put all your skills, ingenuity, and passion into it?
Finally, the next issue will be the last episode of this kit.
You might have already done most part of the "SWS Fw 190 A-4 Siegfried Schnell".
I would be more than happy if this old man's blog can be of some help to you.
If you have not bought this kit yet, trust me and this blog and please add this Fw 190 A-4, the latest and most advanced SWS kit to your collection.
You will be wowed with both the tension and the satisfaction.
Please look forward to the next issue~~~~
Hideyuki Shigeta
President, Zoukei-Mura
![]()


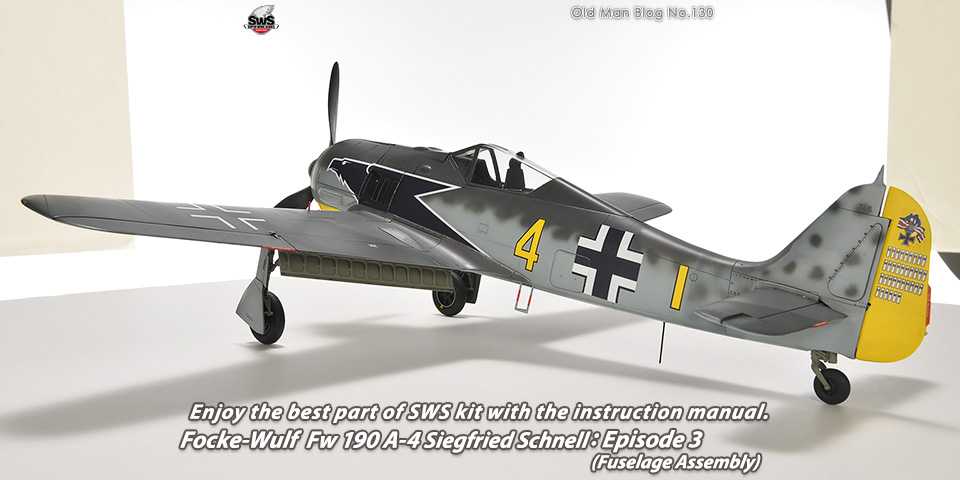 Old Man Blog No.130
Enjoy the best part of SWS kit with the instruction manual. Focke-Wulf Fw 190 A-4 Siegfried Schnell: Episode 3 (Fuselage Assembly)
Old Man Blog No.130
Enjoy the best part of SWS kit with the instruction manual. Focke-Wulf Fw 190 A-4 Siegfried Schnell: Episode 3 (Fuselage Assembly)
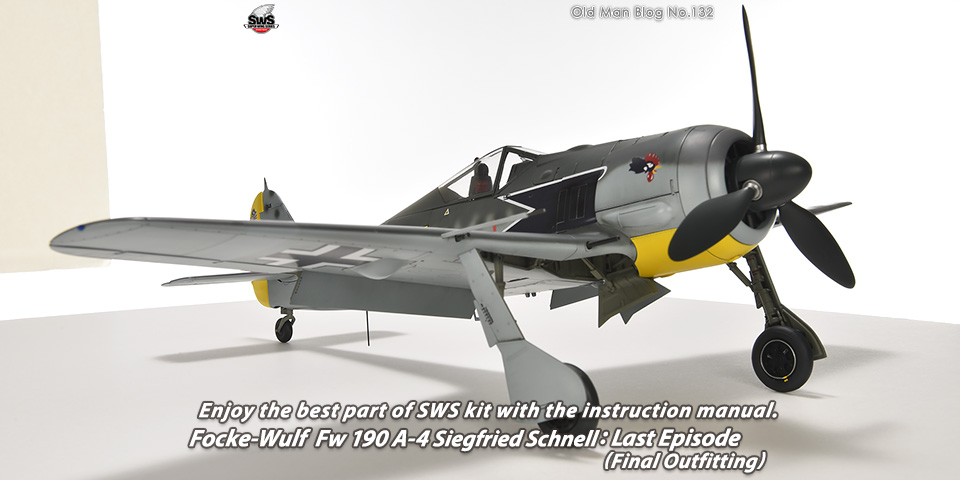 Old Man Blog No.132
Enjoy the best part of SWS kit with the instruction manual. Focke-Wulf Fw 190 A-4 Siegfried Schnell: Last Episode (Final Outfitting)
Old Man Blog No.132
Enjoy the best part of SWS kit with the instruction manual. Focke-Wulf Fw 190 A-4 Siegfried Schnell: Last Episode (Final Outfitting)