
It is in late autumn here in Kyoto, and the trees in the mountains have change their colors deeply and so beautifully.
It is in late autumn here in Kyoto, and the trees in the mountains have change their colors deeply and so beautifully.
How are you doing, SWS brothers?
Covid-19 pandemic is finally over, and Kyoto is back again attracting many tourists from all over the world. Some popular tourist destinations are literally packed with tourists.
This time, I would like to take a look at the first Zoukei-Mura SWS kit, the Imperial Navy fighter aircraft "Shinden". This kit was released ten years ago. Therefore, I see our immaturity here and there, and remember how Zoukei-mura was wavering between hope and reality at the time. I blush a bit while writing this blog.
If you are motivated and inspired to work on the Shinden by reading this blog, I would like you to understand that Zoukei-Mura was still in its infancy even if you notice some immaturity or minor defects. I will appreciate if you could smile with your generous heart and enjoy chewing on the pains, immaturity, and struggles of the manufacture in its early days.
I am so thankful and pleased that so many modelers have already assembled this kit easily. Zoukei-Mura has learned and absorbed a great deal from the developing process of this kit and continues learning.
Please keep supporting us with your generous heart and passion of modeling.
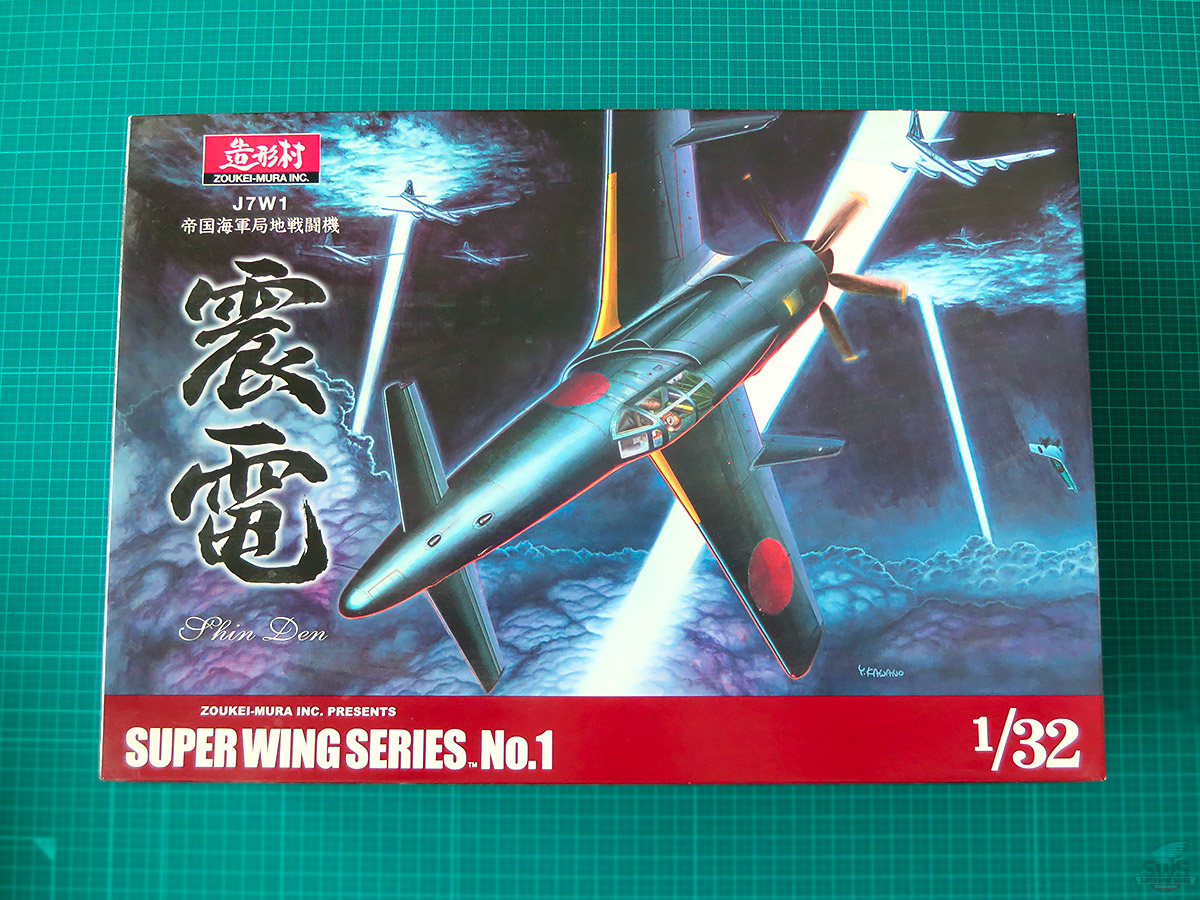
▋Zoukei-Mura SWS began with this nostalgic package.
Many aircraft modelers welcomed this kit of "Shinden" which boldly faced off against a large formation of B-29s flying over the skies of the Imperial City of Tokyo. Thank you to those who added it to their collection~~!
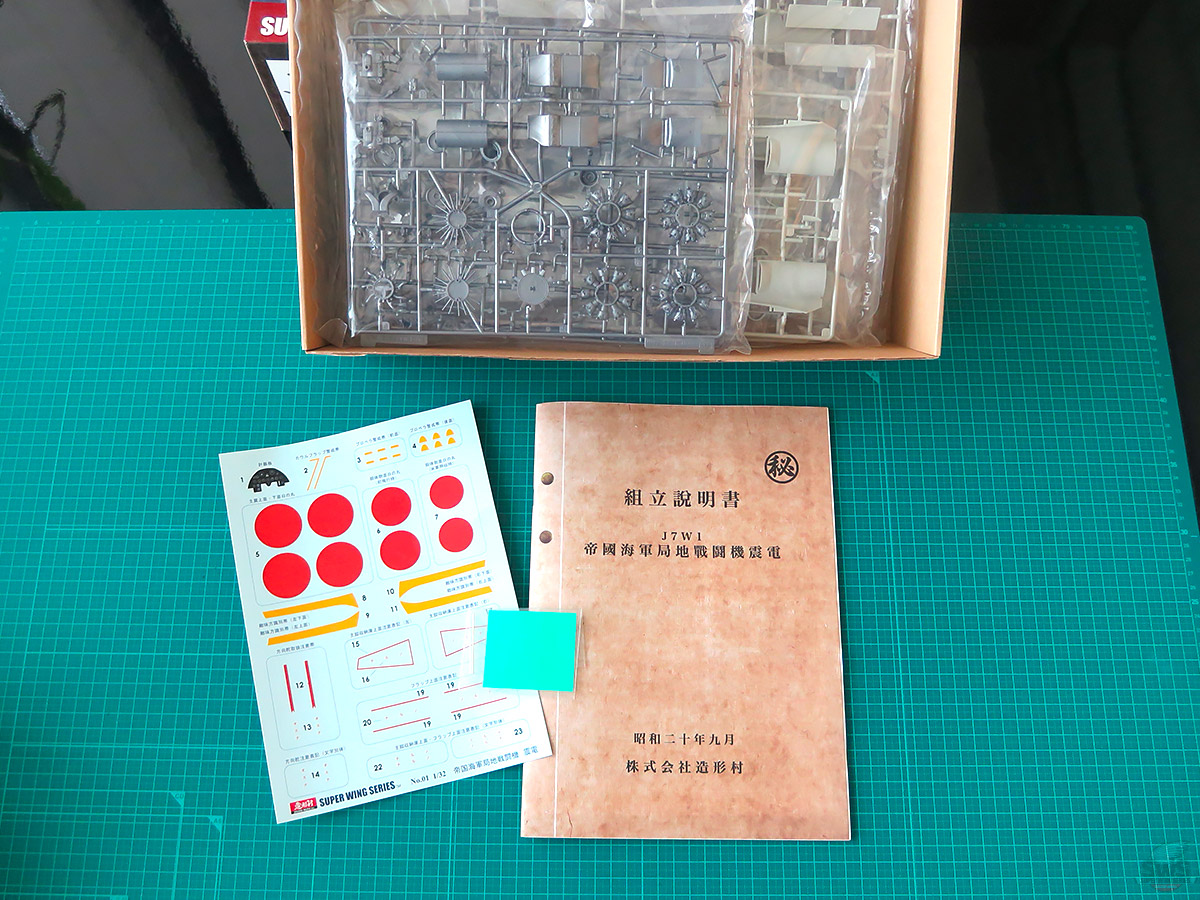
▋At that time, the runners were in four different colors: silver, light gray, black, and clear. We decided to use these colored parts because we thought that modelers could feel its structures and power even after a straight building. The kit had some masking tape for the canopy to help reduce some troublesome in the painting process. The design of the decal is for the standard paint scheme of Imperial Navy aircraft.
The Shinden didn’t make it for actual battles. It would be fun to try painting it as you like.
▋Japanese aircraft modelers have their passionate admiration and longing for the Shinden, which is in a way, hard to describe. Once it soared into the blue sky, it could have crushed enemy B-29s with its incredible flying ability.
If only we had this. If only we had enough of these aircraft.... Japanese aircraft modelers still hold this fleeting dream-like feeling in their hearts.
▋The long-sought-after 2,000-horsepower engine and four 30mm machine guns, which were beyond the standards at the time, were installed to slaughter the fortresses in the sky from far above in a single blow.
“Shinden” was an embodiment of novel devil and the last vision of the Imperial Navy fighter.
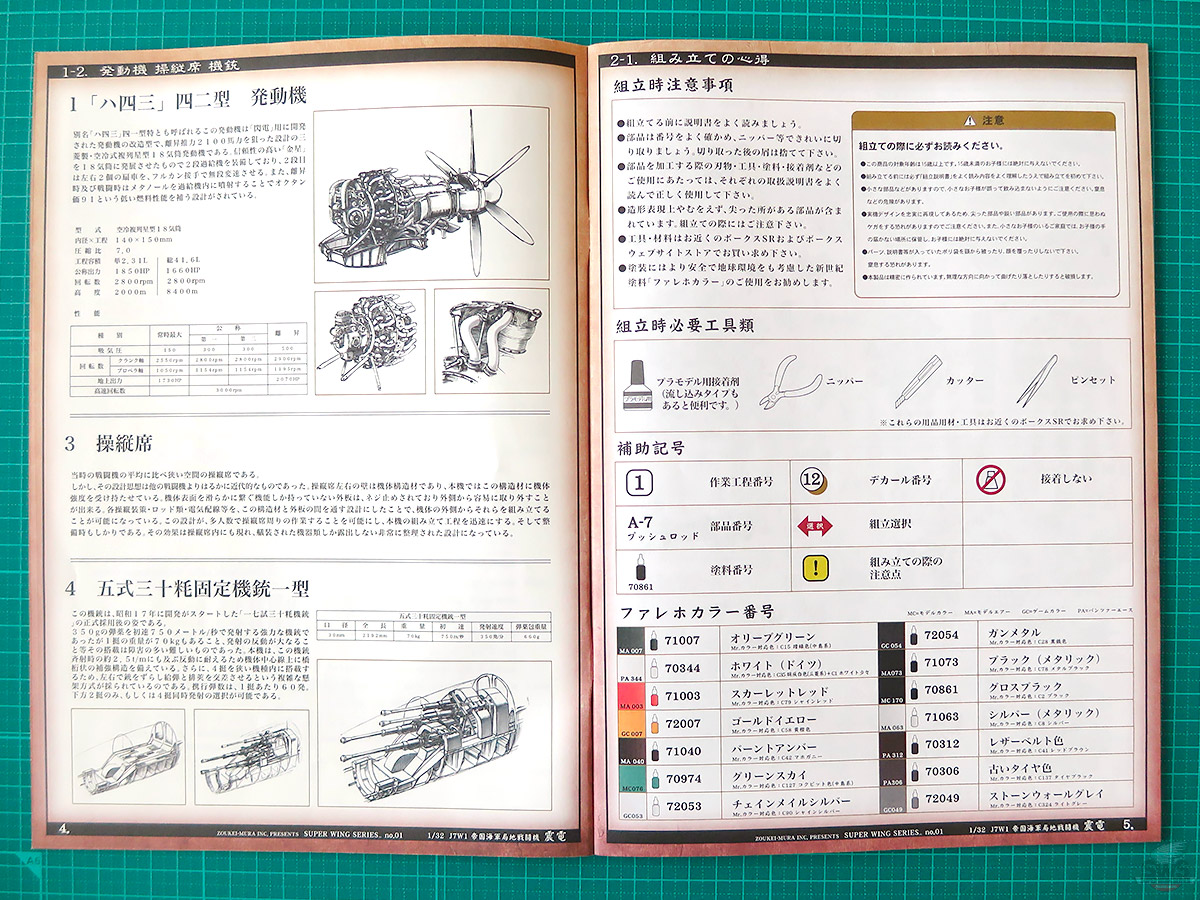
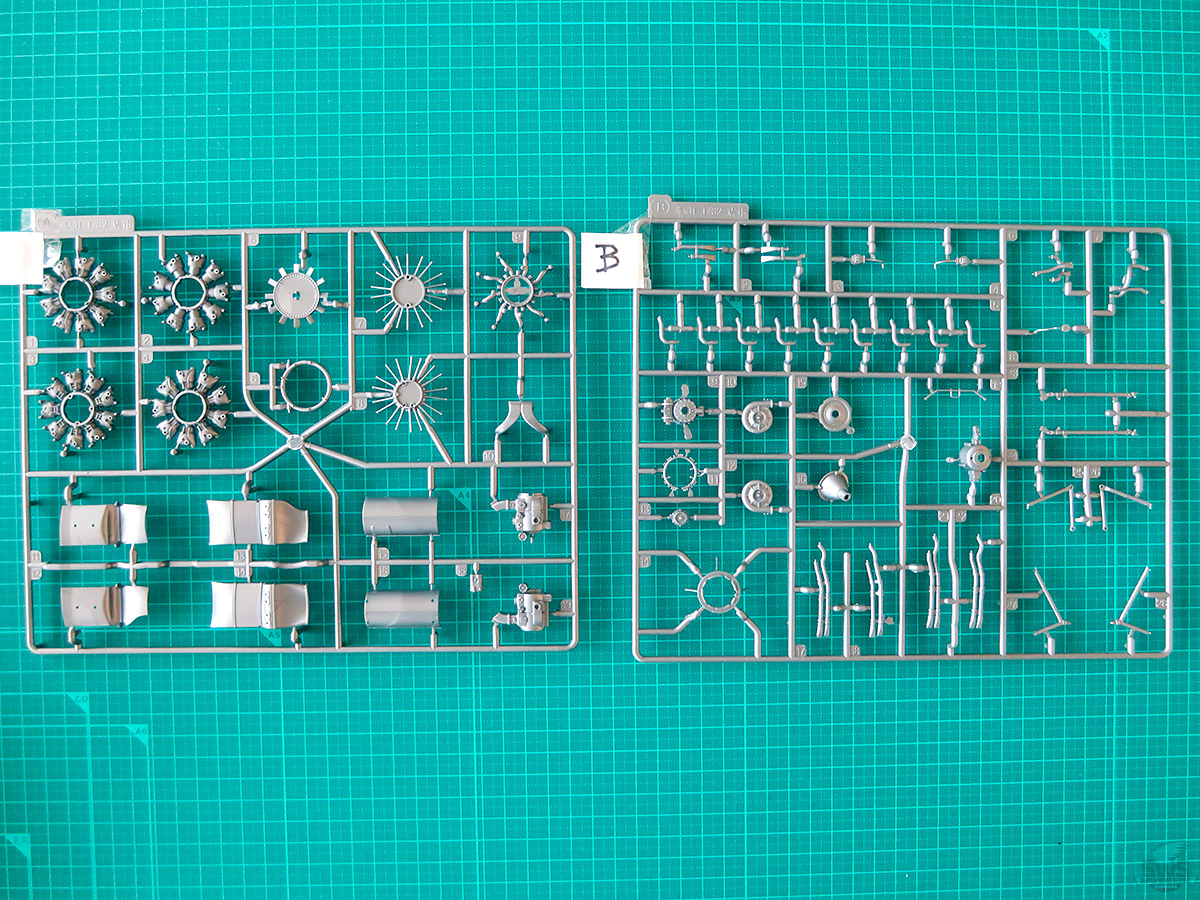
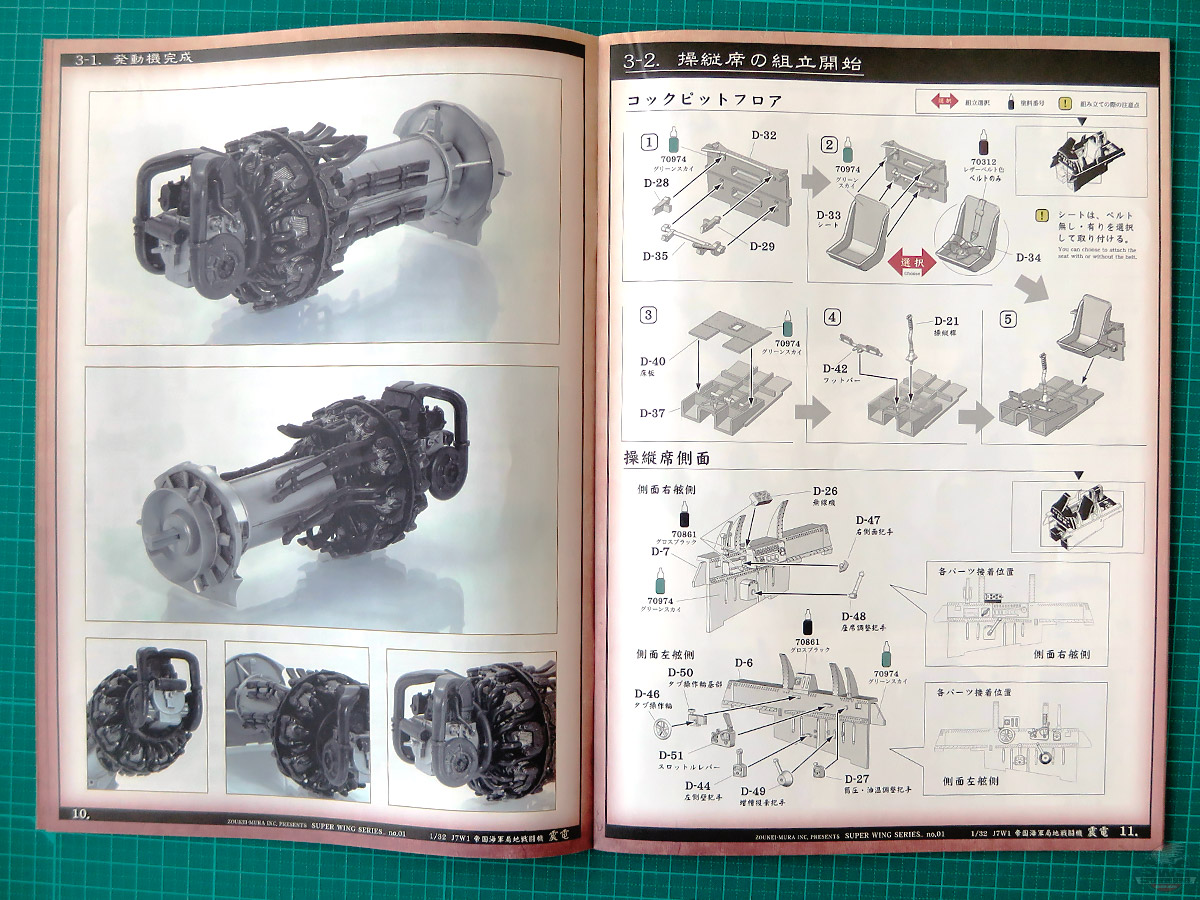
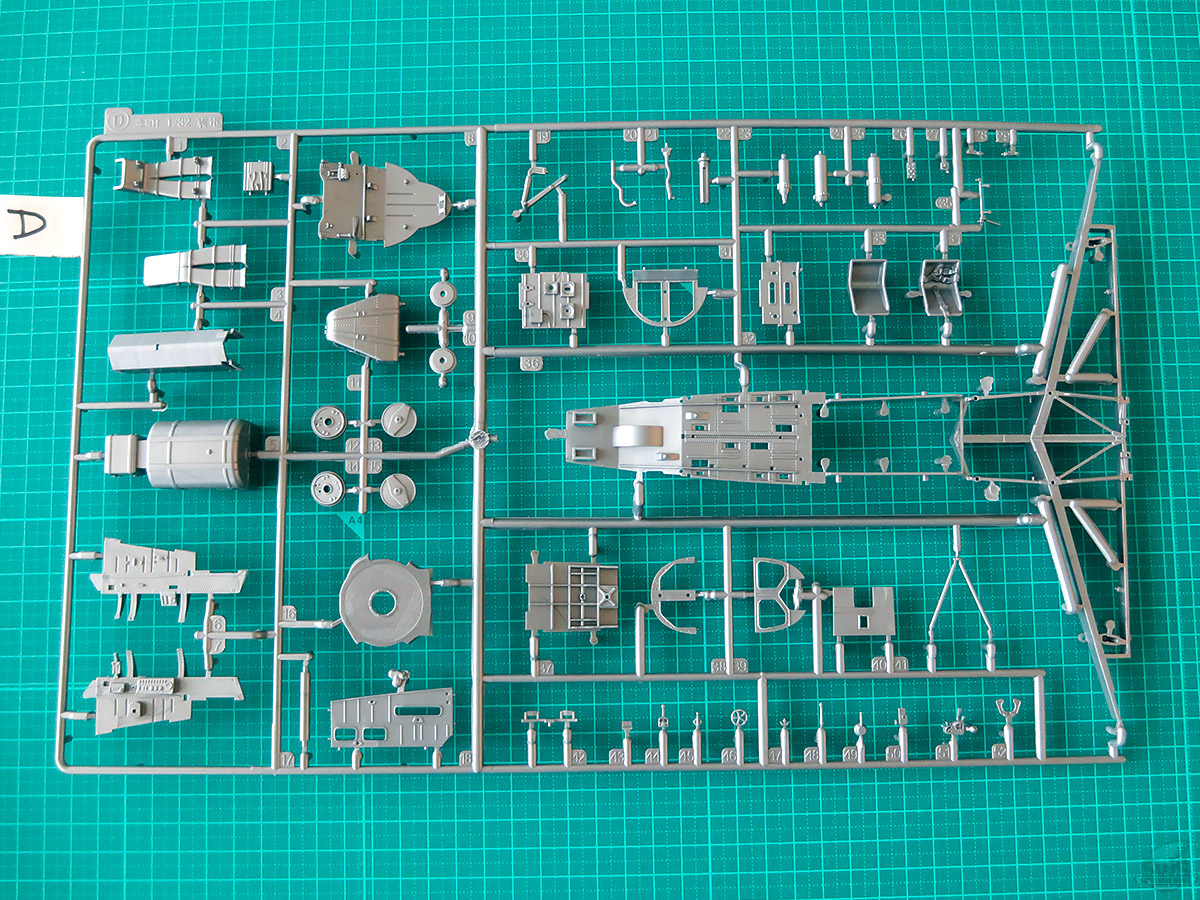
▋Engine assembly.
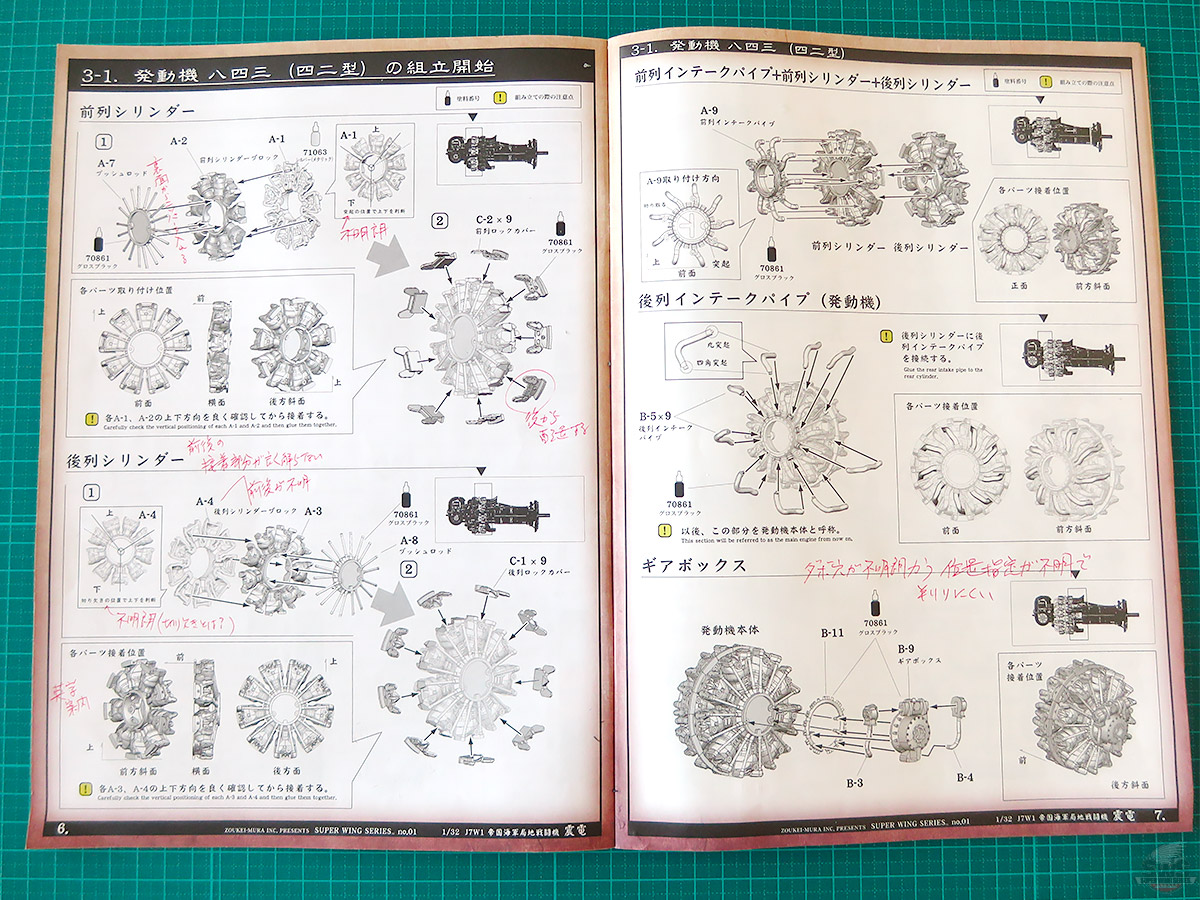
At this stage, I already noticed one of the problems of this kit released in the early stages. I cannot find the dowel holes for the parts as shown in the instruction manual. What? I was puzzled. We all have to look for the best position drawing on our past experience.
After some attempts, you will start to understand the molds of the parts and know what to do. Finally, the cylinder block is completed. Same with the intake pipe, exhaust pipe, and various peripheral equipment. The dowel holes are not clear, and we manage to fit somehow after several attempts. It is a problem kit. However, those of you who know about this type of engine, may handle it just fine. Just be patient. The hardest part is yet to come.
▋If you just look at these parts, they look alright....
If you are an experienced modeler, these are just fine....
Before start building, please look at the photo on page 10 of the instruction manual until you get the whole picture of the finished product.
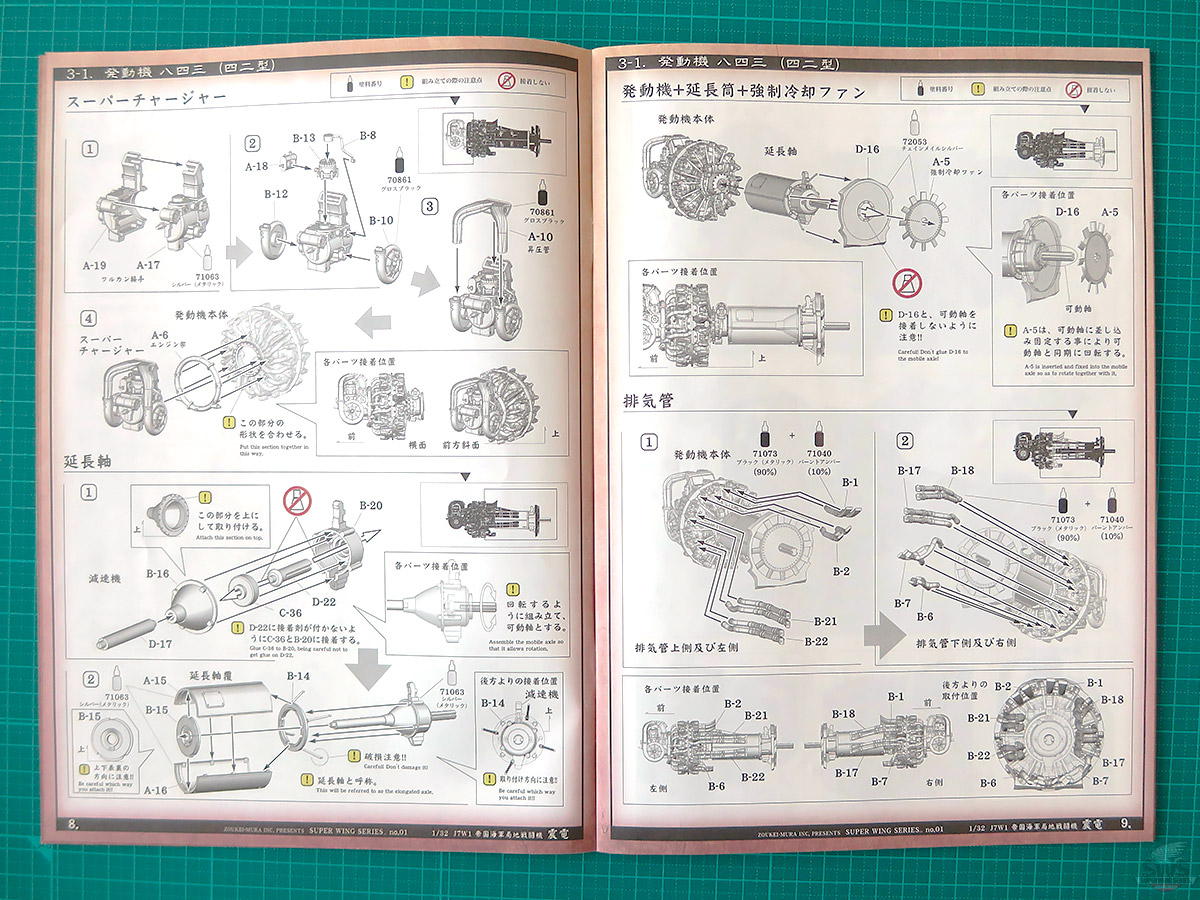
The trick is to review the "A-15, A-16, B-15, B-14," "D-16," and "A-5" well, as well as the engine installation on page 20, and then proceed with the construction.
If you have assembled this kit, you know what I mean.
▋When I was just looking at the illustrations in the instruction manual, I thought to myself, "This will be a piece of cake”. However, soon after I started, I was like "hmm" and "umm".
Some of the instructions were unclear and I felt like as if I was solving a puzzle.
Especially on Page 8, the top and bottom of the extension shaft covers, "A-15, A-16, B-15, B-14," is very unclear.
This will be attached to the "D-16" and "A-5" on page 9, and then will be attached to the rear of the fuselage on engine mounts. However, if the joining holes to the mounts are not in the correct positions, the entire engine section cannot be placed on the fuselage.
Before working on pages 8 and 9 of the instruction manual, you have to build the top and bottom of the engine body correctly while referring to the photo of the completed engine on page 10 and the engine mounting work on page 20.
If you have built this kit several times, this should not be a problem, but if this is your first time, you will have a lot of troubles at this stage.
This kit was developed in the early days, but I still have to admit this is not good.
▋These pictures of the completed engine should be on the first page of the instruction manual. To install the engine mount in the right position, the straight line at the front and back of the top of the extension shaft from the engine body to the forced air-cooling fan should be facing right up. Please refer to these photos and proceed with the right angle.
I would like to send my compliments and appreciation to the many modelers who have completed this without difficulty, by checking the instruction manual and the molded lines.
Thank you~~ and thank you for your hard work.
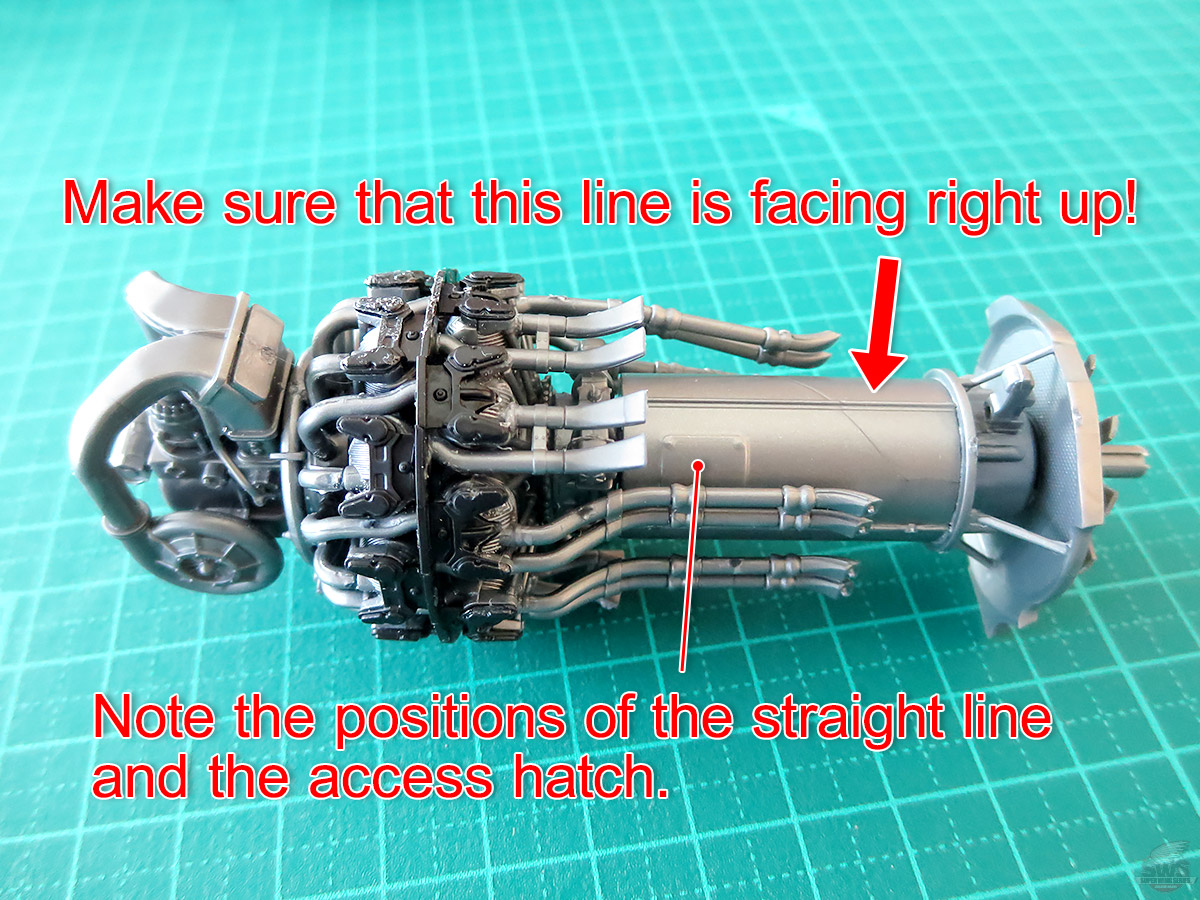
▋Note the straight line on top of the extension shaft cover. If this is not facing right up with the correct position with the access hatch, you cannot glue the engine mount to the joining hole on the underside of the extension shaft.
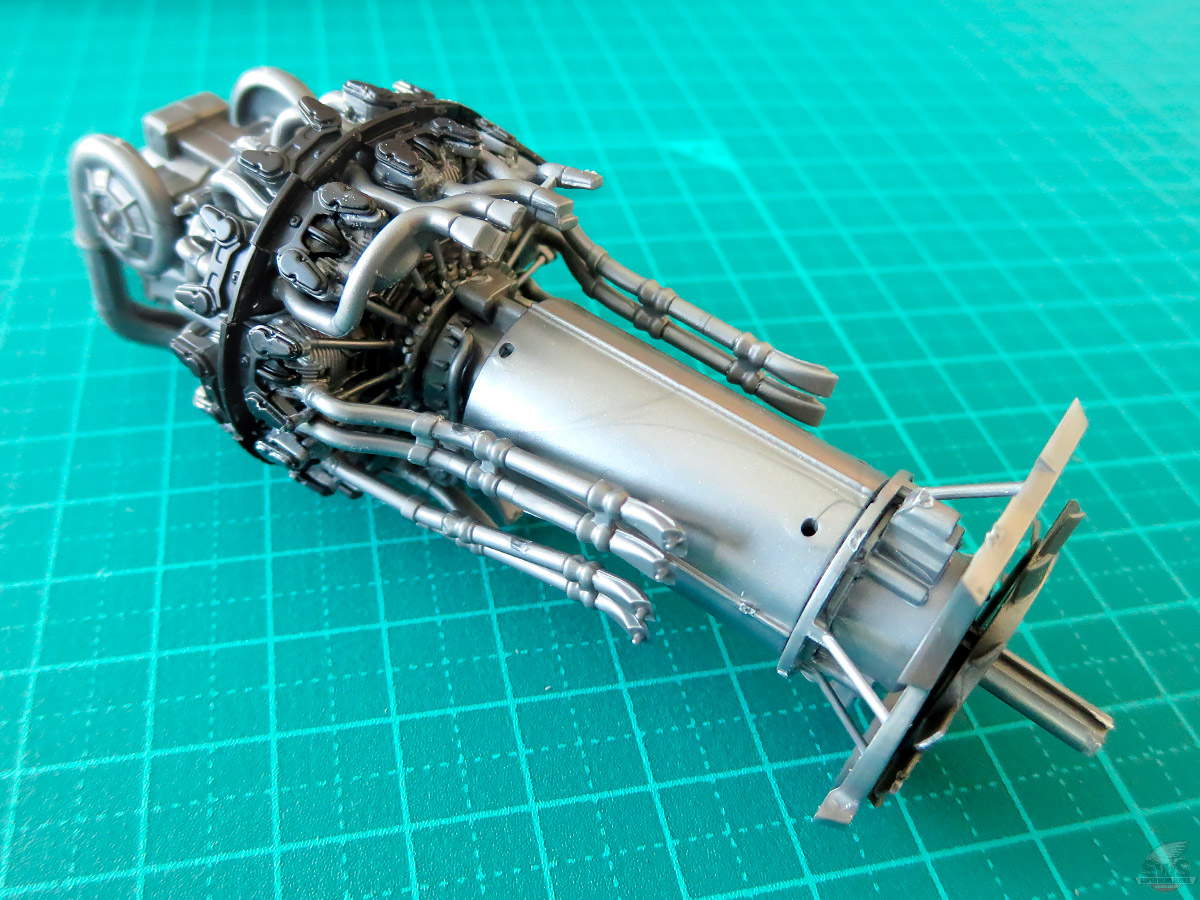
▋The engine seen from below. Oil coolers will be attached to both sides of the engine.
The exhaust from the engine is discharged from the tail by an exhaust fan. These are important for the second half of the project. You need to adjust carefully to ensure that they fit snugly into the fuselage.
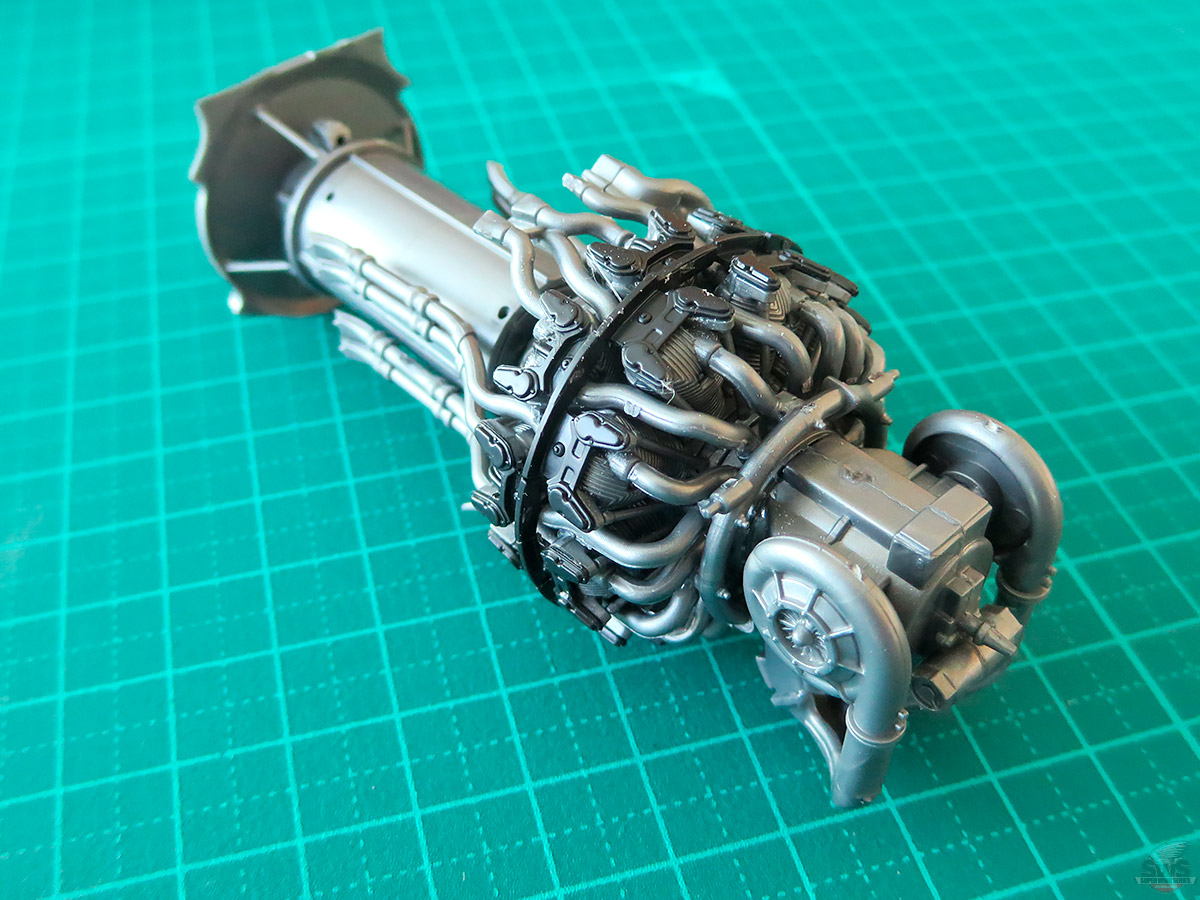
▋Note the layout. It shows the pains and hard work of the Kyushu Aircraft to mount this powerful, air-cooled engine with a little space and in a well-balanced manner.

▋I tried putting the propeller.
Shinden adopted a six-blade propeller, which was rare for an Imperial Navy plane at that time.
This is one of the reasons why Shinden has remained in the hearts of Japanese aircraft fans to this day. I think about what kind of sound it would have made.

▋The forced air-cooling fan is also well reproduced.
The addition of this unique-looking Imperial Navy fighter, "Shinden," will surely give more breadth, depth, and uniqueness to your aircraft collection.
Please enjoy and complete this commemorative aircraft kit that has been sent out into the aircraft scale model world as the first product from Zoukei-Mura SWS,
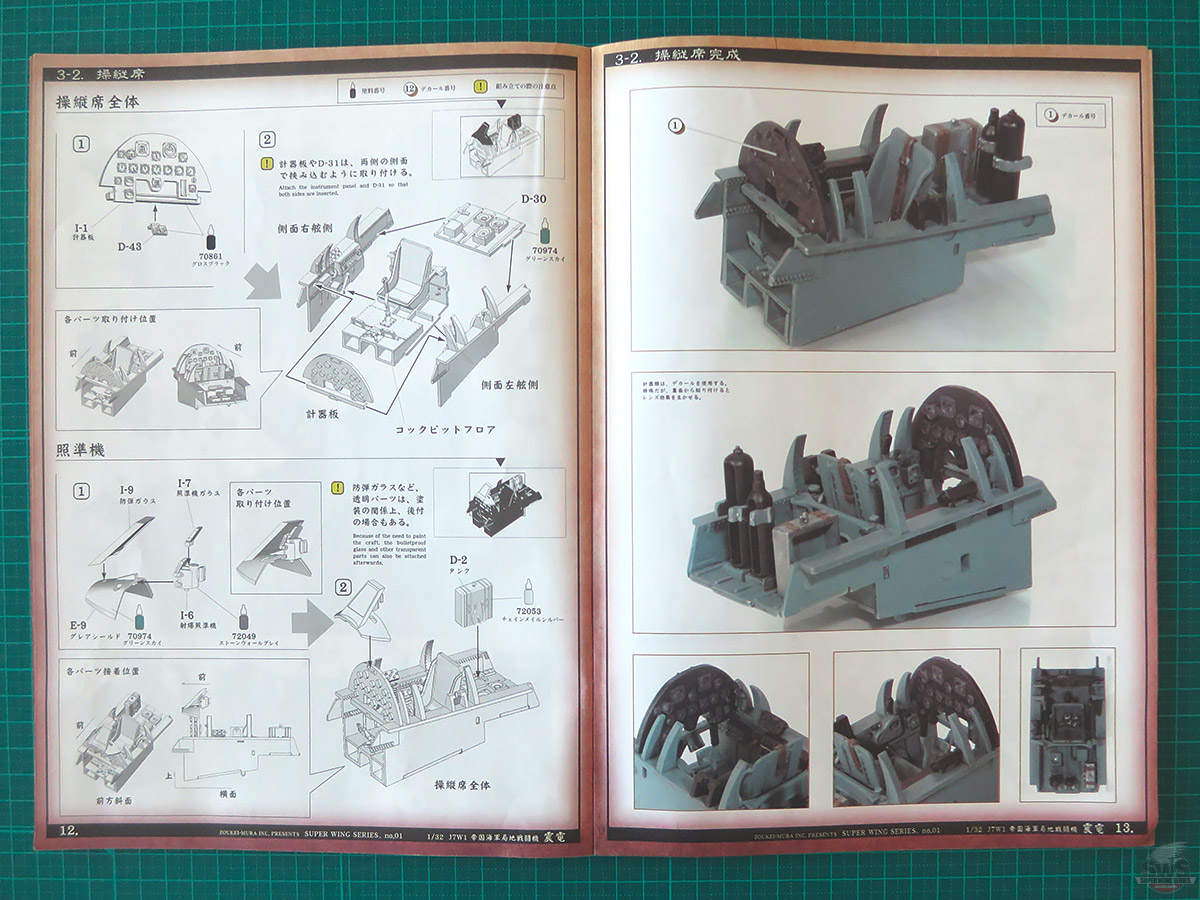
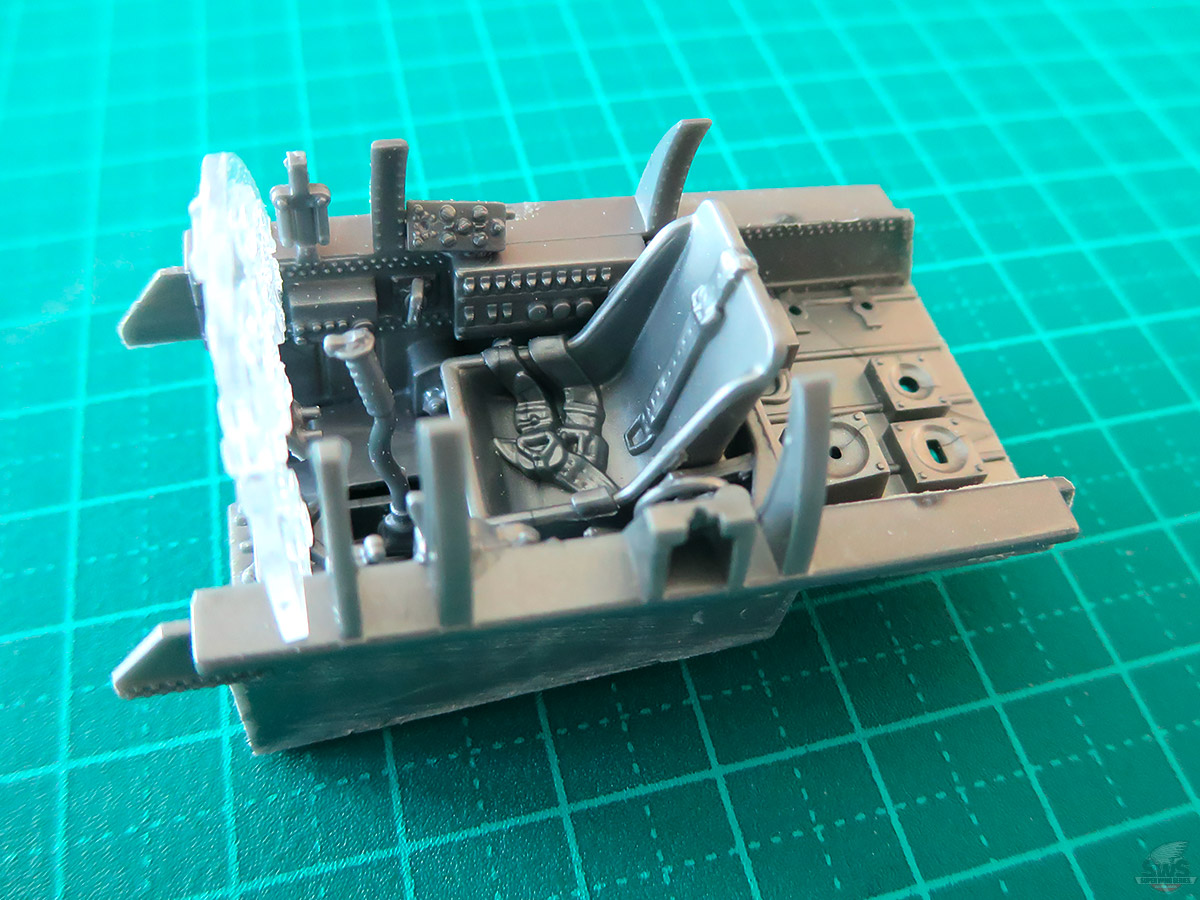
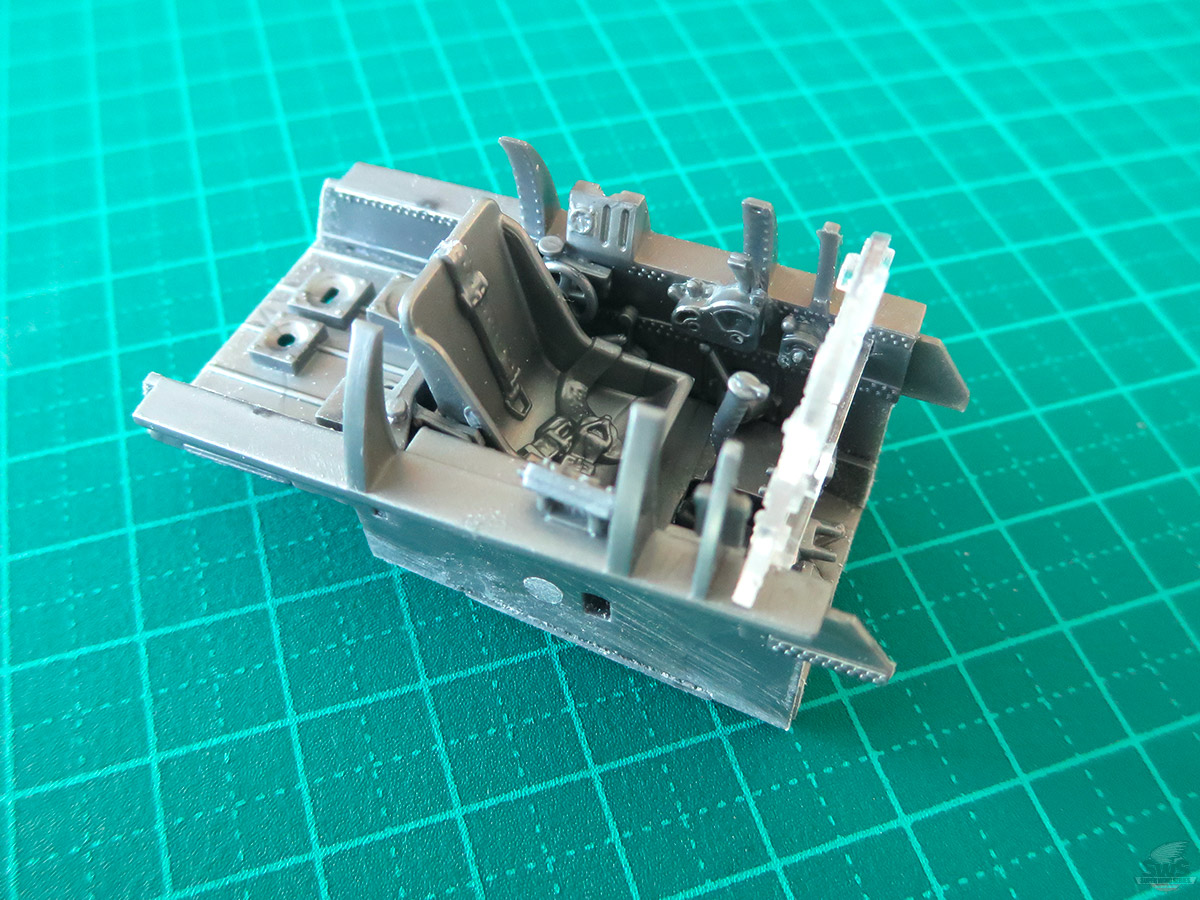
▋Compared to the engine, the cockpit was completed in a very short time.
This model was developed without any reach on the actual aircraft, and there were only few records or photographs of the actual battles.
We were able to get permission from the Smithsonian Aircraft Museum, but the fuselage had been split up, and the engine, wings, and tail barely remained in pieces. Zoukei-mura development team spent many days and nights there, and finally produced the kit.
▋The first Zoukei-Mura kit, we could finally put together.
Compared to our latest 1/32 Fw190, the molding is not elaborate. However, I see the burning passion to reproduce the aircraft faithfully in it and this passion has been continuing since then. What do you see in this kit?
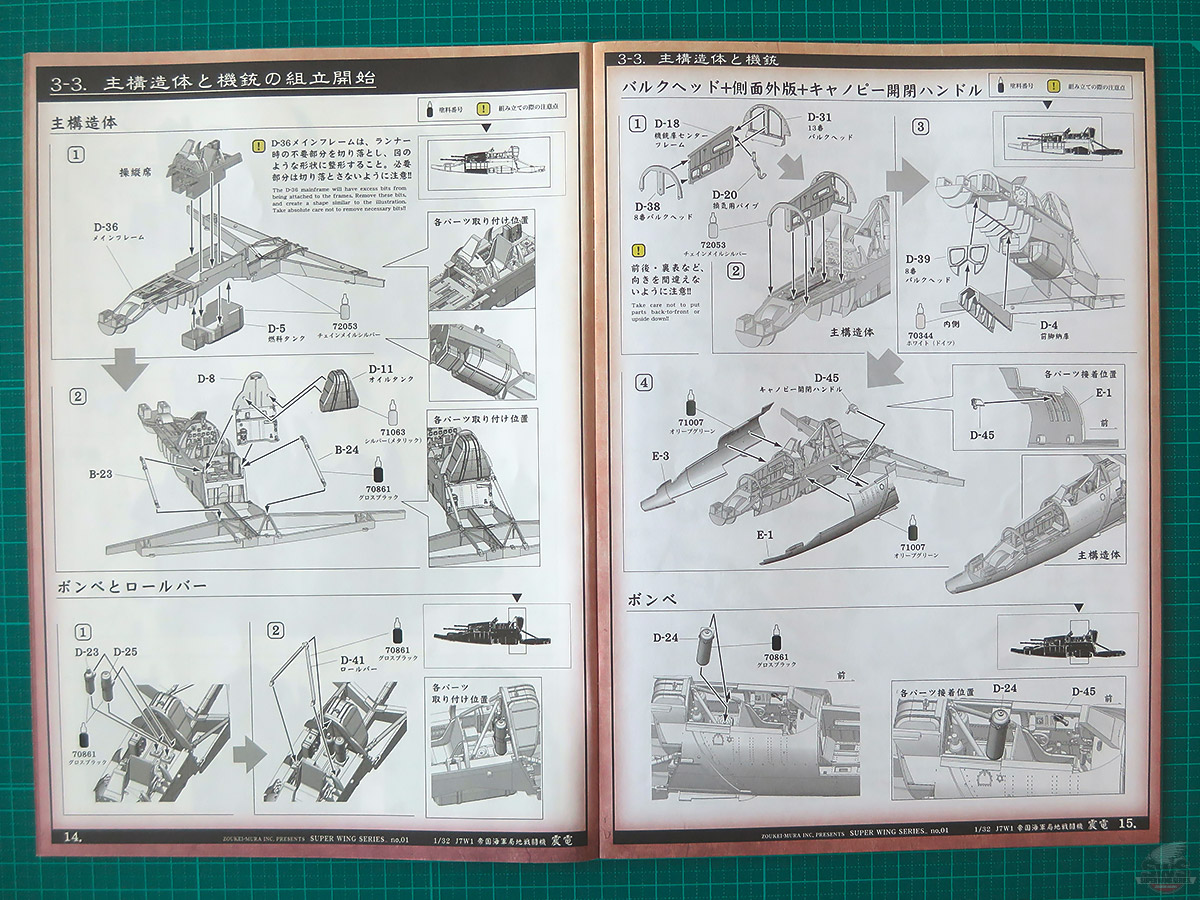
▋Now, we will start to assemble the fuselage.
The main work here is to carefully clean up burrs and sink marks from the parts with sandpaper or Prakanna. Just one thing; B-23 and B-24 on the page 14 are easily reversed, so be sure to check them beforehand by assembling them temporarily.
After building the machine gun bay center frames of "D-38, D-18, and D-31" on page 15 and drying them well, please make sure that the machine gun covers "H-5 and H-6" on P-24 fit well.
If the covers are slightly open on either side, there will be a gap between the cover and the fuselage.
In that case, you need to cut off the upper part of the center frame slightly so the covers can be attached without any gap.
The work will be done by checking the fit of the nose cover, the lower fuselage, and the center frame as shown on P-24 of the instruction manual. Once these parts are in place, Shinden's fearless appearance will stand out even more.
▋The main structure, the cockpit area, and part of the engine are in the "D runner".
The main wheels are in it too. Be careful with the molding on the reverse side.
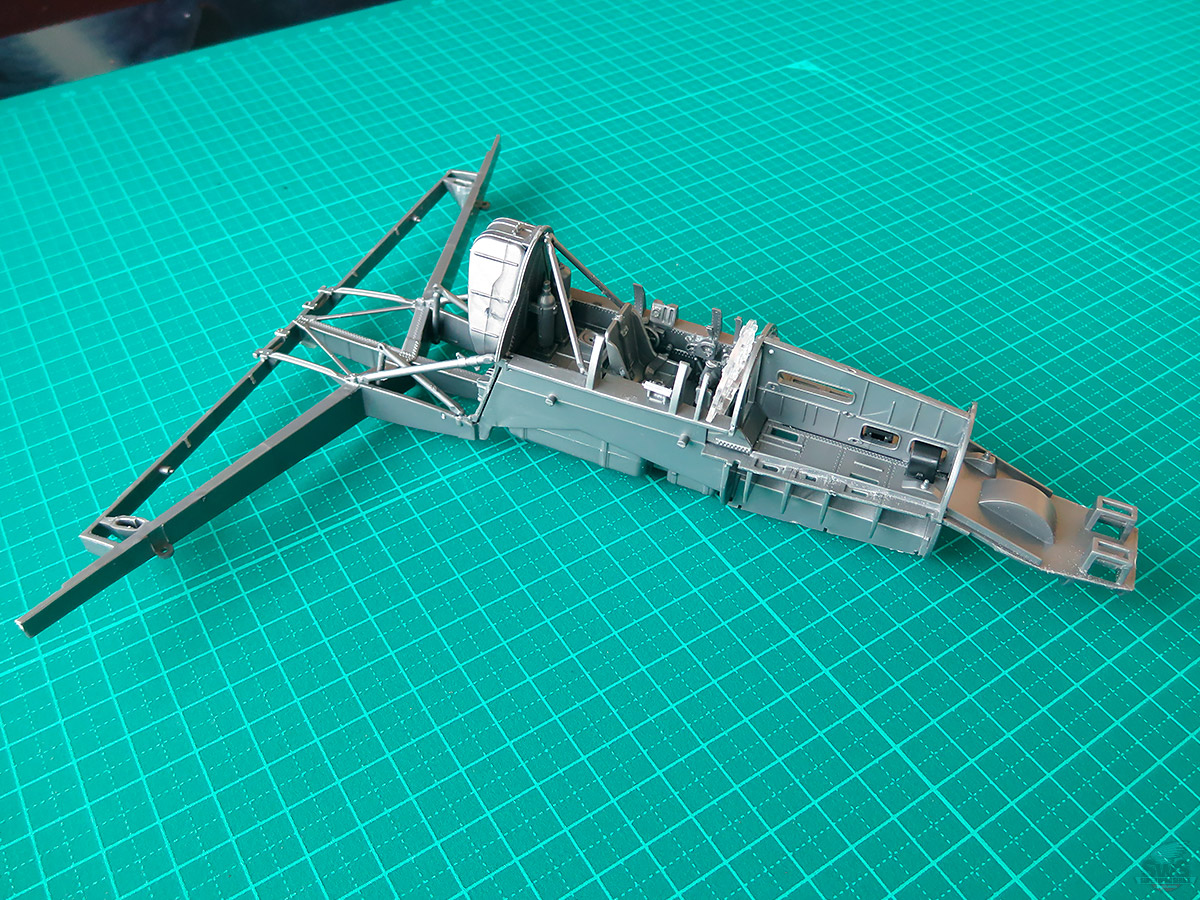
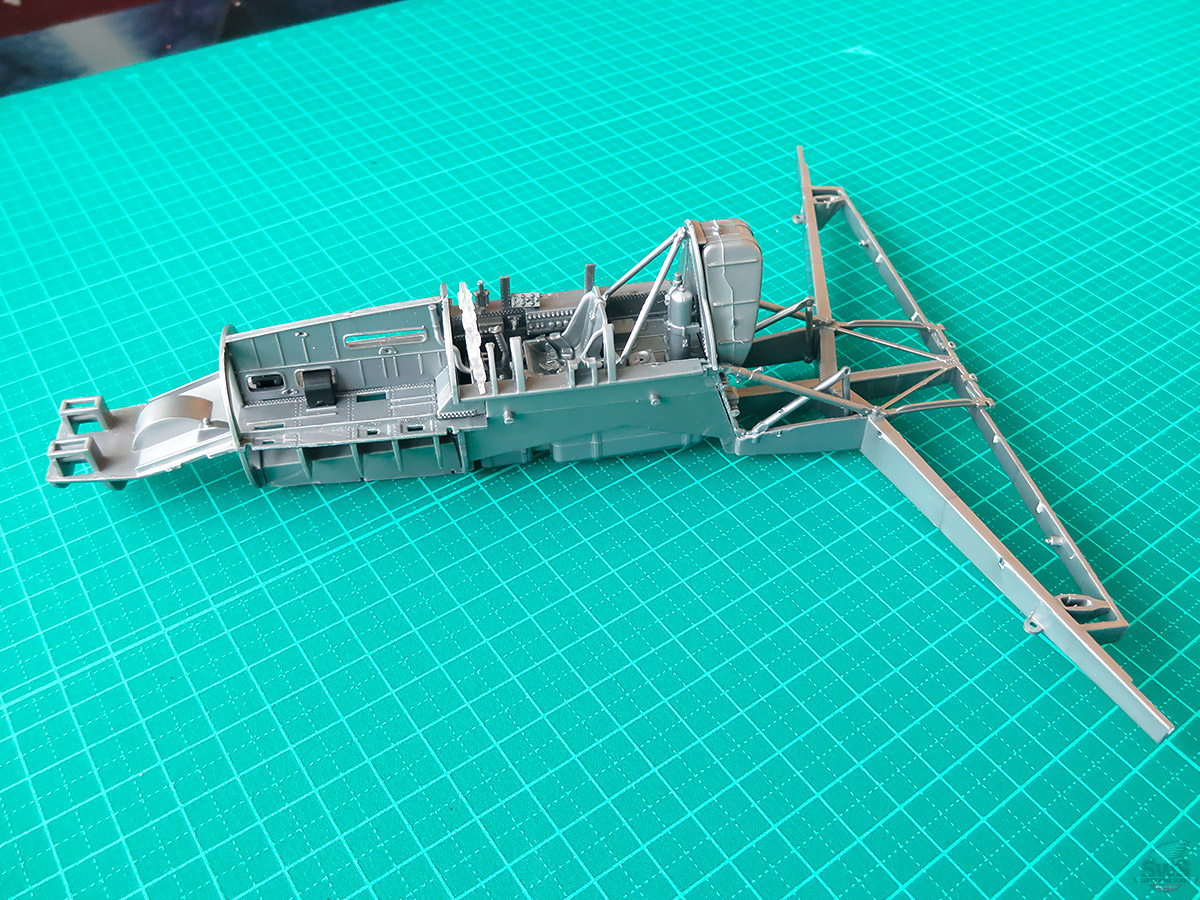
▋I have built it so far.
The main girders and main structure are in one piece, and this alone shows one of the uniqueness of "Shinden.
Four 30mm machine guns in the nose. A super-powerful armament that had not seen on any previous Imperial Navy aircraft, tells us about the essence of this aircraft than anything else.
What if this aircraft .... what if .....
Even now, the unique fighter "Shinden" appears dashingly in fictional war stories and leaves with the Japanese flag on both wings shining brightly in the air.
This is the one worthy of your collection.
Ten years ago, Zoukei-Mura, a small and unknown manufacturer, was suddenly born in Japan.
In the world of aircraft scale models, where there are so many manufacturers all over the world, Zoukei-Mura suddenly made its debut with a reckless attempt to reproduce the internal structures of a large 1/32 scale model, which must have been quite a surprise to many modelers at the time.
As time goes by, it has become a distant memory.
The reason that Zoukei-Mura still exists today is because many modelers have supported us, believing in our future progress, even with kits at our early stage such as the "Shinden" and "Ta 152”.
On behalf of all Zoukei-Mura staff members, I would like to extend my heartfelt thanks.
In the next blog, we will focus on the installation of the machine gun and engine. And then, we will move on to the final assembly process at once.
If you have this kit in your collection, I hope you will take this opportunity and start assembling it, the very first kit of Zoukei-Mura.
See you next time!
Hideyuki Shigeta
President, Zoukei-Mura
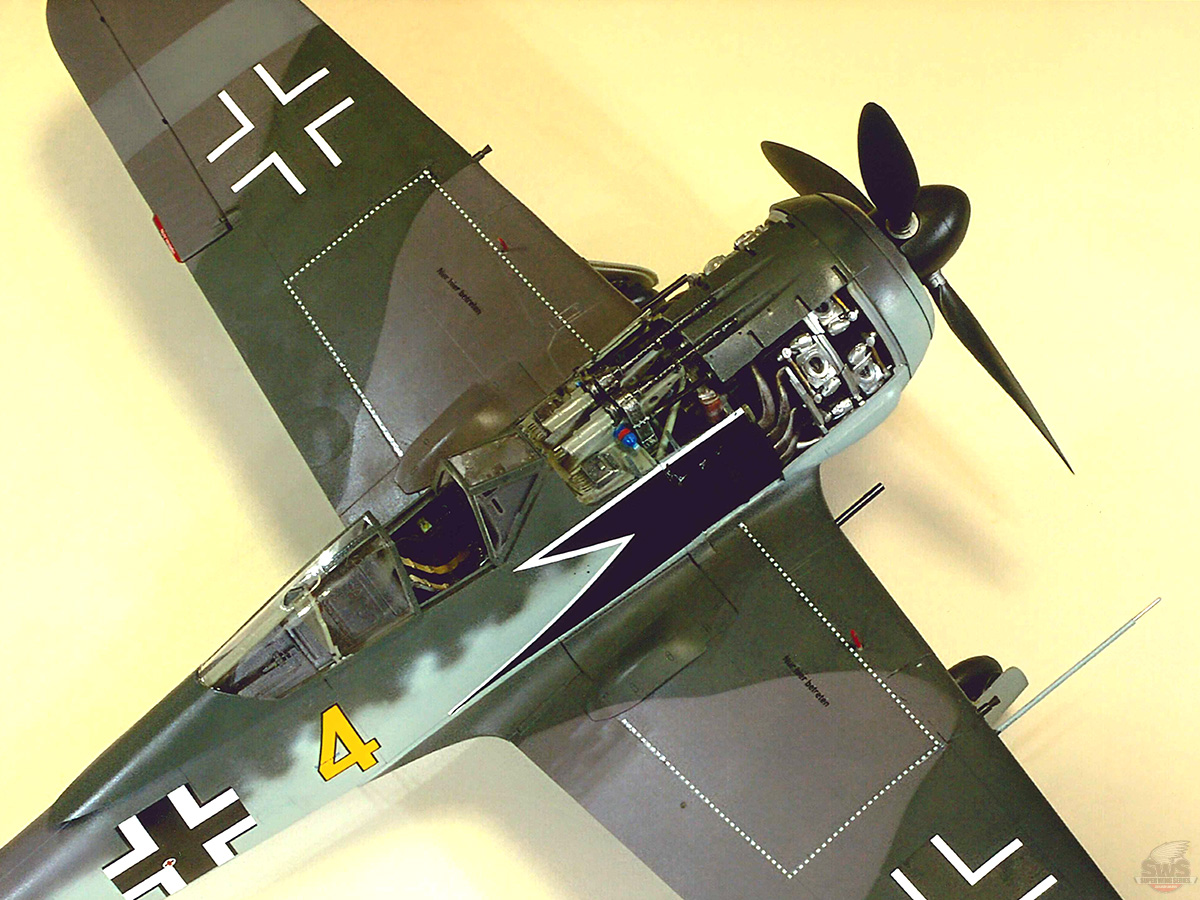
Mr. Chikara Yamamori, who has been making plastic models for many years and lives in Nagoya City, sent us some photos of his completed 1/32 Fw 190.
Hats off to him for his skills! He reproduced the Schnell aircraft faithfully and beautifully!
The cockpit and the BMW engine have been beautifully reproduced. What a truly manly Focke-Wulf!
Thank you very much for the precious photos and the letter of encouragement~~~!
Dear Zoukei-Mura-Team,
I have to say: CONGRATULATION AND THANK YOU! This kit was worth waiting 9 years!!!! Definite. This seems to be the utmost correct Fw 190 kit ever on the market. Multiple options and a billion of wonderful and stunning parts. Canopies closed/ wide and open/ hinged as well as different wheels, weapons, landing gears, cooling flaps aso... It just blew me.
Guys this is some effort!!!
I could not find a single flaw or mistake so far as I was having a glass of wine when unpacking. From delivery, packing, artwork, and parts not to name the utmost meticulous instruction! Wow. What a job you have accomplished.
This is THE Fw 190 kit! Revell and Eduard come after in named sequence. I am so glad I had the opportunity to receive No.73 from pre-order and what a joy it has been just to look at the parts with a magnifier and let it sink in.
Again this top notch.
I am looking forward hearing from more types of this wonderful construction.
Let me close by wishing you lots of success, health and joy for the future. My deepest respect towards the design and research team. VERY WELL DONE!
Best regards
Danny Schulz
![]()


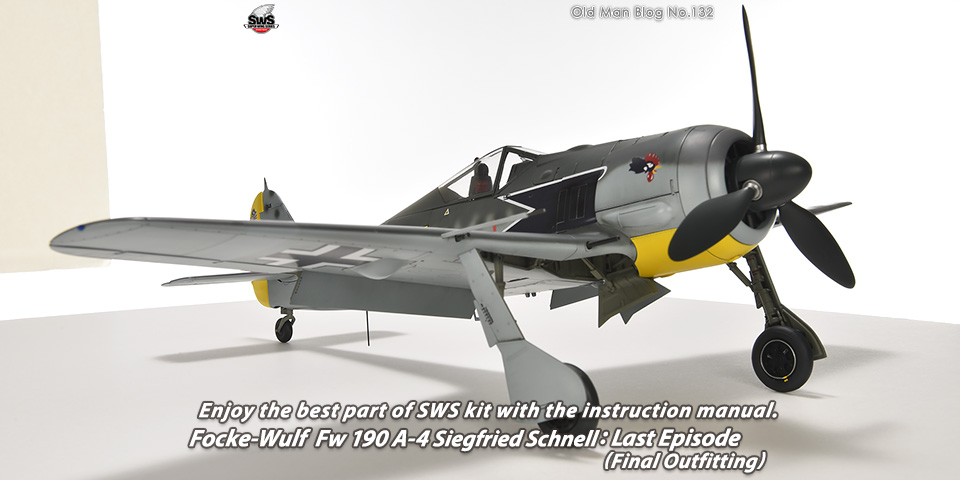 Old Man Blog No.132
Enjoy the best part of SWS kit with the instruction manual. Focke-Wulf Fw 190 A-4 Siegfried Schnell: Last Episode (Final Outfitting)
Old Man Blog No.132
Enjoy the best part of SWS kit with the instruction manual. Focke-Wulf Fw 190 A-4 Siegfried Schnell: Last Episode (Final Outfitting)
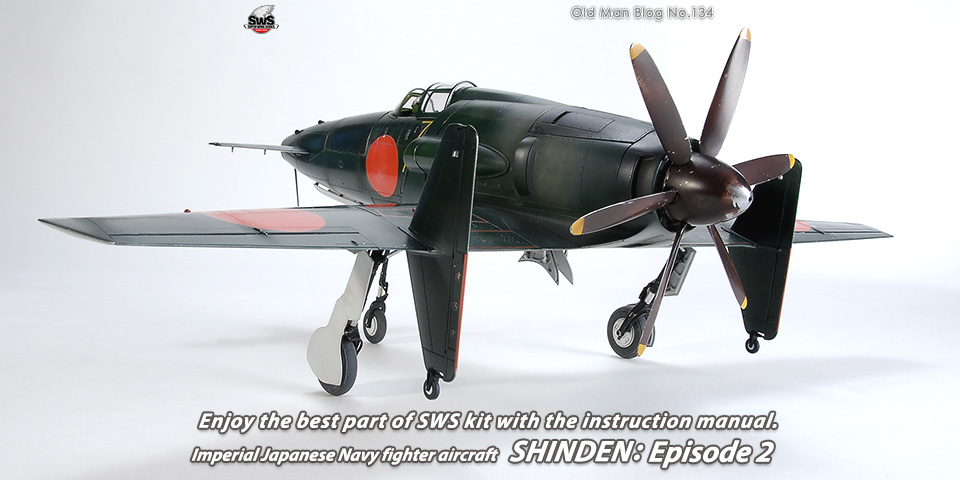 Old Man Blog No.134
Enjoy the best part of SWS kit with the instruction manual. Imperial Japanese Navy fighter aircraftSHINDENl: Episode 2
Old Man Blog No.134
Enjoy the best part of SWS kit with the instruction manual. Imperial Japanese Navy fighter aircraftSHINDENl: Episode 2