
|
Order via Japan (in Japanese Yen) Order via Japan is sold out. |
Order via Volks USA (in US Dollars) Order via USA is sold out. |
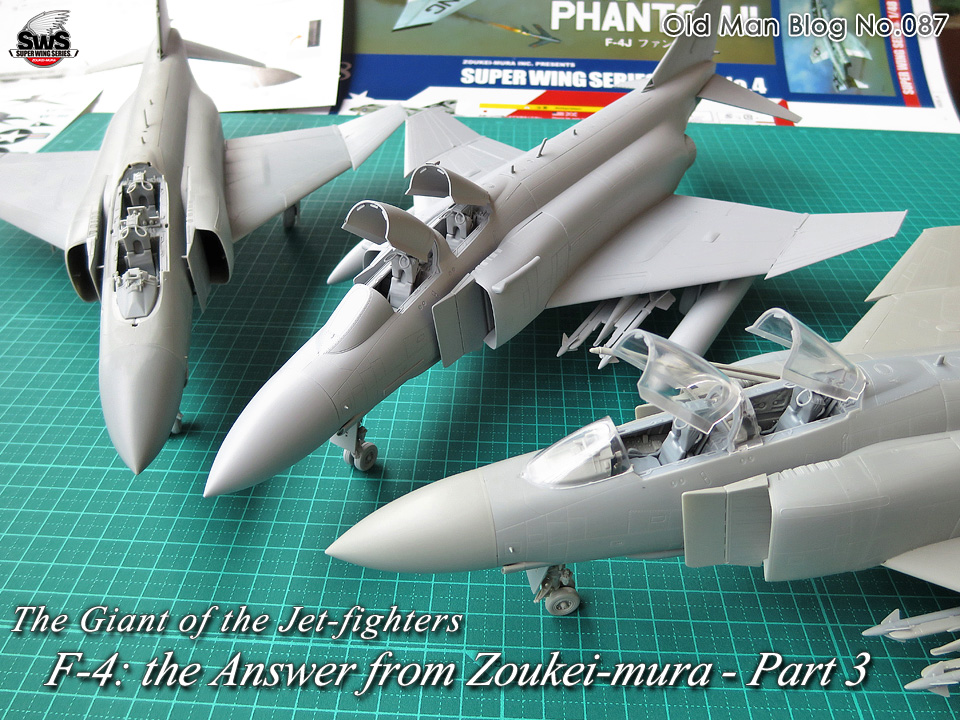
SWS fans around the world, how are you doing?
I am glad to deliver you the third part of the "F-4: the Answer from Zoukei-mura", from Kyoto (Japan) where the fall sun is finally shining.
Still two months to go until the release of our new SWS 1/48 F-4J.
Thanks to this blog you can go ahead and enjoy that beauty.
This time I will go through the attachment of the main wings' front edge slates, followed by the assembly of the landing gears, the missile armament and the belly tank, and I will finish with the canopy assembly and how to attach it to the kit. Everything is explained in this blog entry.
I am really sad I cannot show you any beautiful mass-produced F-4J runner part or the build of the finished kit, since this is just a test shot sample.
But, just building the sample gets me into high-spirits, and I feel a kind of satisfaction that I cannot explain by words.
I am also looking forward to seeing how you will appreciate this kit once it will be in your hands.
So let's enjoy the build together to the very end.


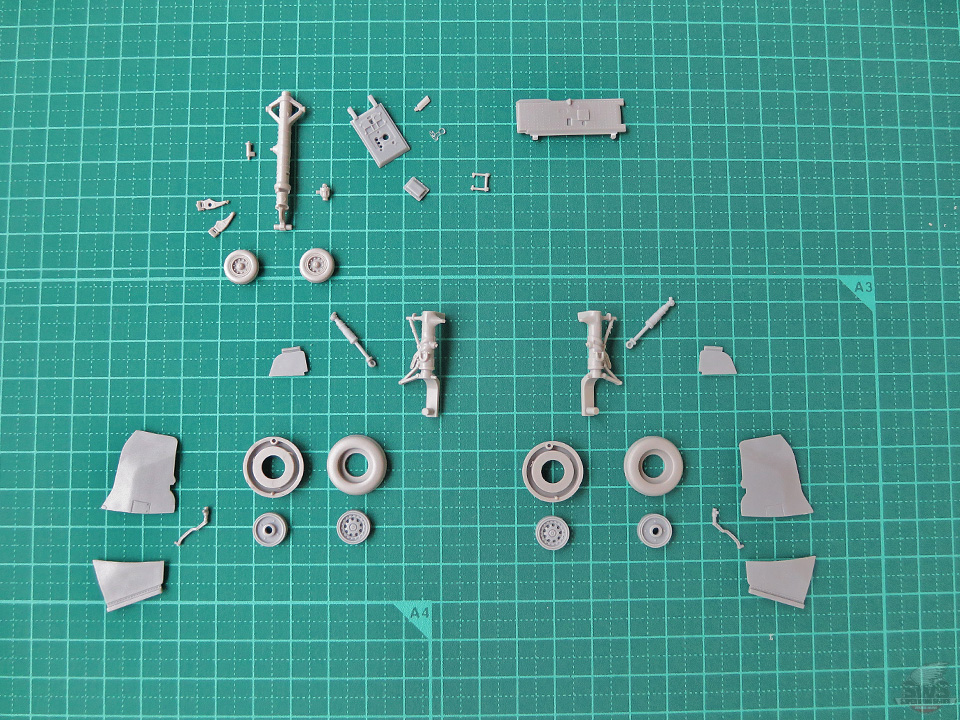
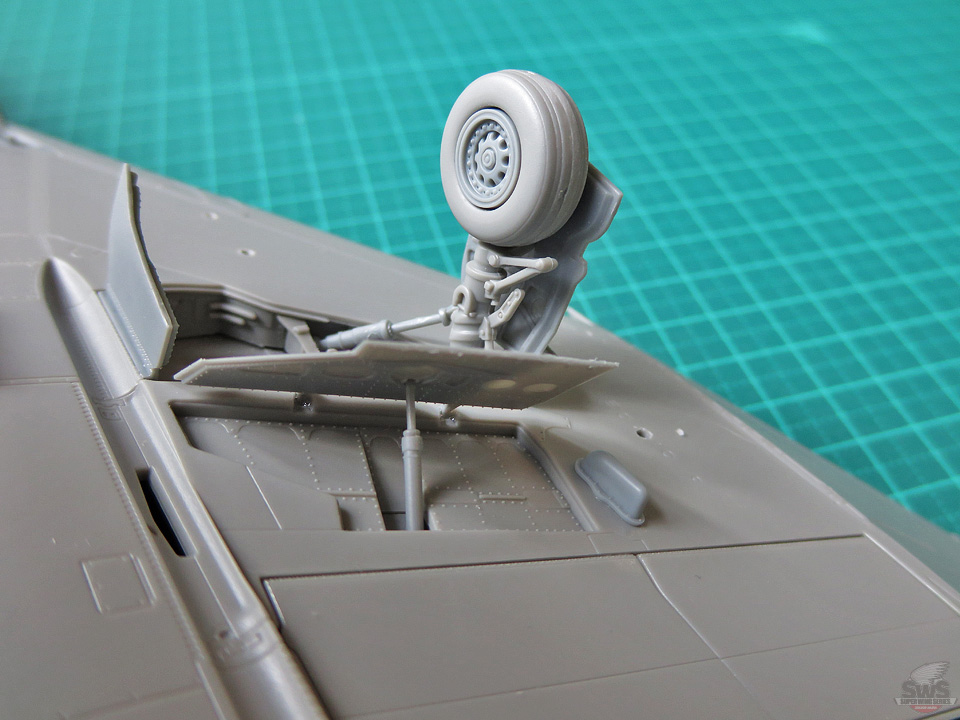
▋Pay attention to the front and rear landing gears. Despite being made with few parts, they are robust and you can fix their orientation easily when assembling. The struts are also easy to assemble. Wheel moldings are awesome too. Next is up to your painting, so please do your best.
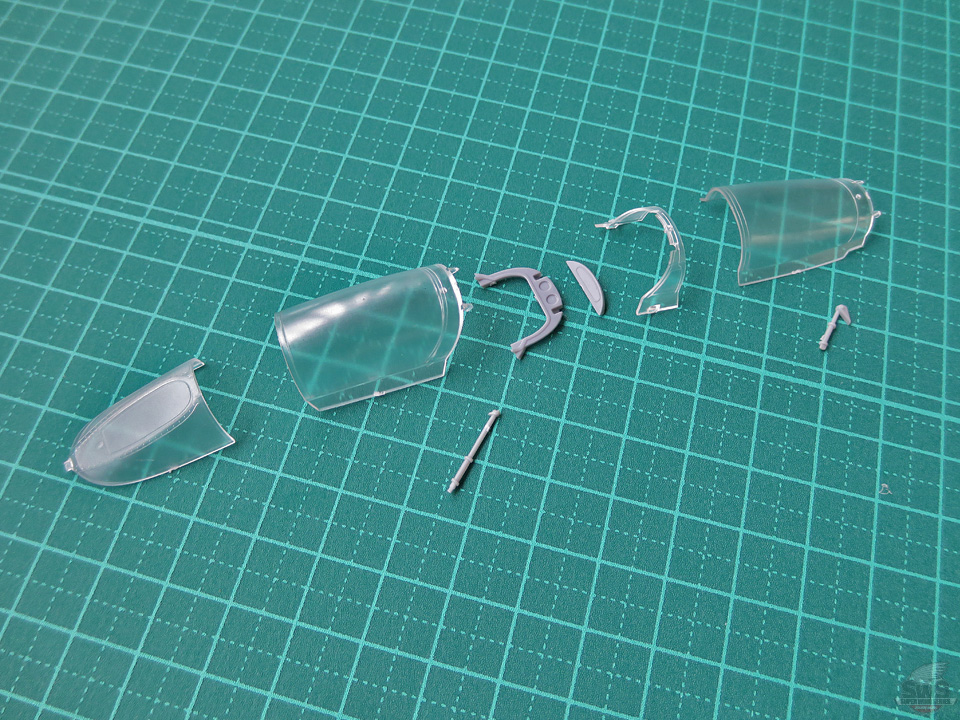
▋Some smoke on the canopy?
Yes, there is. The reason is that this canopy has not undergone the final polishing process yet. But no worries, all the parts included in the kit are beautifully polished. Furthermore, we have reproduced the inner back-mirror piece as a separate part too. Parts are small so be careful not to lose any.
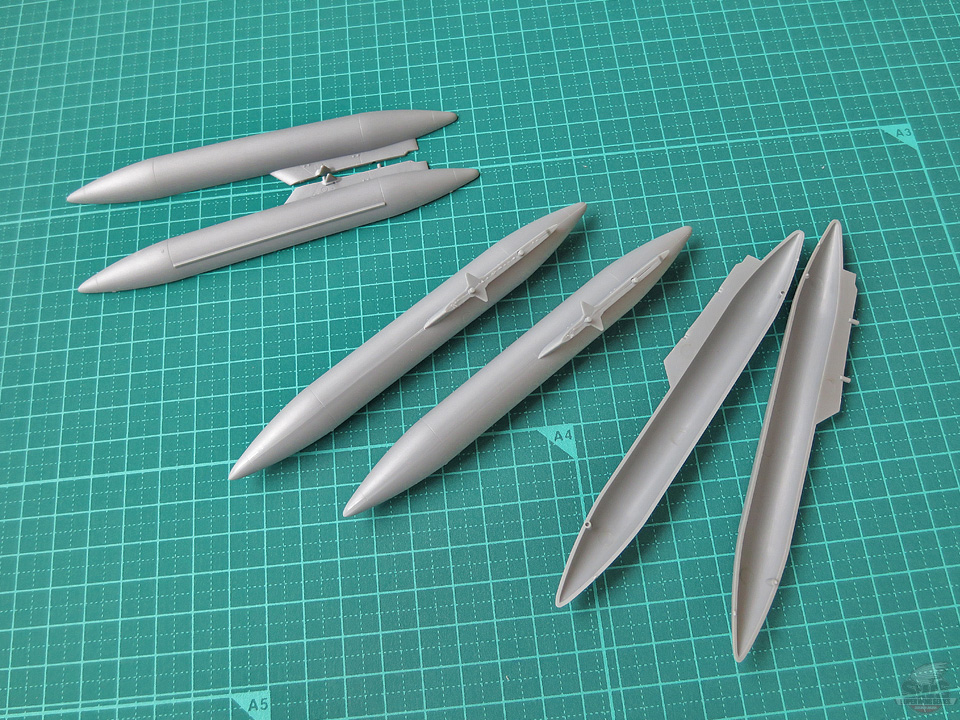
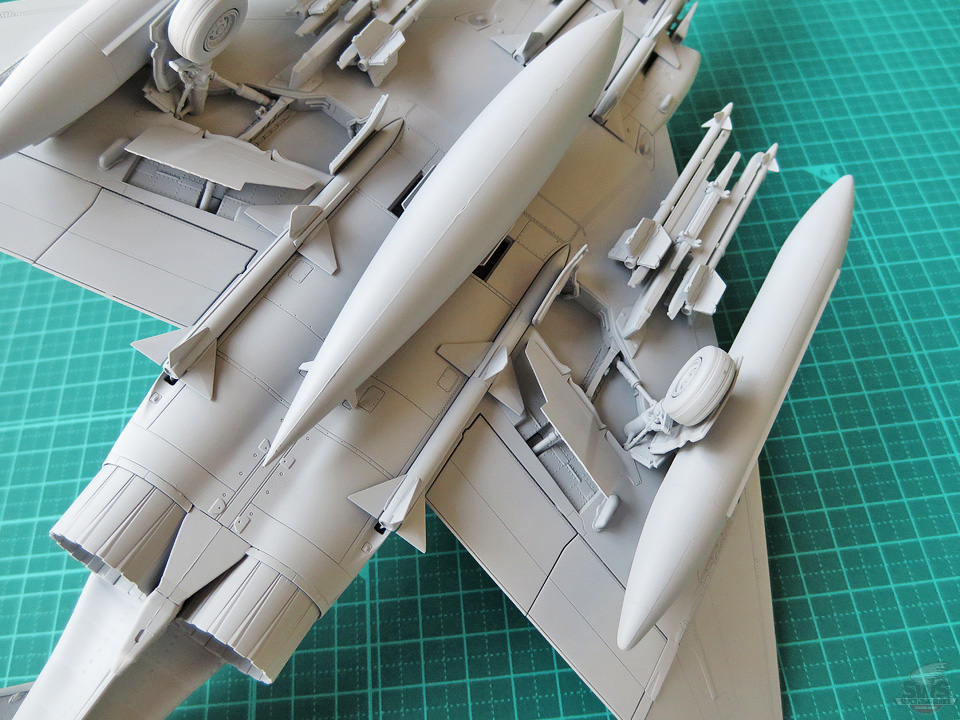
▋The belly tank is fully equipped in this SWS kit, and suits this fuel-gluttonous F-4 jet fighter. The fitting of left and right parts is also perfect. After cementing with strong permeating cement, you can reproduce pretty curved lines by applying softly a file or a chisel, and then polish with sandpaper.
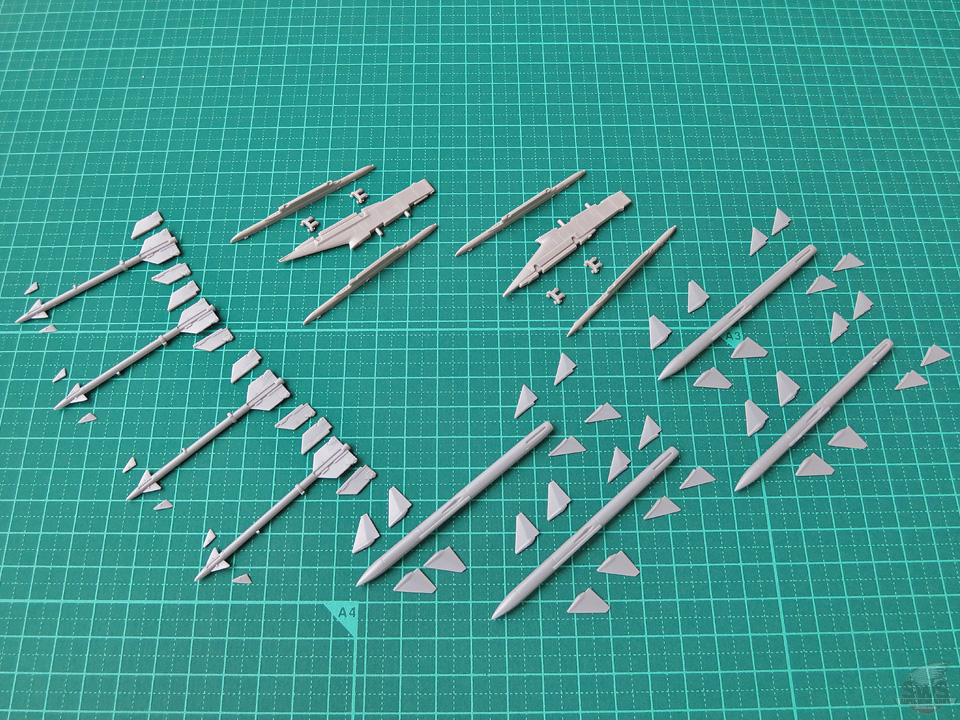
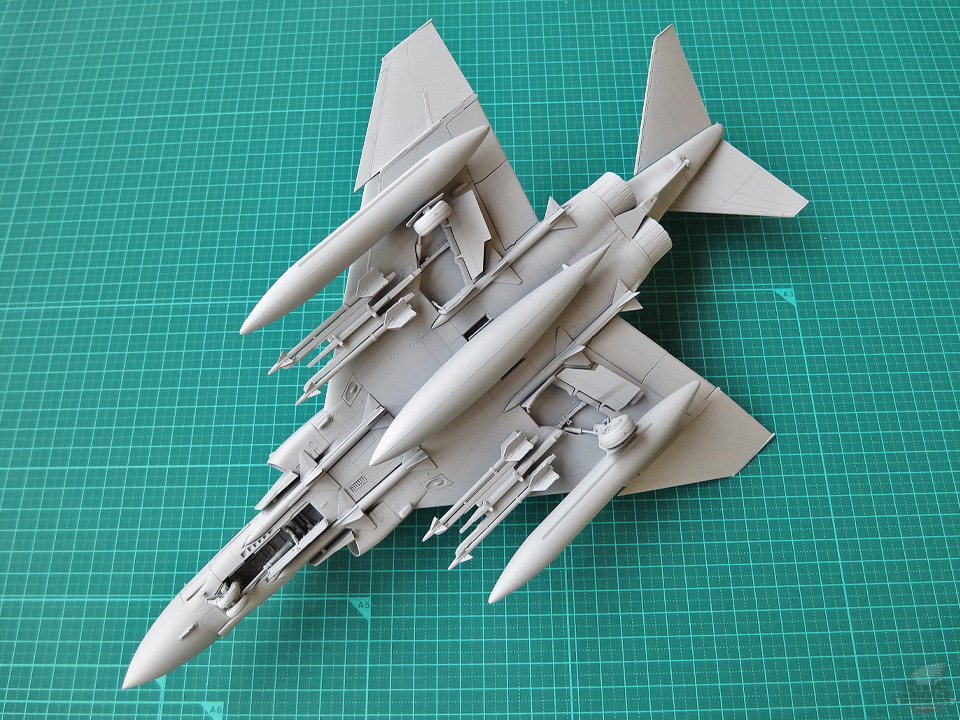
▋AIM-7E Sparrow missiles and air-to-air missiles are also reproduced with the highest detail possible. The cross-sections of the wings, the mounting pylons and the missile racks… The finishes that are usual for modern aircrafts adorn this F-4J.
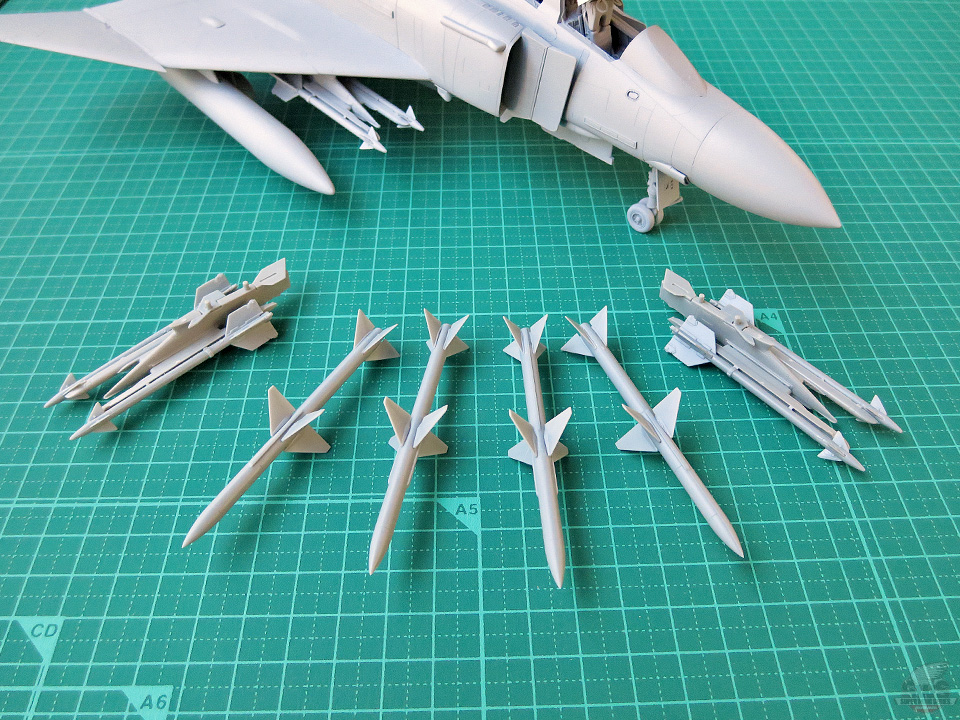
▋Before attaching the missiles. As one of the highlights of this kit, please do not overlook the reproduction of the voluminous and accurate cross-section of the radome. The exquisite curved lines take out the best of this F-4.
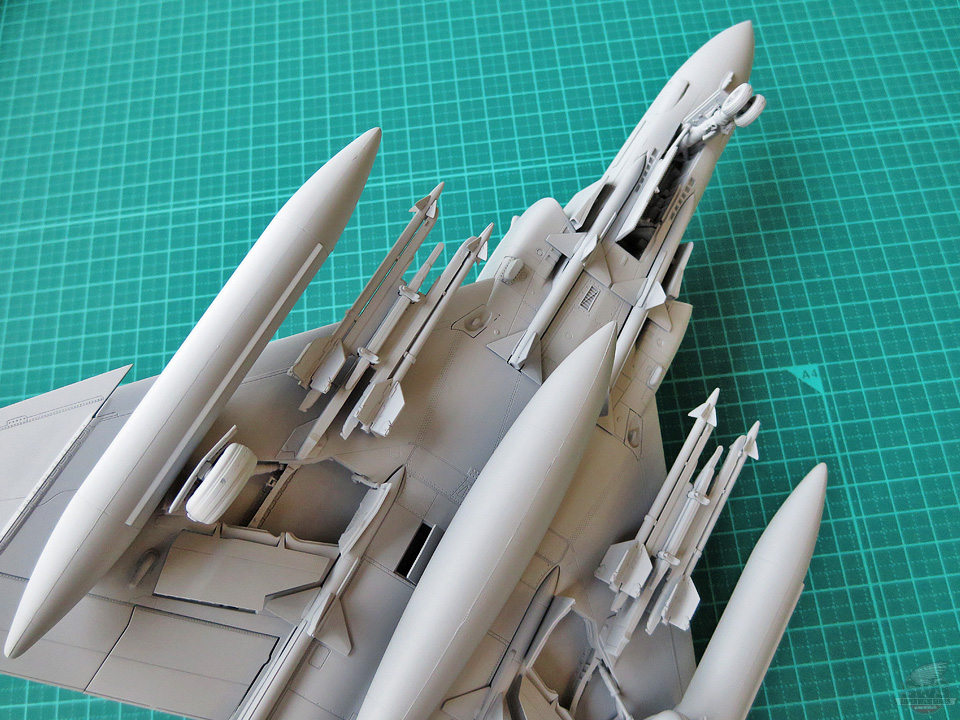
▋Main landing gears, belly tank and each missile are now equipped. The thoroughly reproduced main wings' details enhance the so unique F-4 power. Even if it is just an uncomplete sample kit, I want to build, build and build it again. That's how enjoyable this kit is.
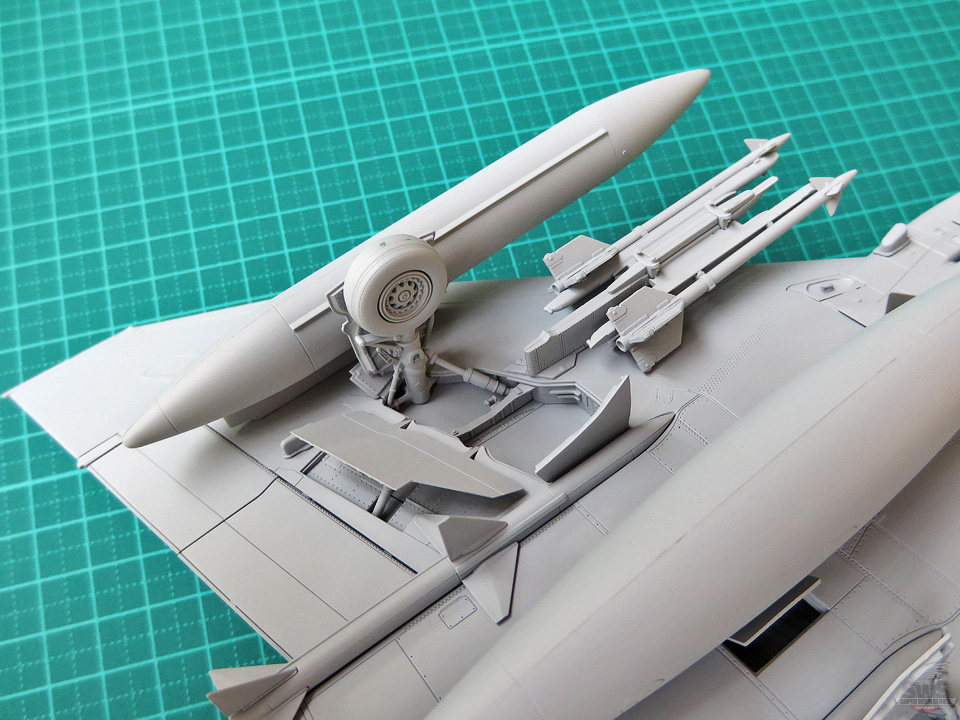
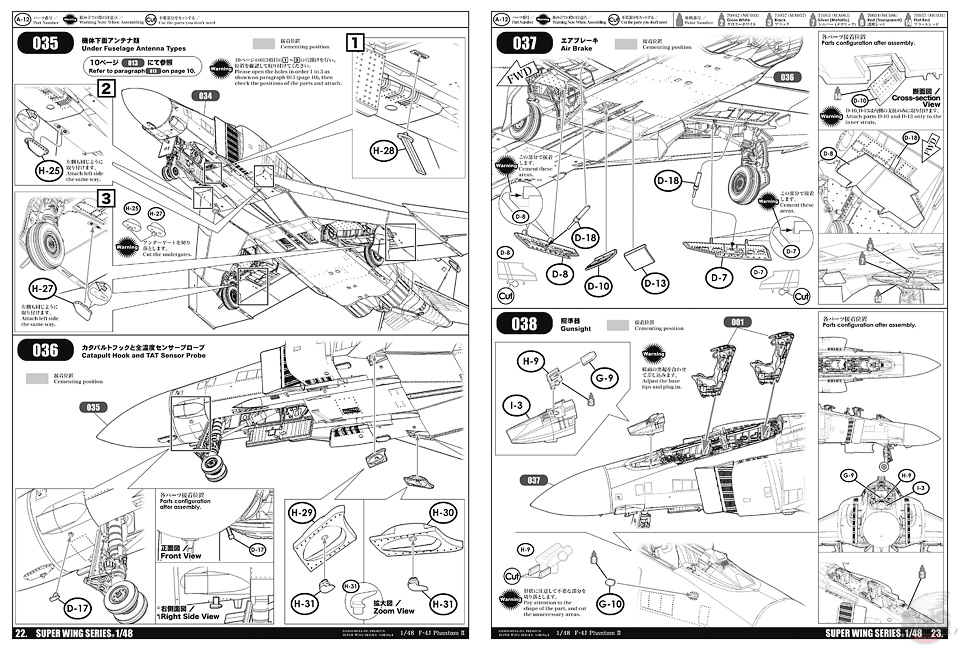
▋The strong landing gears, the accuracy of each flap, the air brakes and the inner side of the gear covers… All the molds are refined with stunning realism. I want to look at these forever.
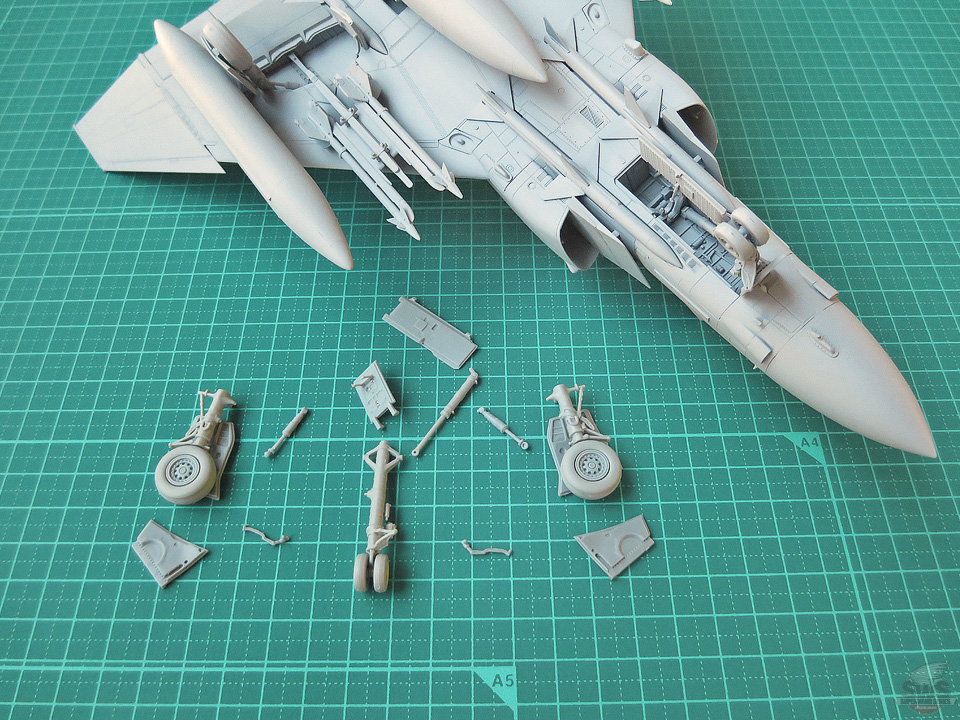
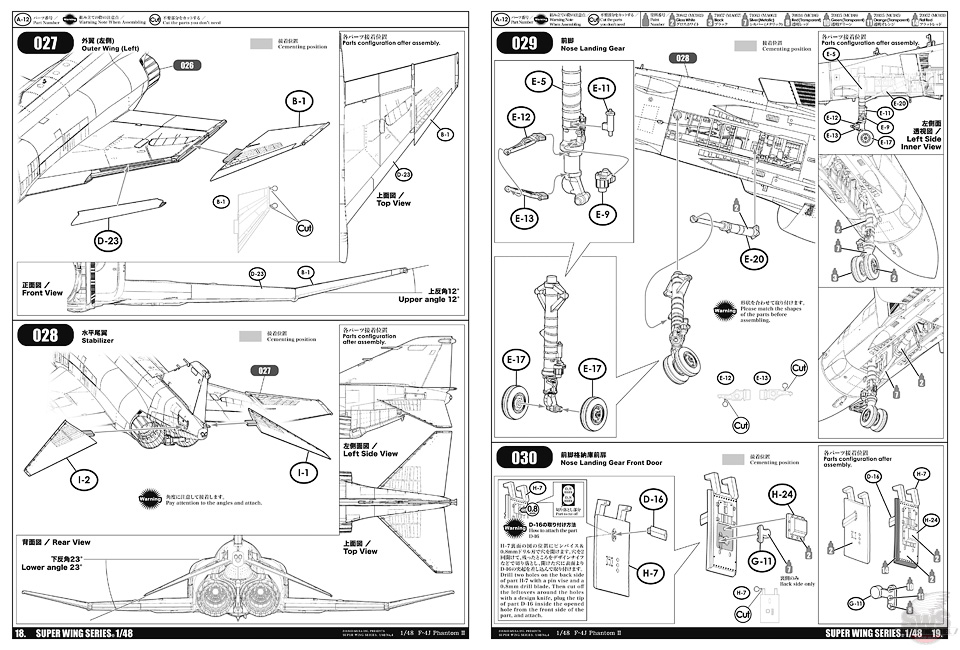
▋See here. Such detailed landing gears reproduced with such a few number of parts. The shape of the components has been thought so that the orientation of the parts and the assembly itself can be figured out at a glance. But do not forget to test fit and proceed cautiously with your assembly.
▋This is the coolest point of this SWS Phantom!
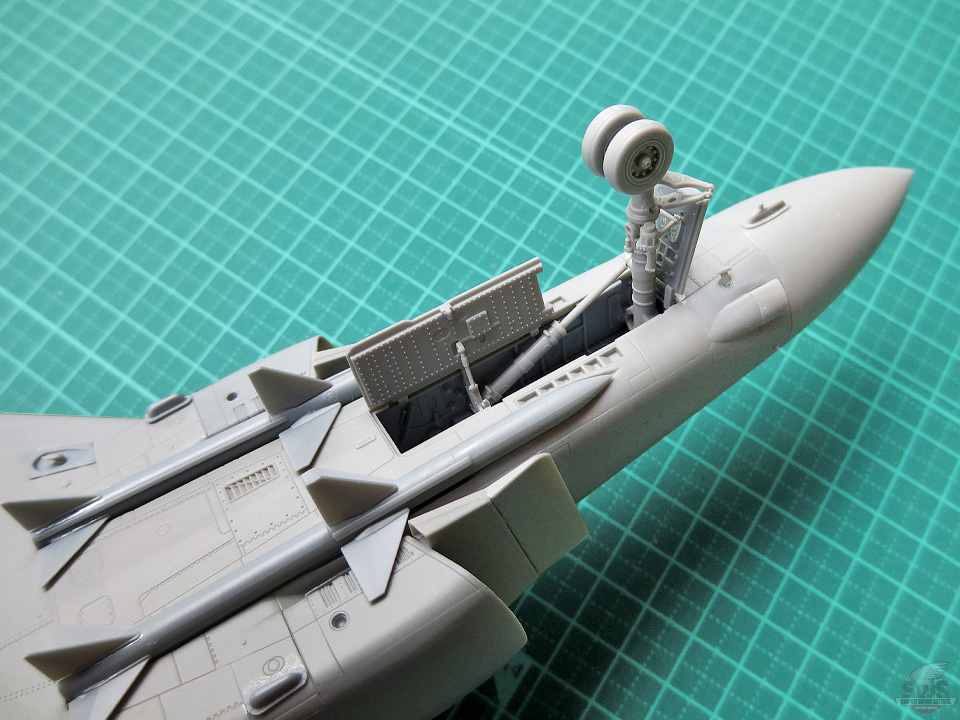
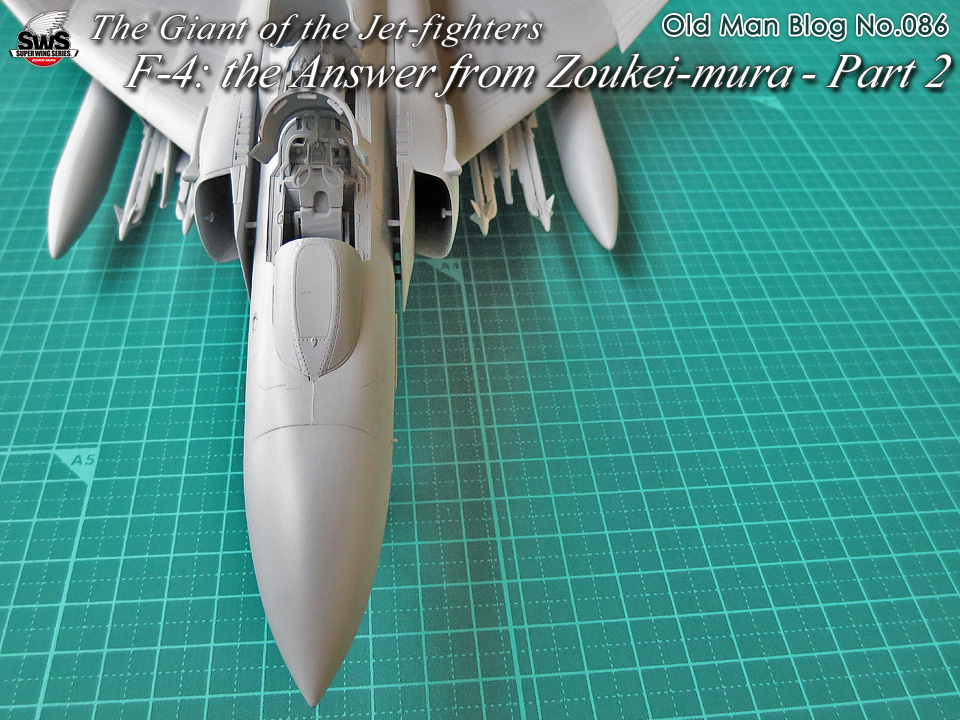
The highlights of the nose part! From the downward cockpit side to the front of the ram air intakes, the change in the cross-section line has been accurately reproduced. You must look at the representation of the cross-section of the downward cockpit side with your eyes. This gigantic F-4 is enjoyable even when you turn it upside down.
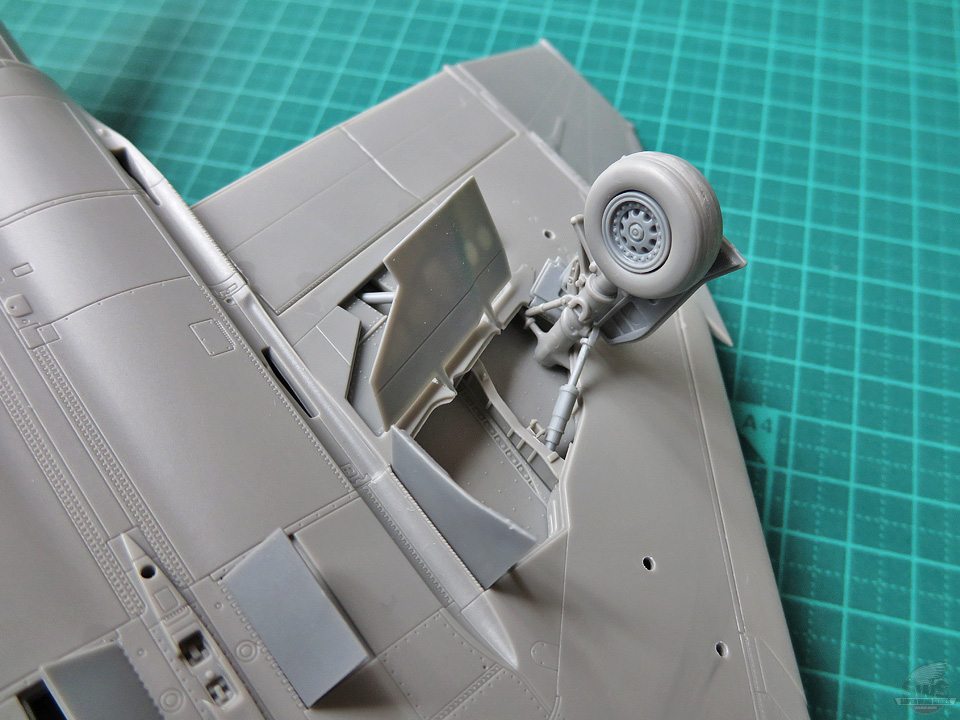
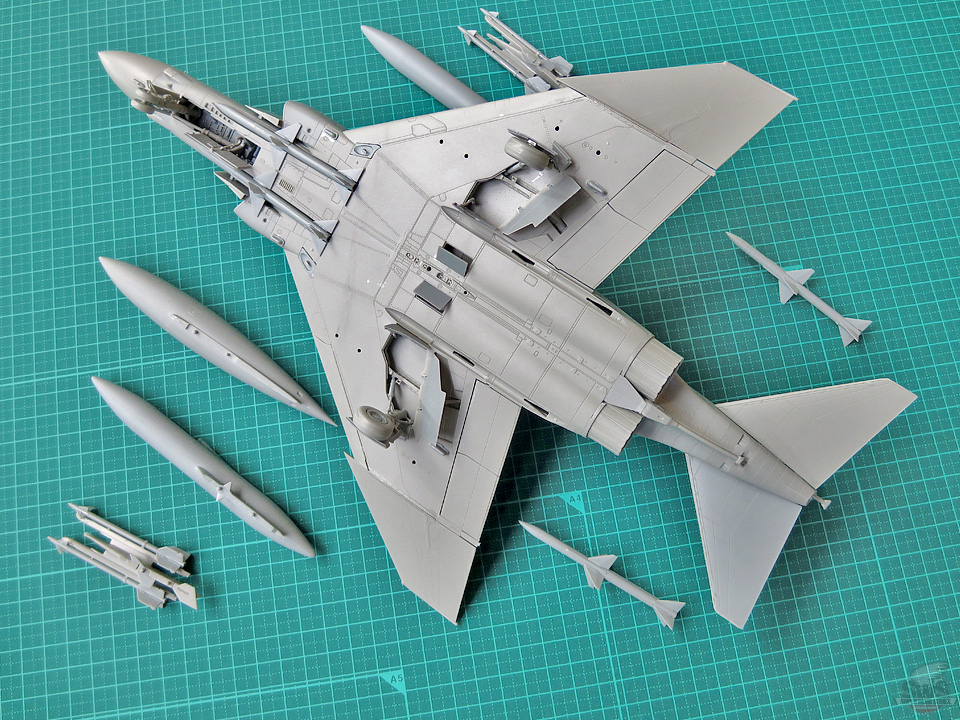
▋See the mold of the landing gears, air brakes, and the heat sink. These parts have also been represented with the utmost details. The large holes opened in the main wings are to mount the pylons for weaponry. Do not forget to open them before cementing the top and bottom of the wing parts.

▋The cockpit has been reproduced as accurately as possible for a 1/48 kit. The instrument panel and the side consoles are reproduced with their meters. Also, a fine decal sheet is provided to level up the instrument panel and the side console accuracy. You can expect a stunning finish by using it. This way, you can also reproduce the scene when the probe pipe is used during in-air refueling. Say what! The Martin Baker Mk.7 ejection seat has also been reproduced in seven parts.
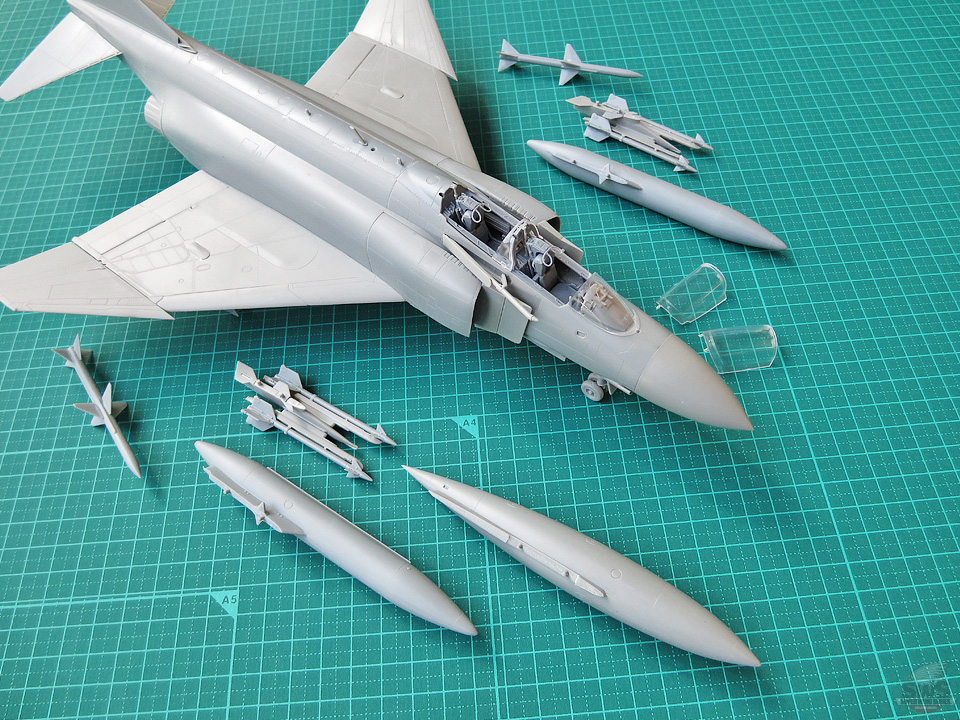
▋The assembly of each equipment is done. I just have to attach them to the plane. Since this time I have been given three sample kits with three different levels of completion, I just put them together in disarray so there are still some troublesome parts. Do not worry, the kit you will receive will not have any problem of that kind, so please enjoy your F-4 assembly without rush.
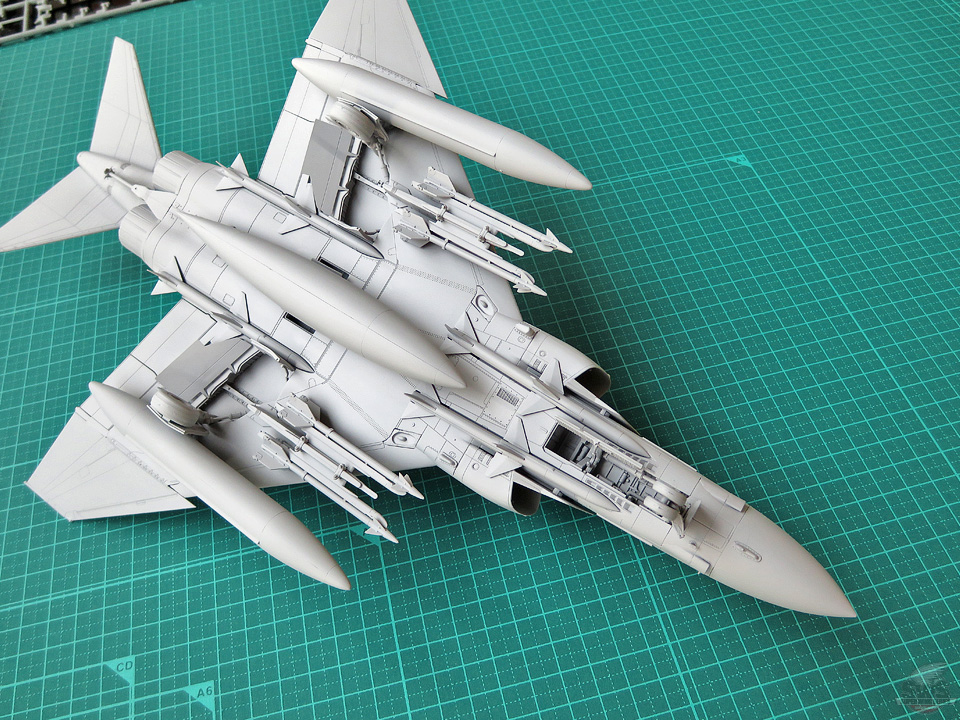
▋The full equipment of the SWS F-4J kit is now complete. Only modelers who built this kit themselves can see this. Look at these three pictures showing different views. The more you look, the more the figure of Phantom, arguably named a masterpiece of jet-fighters, seems to pop up. Not visible from here, but on the top surface of the wings there are the bulges typical of J / C / D types (to balance the thickness of the tires). This delicate mold has also been accurately reproduced.
▋Do not forget to open the holes.
I also forgot to open them in the main wings before assembly… I had a lot of pitiful experiences where I had to look for the holes by guessing. Since the main wings are thin, do not cement the upper and lower parts together. If you do so, even by warming the parts to the sun or piercing them with a needle, you will get nothing but a ruthless result.
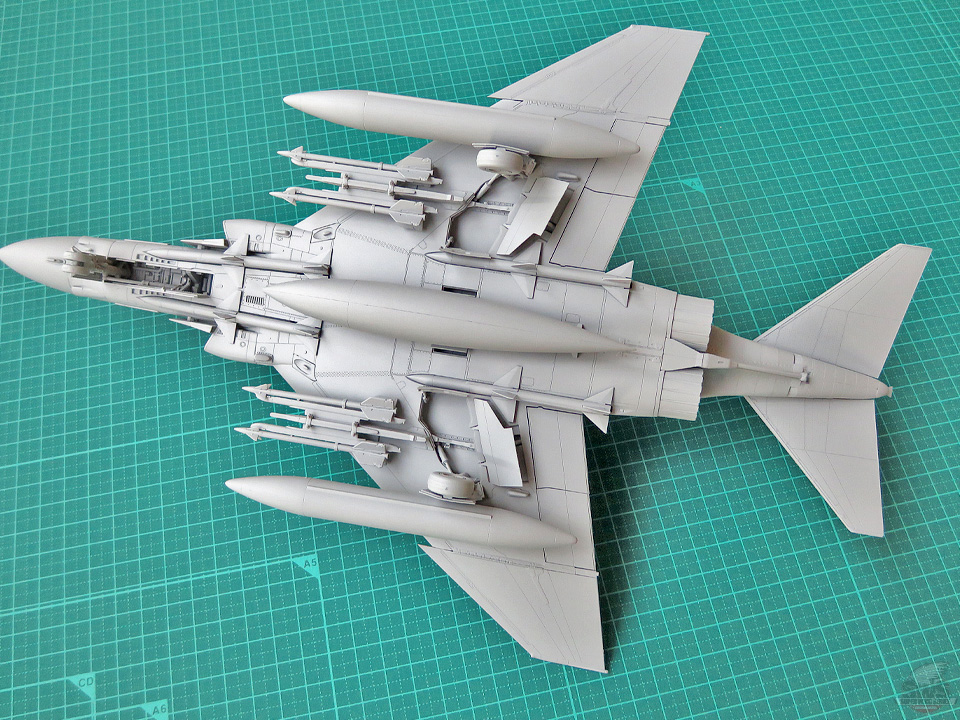
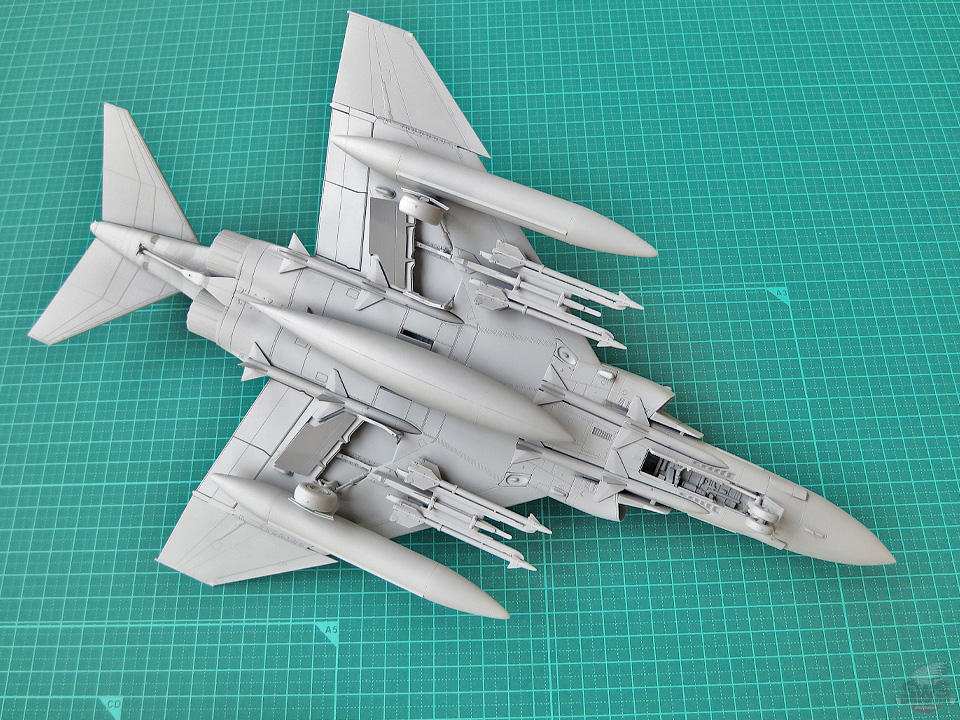
▋I may repeat myself but… Please look at the picture of the downside again, it's just so cool! This view is something only a modeler (meaning you!) can enjoy. Of course, the subtle cross-section changes of the underside of the fuselage and the main wings, as well as the molds of each part are accurately reproduced. In addition, the stabilizer slots are realistically reproduced as thin as possible. Designed to be glued without any distortion but right thickness, it is perfect for the F-4's main wings.
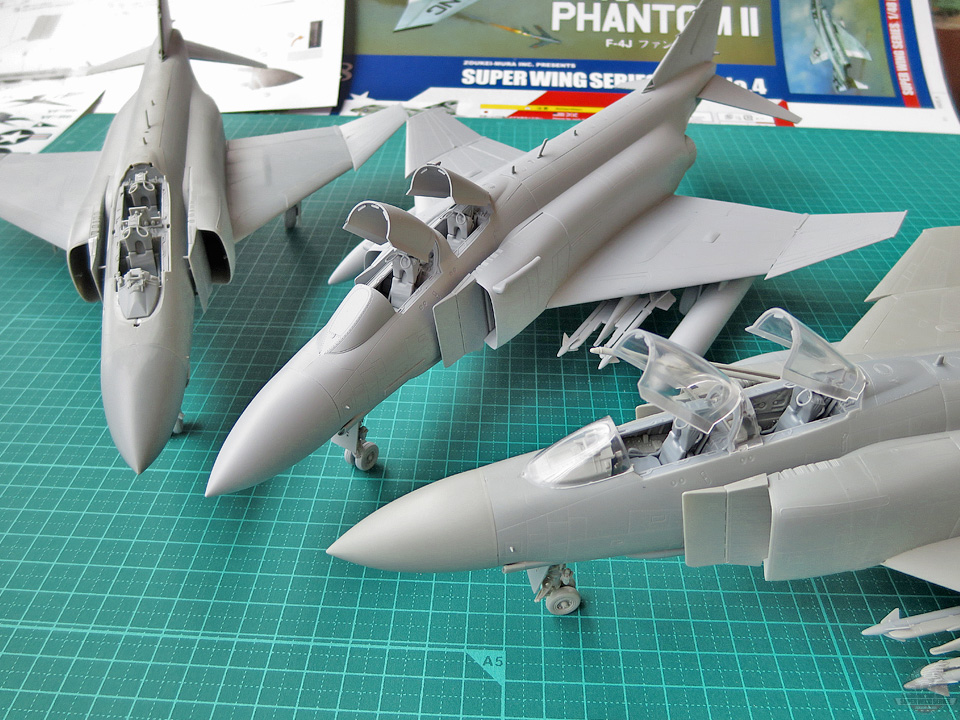
▋Three F-4J sample kits line-up.
See, the volume of the intakes largely spreading on left and right sides, and the rear neck are accurately represented. This is a staple when it comes to represent a Phantom. Looking at the F-4 beautiful shape under different angles is also one of the funs of scale modeling. From now on, if you reproduce the painting you prefer, you will enjoy your kit for years even after completion. If you are to buy this kit, you should get three pieces! No kidding.
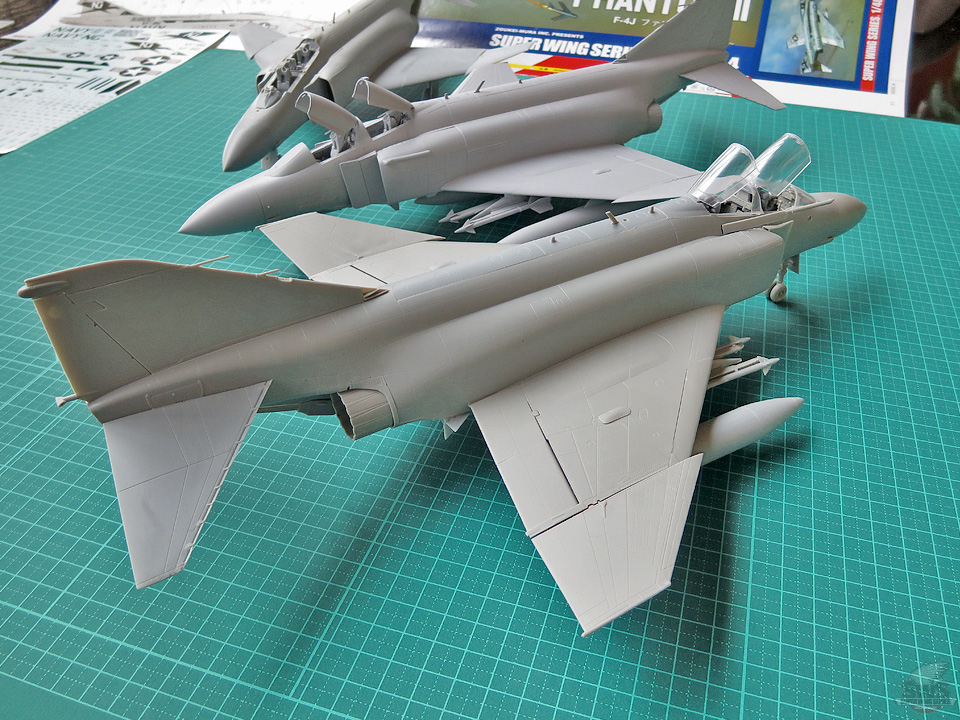
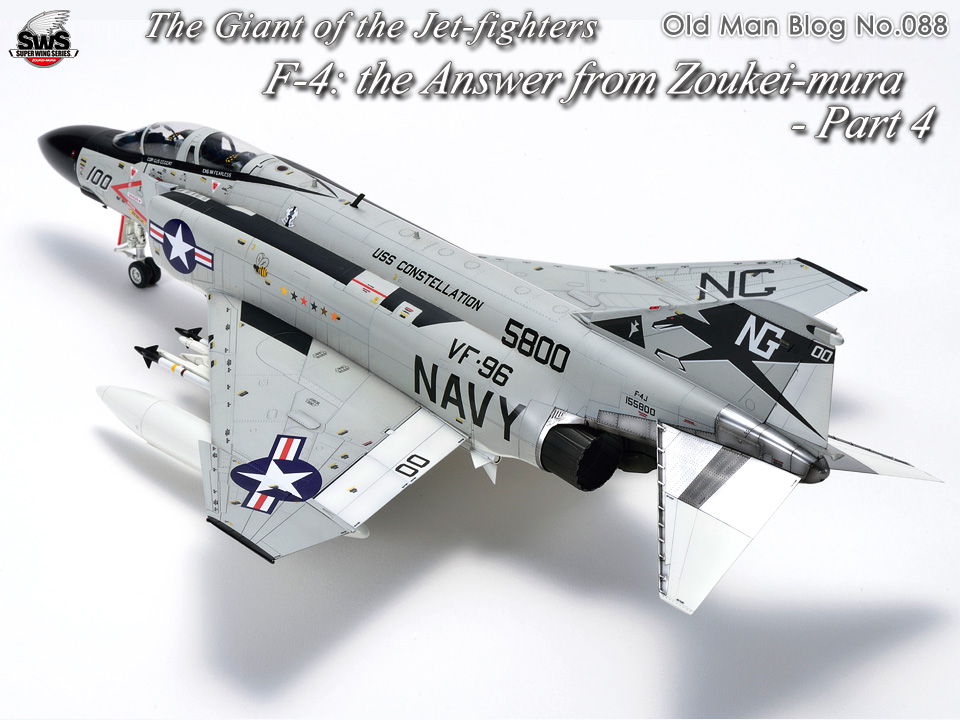
▋For sure, I am not the only one stuck in love with the back of the beautiful F-4! I have always craved for this powerful and beautiful form of the F-4 to be somehow reproduced, so now I am more than happy!! I am also confident in the molds of the tail and the elevators, and in this sharp finish. Absolutely recommended. See here, we reproduce in separate parts how to show the presence/absence of the antenna fairing and also the tip of the tail fin. For some reason, the cover of the drag chute of this kit has not been attached yet.
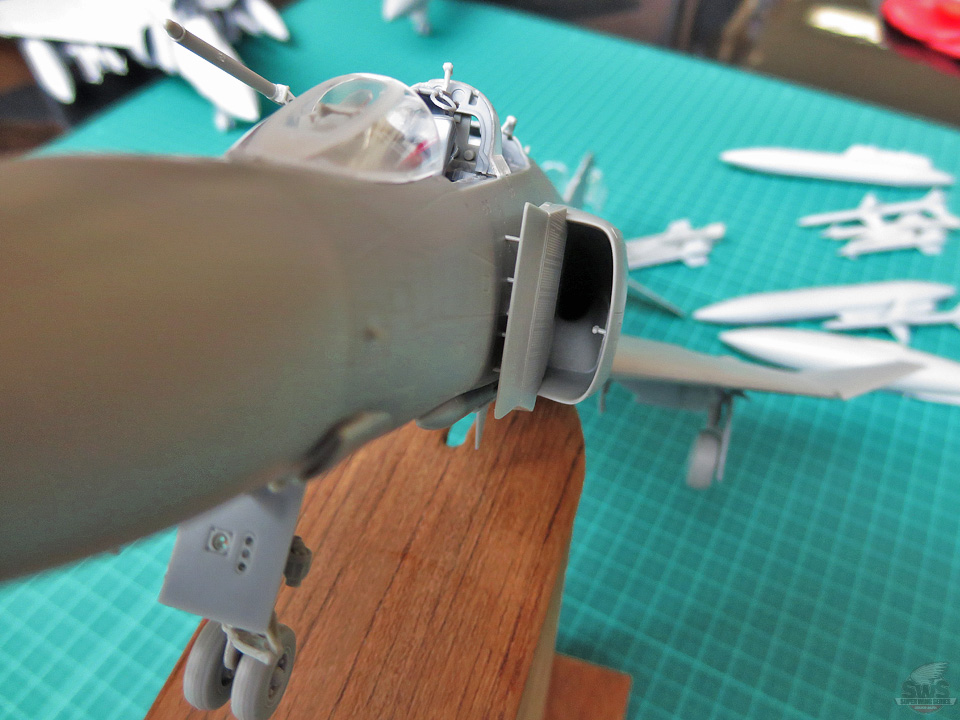
▋You can see the J79 engine through the huge air intakes. Sorry but this is the best of the details I can show you with my camera. The real and enchanting sight will be clear once you have completed the kit. Naturally, this kit shows all the differences between the J79-10 engine used in the J type and the J79-15 engine used in the C/D types. You can level it up and also showcase one piece next to the finished kit! Do your best!

▋An SWS-ish exhaust nozzle mold.
Same here, we added as many details as possible for a 1/48 scale. It seems like you can hear the rumble and the vibration when the afterburner is fully opened. In addition, the representation of the heat-resistant part of the fuselage-back downside is also dramatically realistic. You can enjoy the mold of each part of the gigantic hanger hooks.
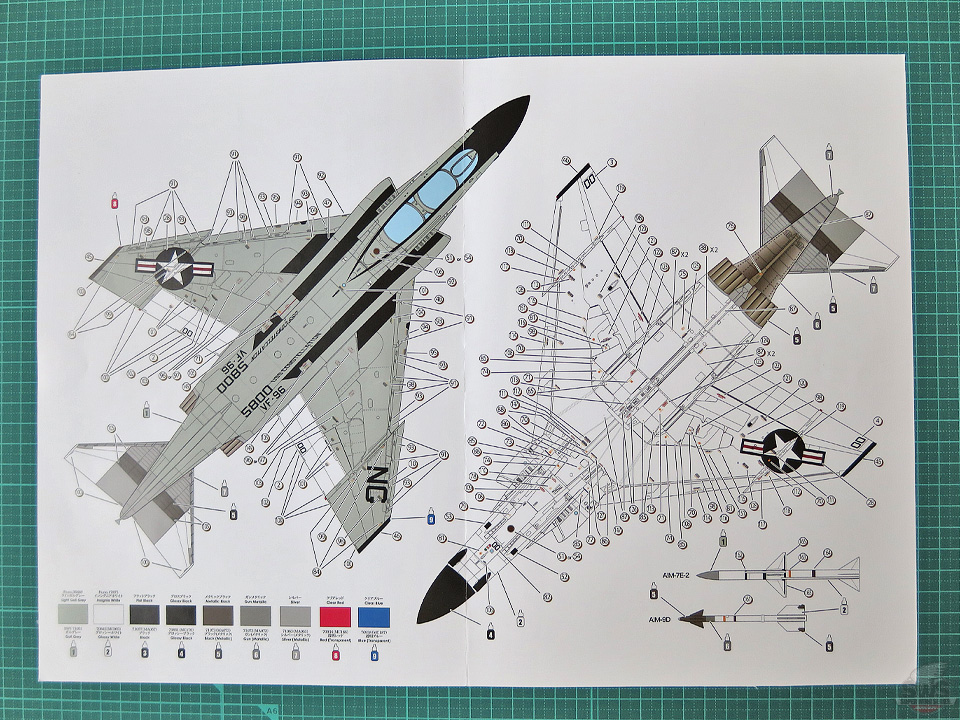
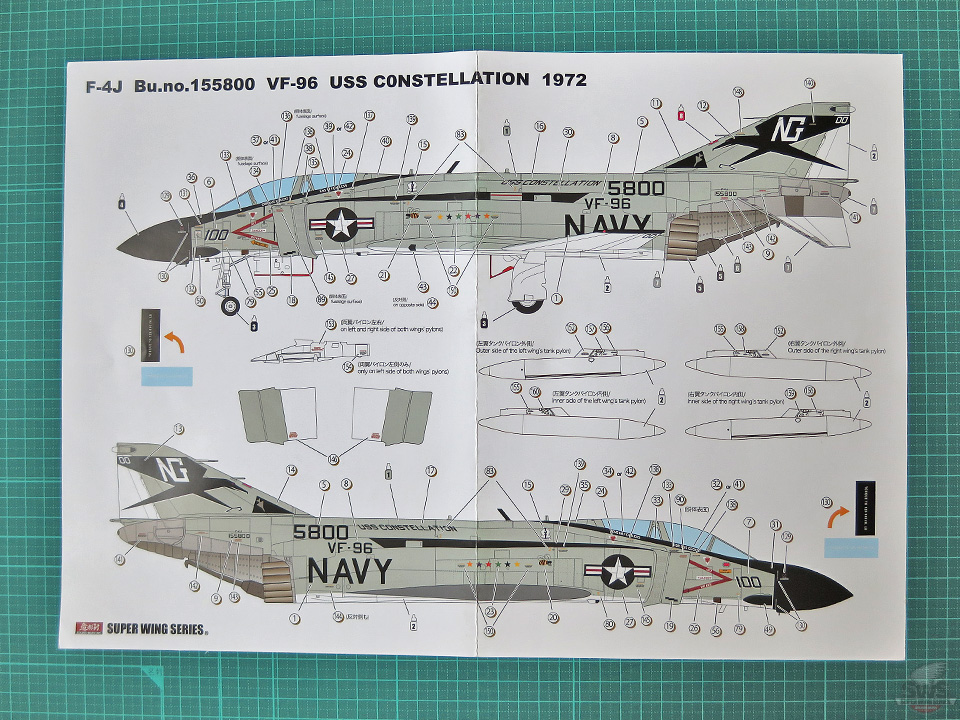
▋Color guide and a detailed instruction booklet on how to attach the decal are included in this SWS F-4J kit. Complete the aircraft and take time to attach the decals on each part. Starting with you, plenty of F-4 modelers/fans have been waiting for this. That's my favorite time.
▋One more highlight from this SWS F-4J kit!
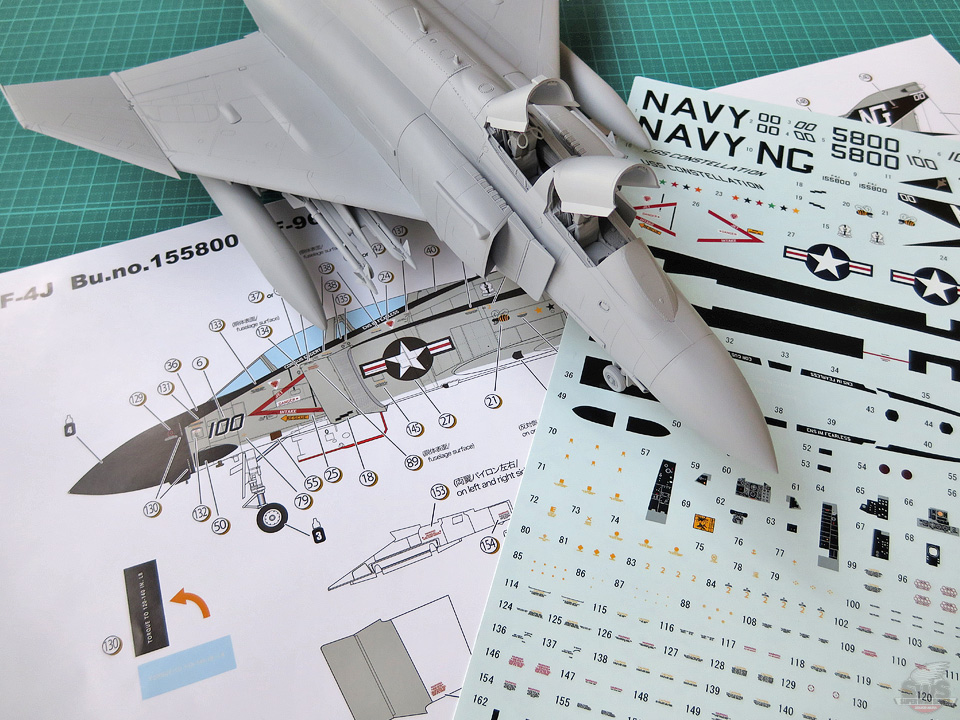
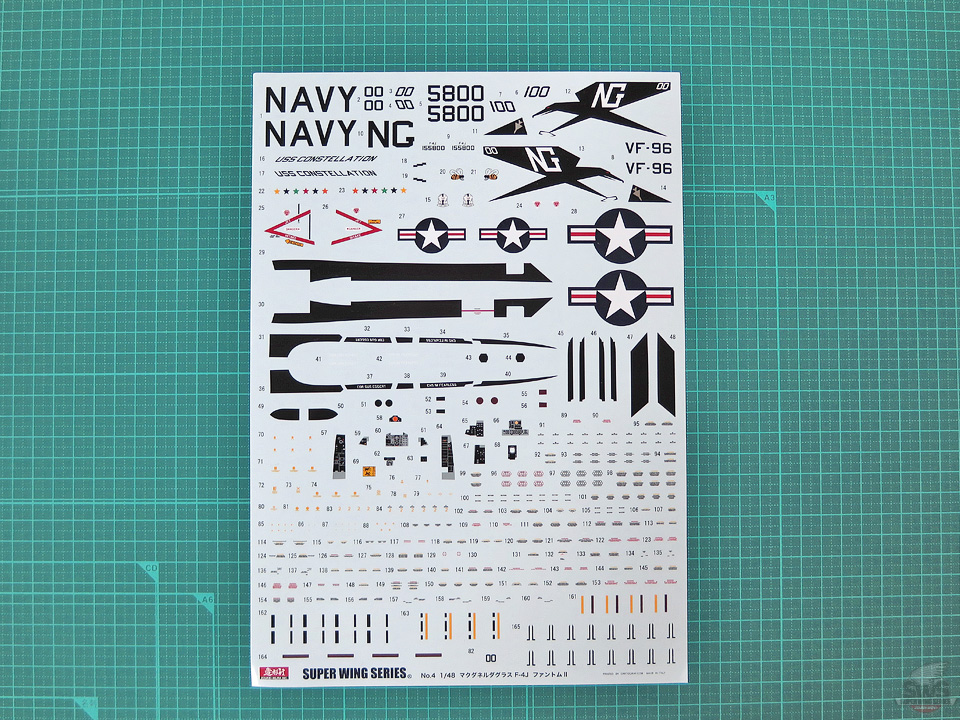
Here is the decal sheet made by Cartograf in Italy. Detailed and elaborated. Enjoy the complete work with the excellent decal adorning all over the finished kit.
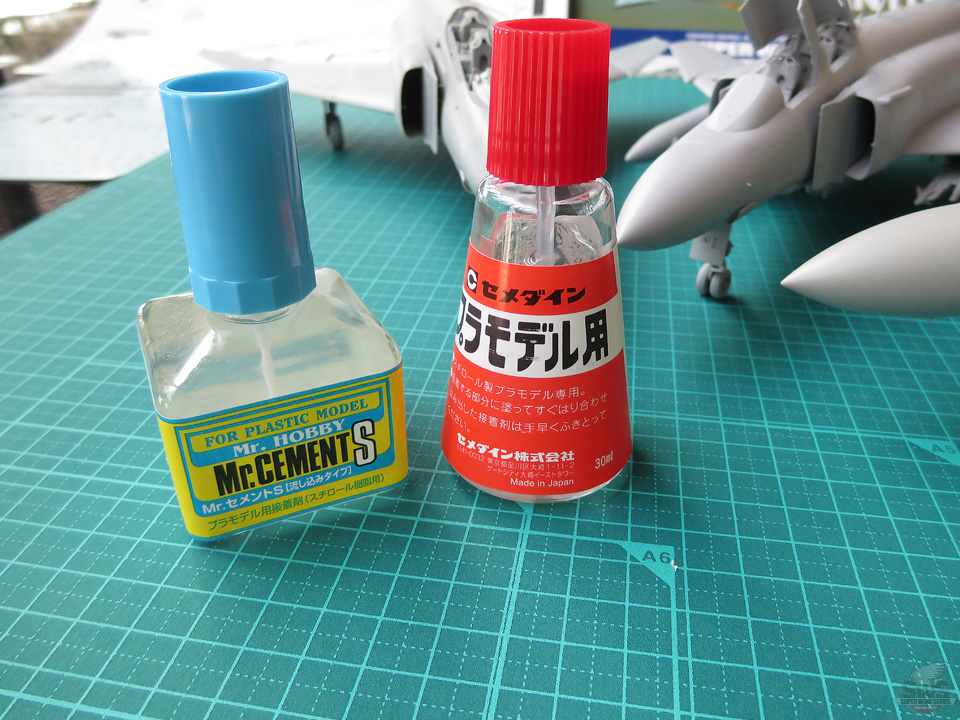
▋Last but not least, let me introduce you two types of cement that I use for modeling. On the left is "Mr. CEMENT S". Cement with excellent penetration and used when your parts are split in left/right sides. Press the sides with your fingers and flow the cement between the parts. It will dry up in a few seconds. On the right is "Cemedine for plastic models". Thickened glue, you need just a small quantity to glue tiny parts at once. Then, you should have some time to adjust the parts' orientations and positions with tweezers.
SWS 1/48 F-4J has finally entered its final production stage.
Package, instruction manual, paint guide and also decals, everything is ready.
Of course, all these stuff will be awesome and ready when the kit will be released.
In case you are interested in: there are 10 runners in total, clear parts included.
In addition, a decal sheet made by Cartograf and a paint guide contained in the fine instruction manual make this kit a real luxury.
Package size: Length 28.5cm x Width 41.5cm x Height 10.5cm.
The package is the same as the SWS 1/32 Shinden. Look forward to it.
Japanese release is scheduled for December 23rd (Friday - National Holiday). Except a long delay in shipping due to weather conditions, port strike or any other incidents, the F-4J kit should be in your hands in a not too long time.
* For the customers who pre-order the kit, the delivery will be a little bit earlier.
So, if you want the kit even a little bit earlier, I definitely recommend you to pre-order it.
Well, next time I will finally show you for the first time the SWS F-4J fully painted kit made by the famous pro-finisher: Master Naoki Kobayashi. This build will be published in the Concept Note.
See you then!!
Hideyuki Shigeta
President, Zoukei-Mura
![]()

 Old Man Blog No.086
The Giant of the Jet-fighters F-4: the Answer from Zoukei-mura - Part 2
Old Man Blog No.086
The Giant of the Jet-fighters F-4: the Answer from Zoukei-mura - Part 2
 Old Man Blog No.088
The Giant of the Jet-fighters F-4: the Answer from Zoukei-mura - Part 4
Old Man Blog No.088
The Giant of the Jet-fighters F-4: the Answer from Zoukei-mura - Part 4