It’s starting to feel like autumn. We hope all of you SWS brothers and sisters are doing well.
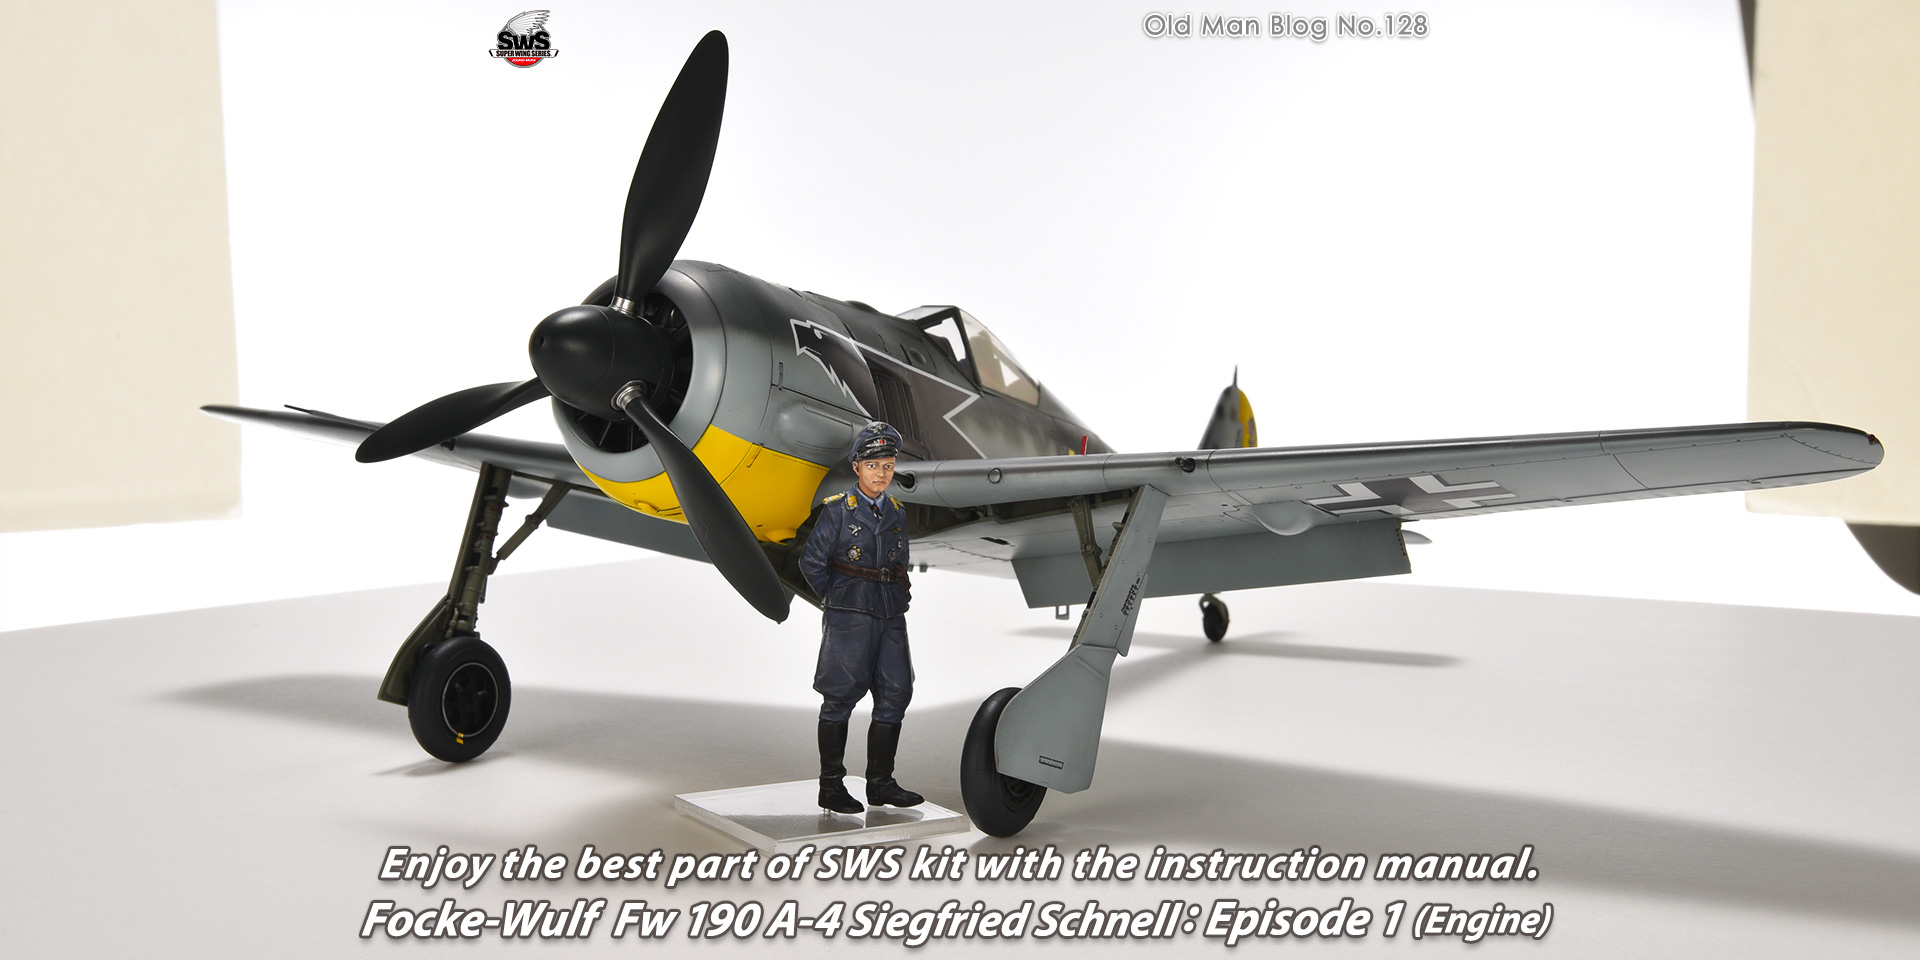
Finally, the day is approaching when the SWS 1 /32 Focke-Wulf Fw 190 A-4 "Schnell Aircraft" kit will be delivered to those of you who pre-ordered it.
This kit, which has attracted the attention of Luftwaffe aircraft fans has 359 parts in total!
As always, we have thoroughly researched the actual aircraft, and reproduced the model as realistic as possible with mold expression in 1/32 scale, in all plastic. It will surely be recognized as a rewarding scale model to you, an experienced modeler.
I have already assembled three kits on a trial basis, counting from the test shot.
I hope to share my impressions of the kits, as well as any other points of interest or points that will further enhance your experience.
For those of you who are ready to challenge the SWS32 Fw 190, we hope this will be a good reference before you start building, and for those of you who are not interested in this kit, we hope this can show you that even a single-engine plane can be reproduced in such detail with the SWS kit.
Now, there are three key points when building the SWS Fw 190!
If you work on these three parts correctly and firmly, your Fw 190 will be beautifully finished as you imagined it to be, or even more so. This is exactly what Kurt Tank was trying to create with his " Kriegspferd(warhorse)", the German fighter, the " Würger of Bremen”.
1. engine assembly
2. cockpit assembly
3. assembly of landing gear
Let me show you the appealing points about this kit, focusing on the assembly process of these three parts.
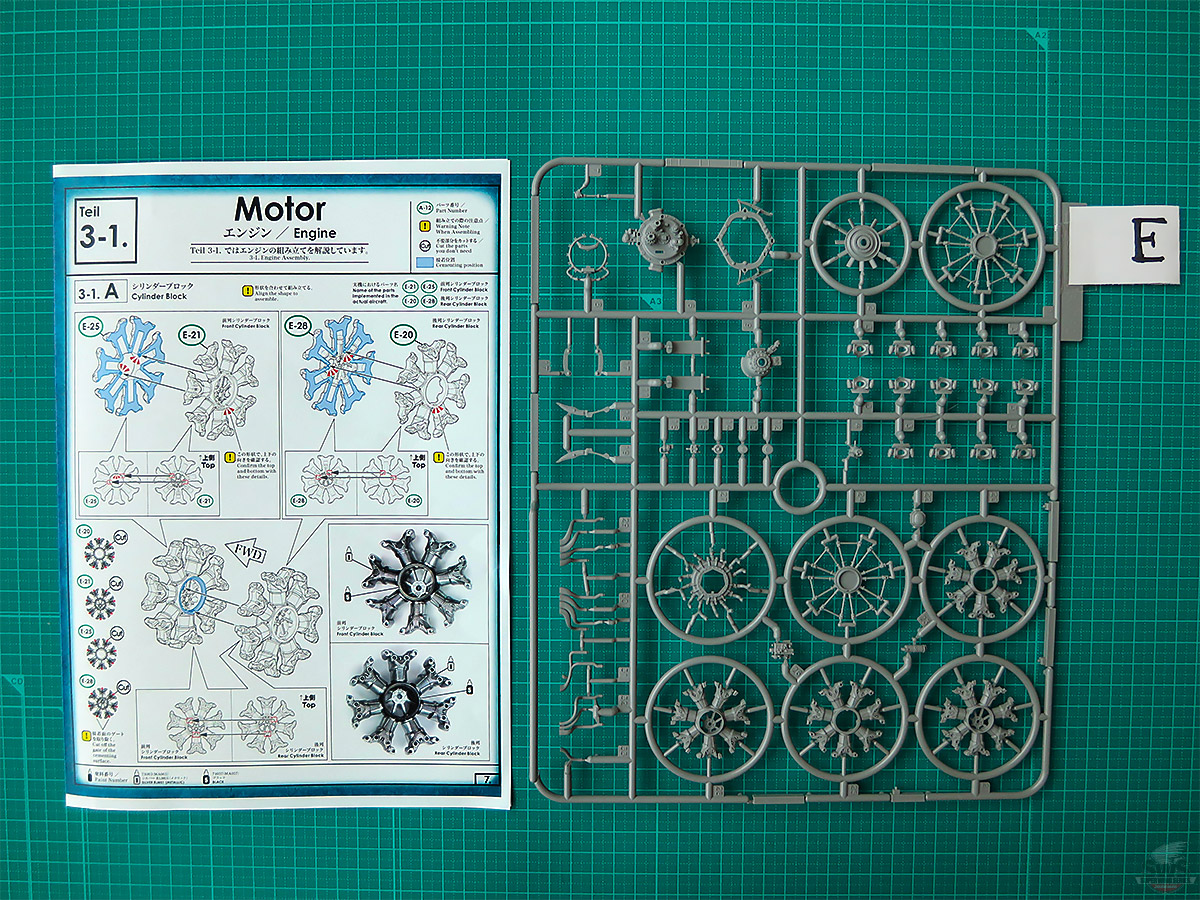
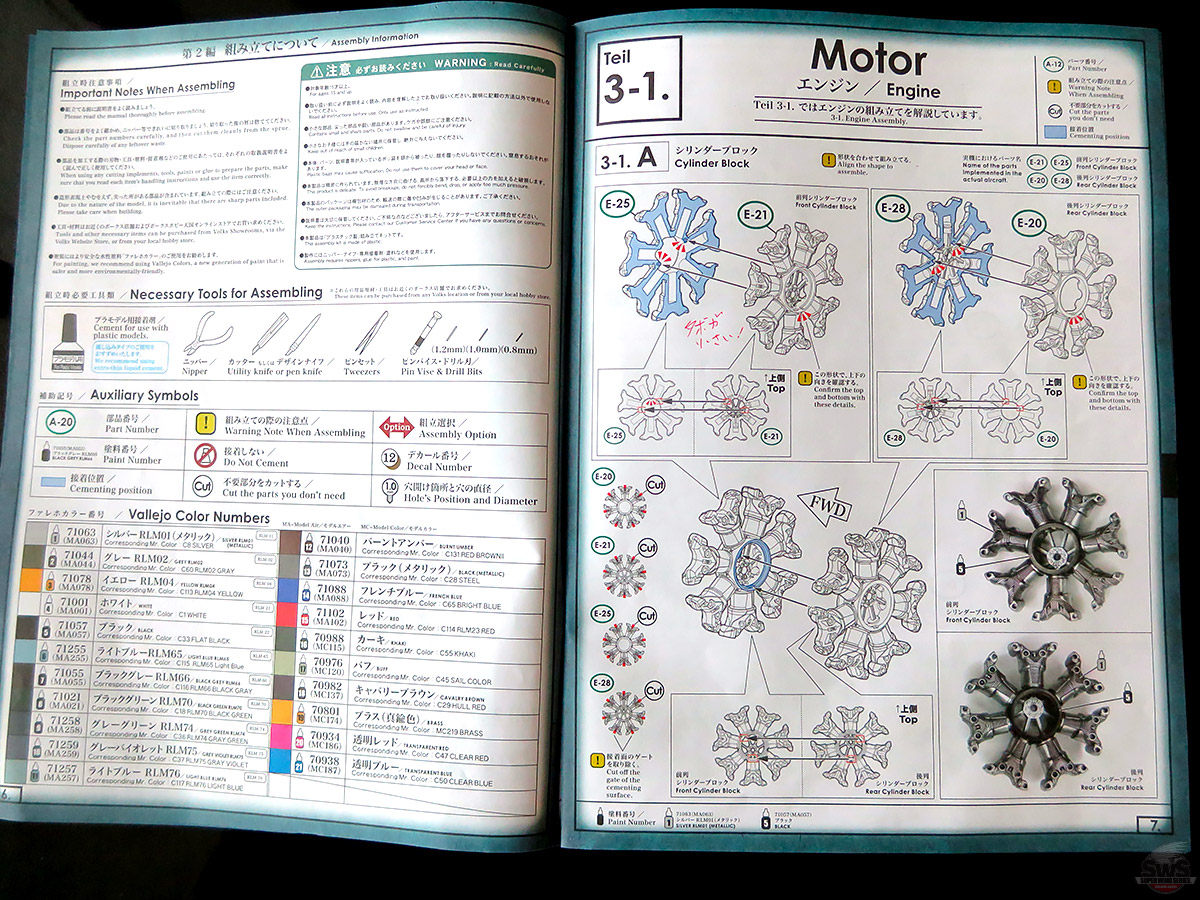
▋This is the whole runner E to make the BMW engine.
When completed, it looks like as if it had more parts, but in fact, it consists of a small number of parts. However, you need to try some temporarily assemblies or glue some parts later. Think ahead and please pay close attention careful.

▋Look at these perfectly painted photos. It looks so powerful and it is stunning!
I am deeply impressed with the fact that this aircraft engine was invented almost 80 years ago, installed in a fighter plane and was in actual operation. What a great work of the engineers at that time!
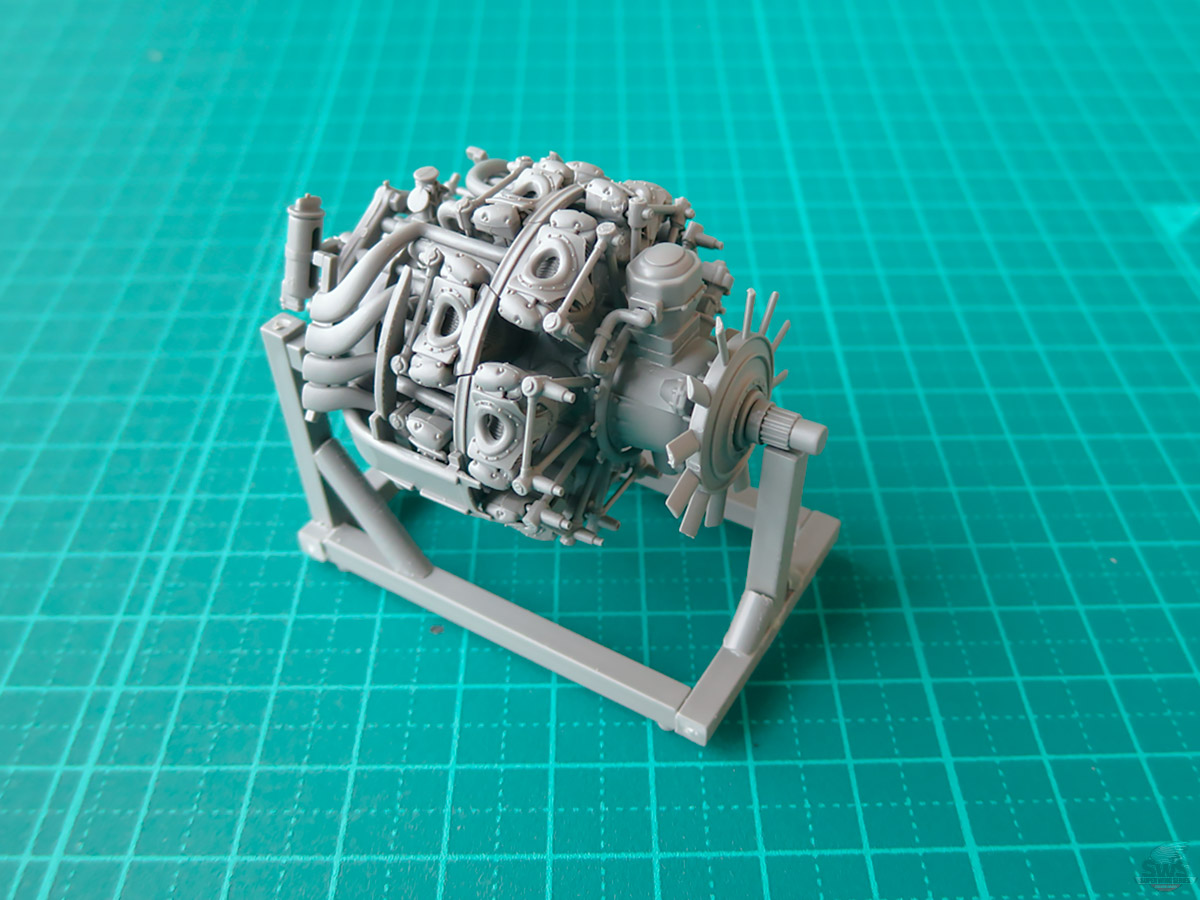
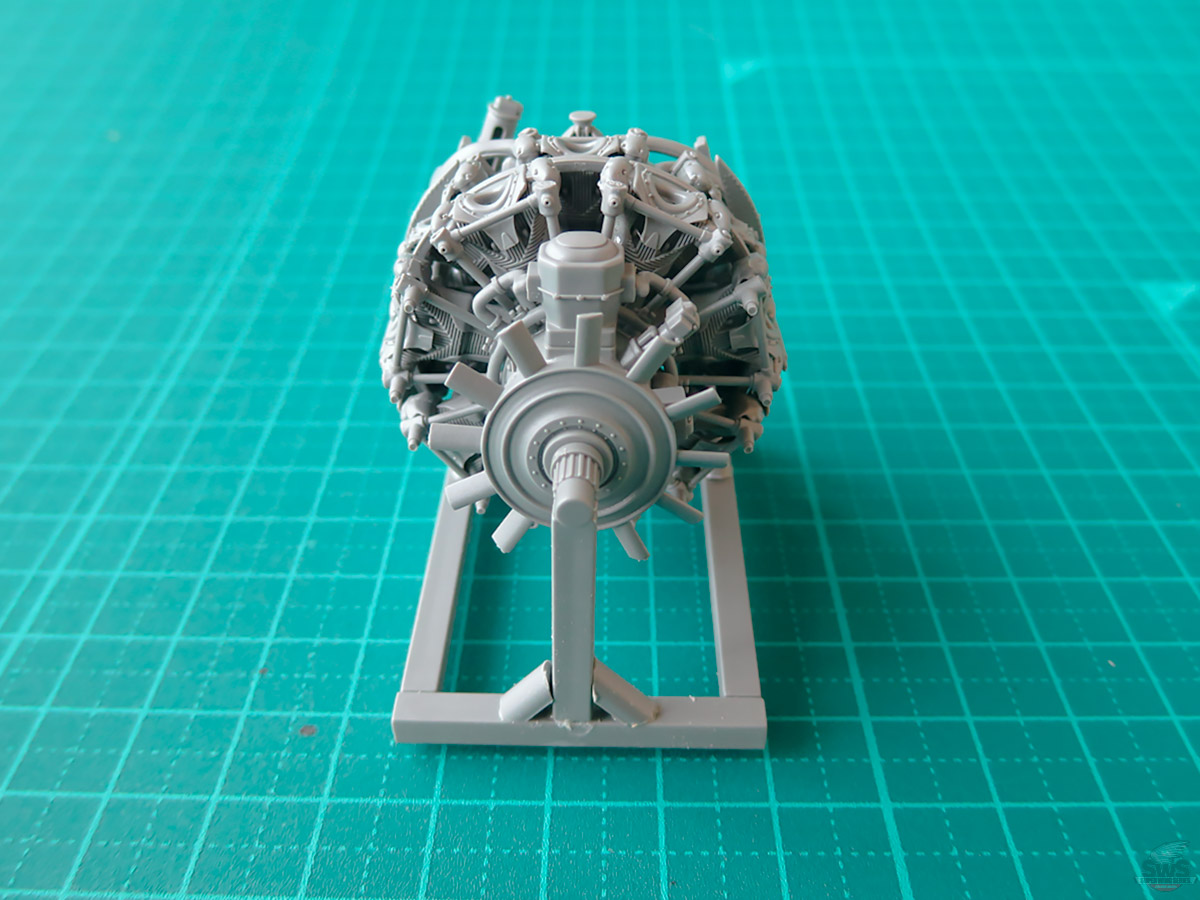
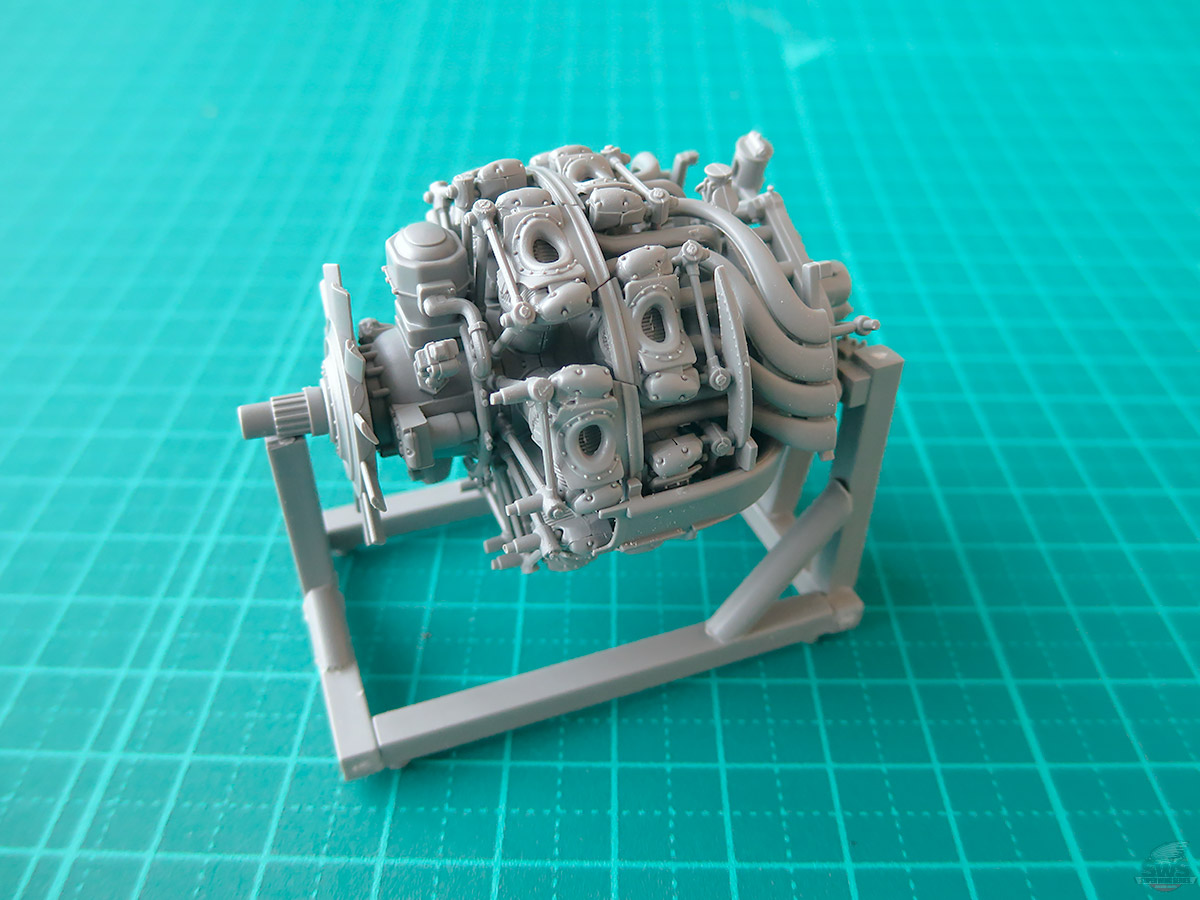
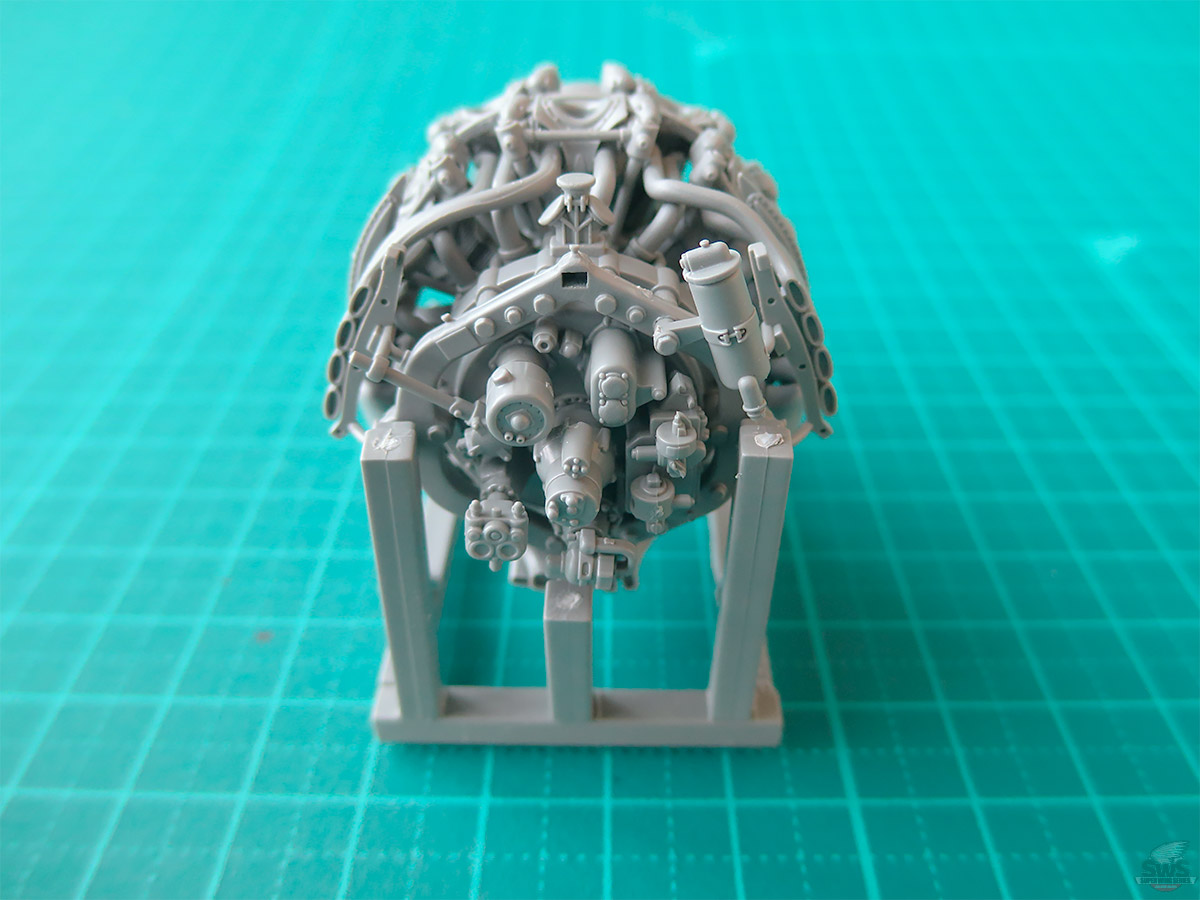
▋The finished engine of the SWS kit was placed on an engine stand made of the runners. You can see the air-cooled fan, gear housing, and even the cylinder block visible under the baffle plate are reproduced in great detail.
▋It is natural to think that you want to somehow make this engine viewable after it is installed. Take it easy. This kit is designed from that point of view. Each cover of the engine cowling is designed to be able to unfold so that the engine can be seen. It’s up to your enthusiasm and patience. If you are confident that you are good at working on the details, please try~~~~!
▋Don't worry about the complex shapes and arrangements of the exhaust pipes! As long as you follow the instructions, place the parts carefully and glue them, each exhaust pipe will fit exactly where it should without difficulty.
However~~~!!
I can’t help admiring the designers and engineers who put their ideas together, as well as the mind-boggling manufacturing capability for mass-production.
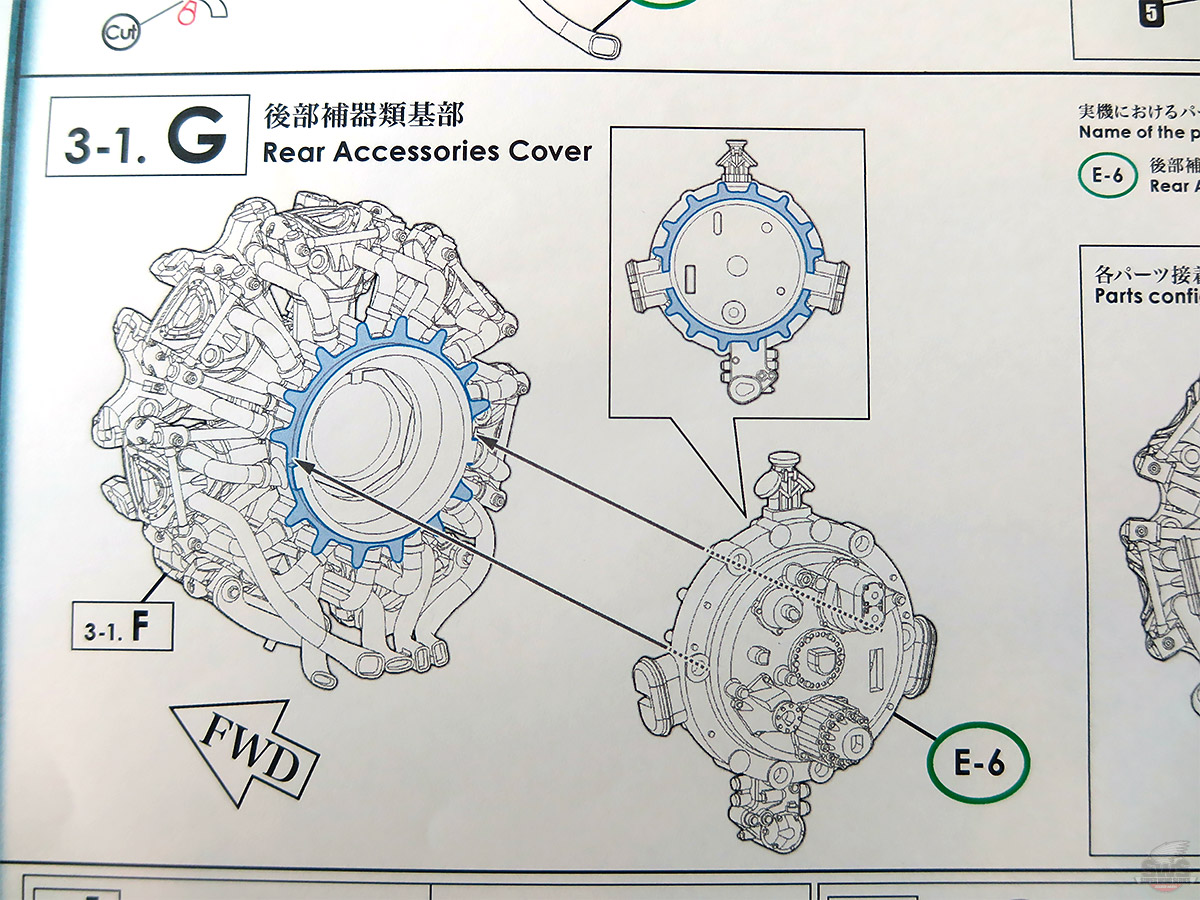
▋The reproduction of the various auxiliaries at the rear of the engine is outstanding, too. In particular, the Command Gelate is one of the world's best reproductions as a plastic model kit. It will be interesting to look into how these parts were actual functioning.
The BMW 801 engine, an air-cooled, star-shaped, double-row, 14-cylinder engine, had a take-off output of 1,700 horsepower!
The BMW 801 engine was adopted by Kurt Tank, and despite its large diameter, it excelled in bullet damage and durability, and demonstrated its performance like a raging lion even on the front lines where maintenance functions were not available from the beginning of the war until the day of its defeat.
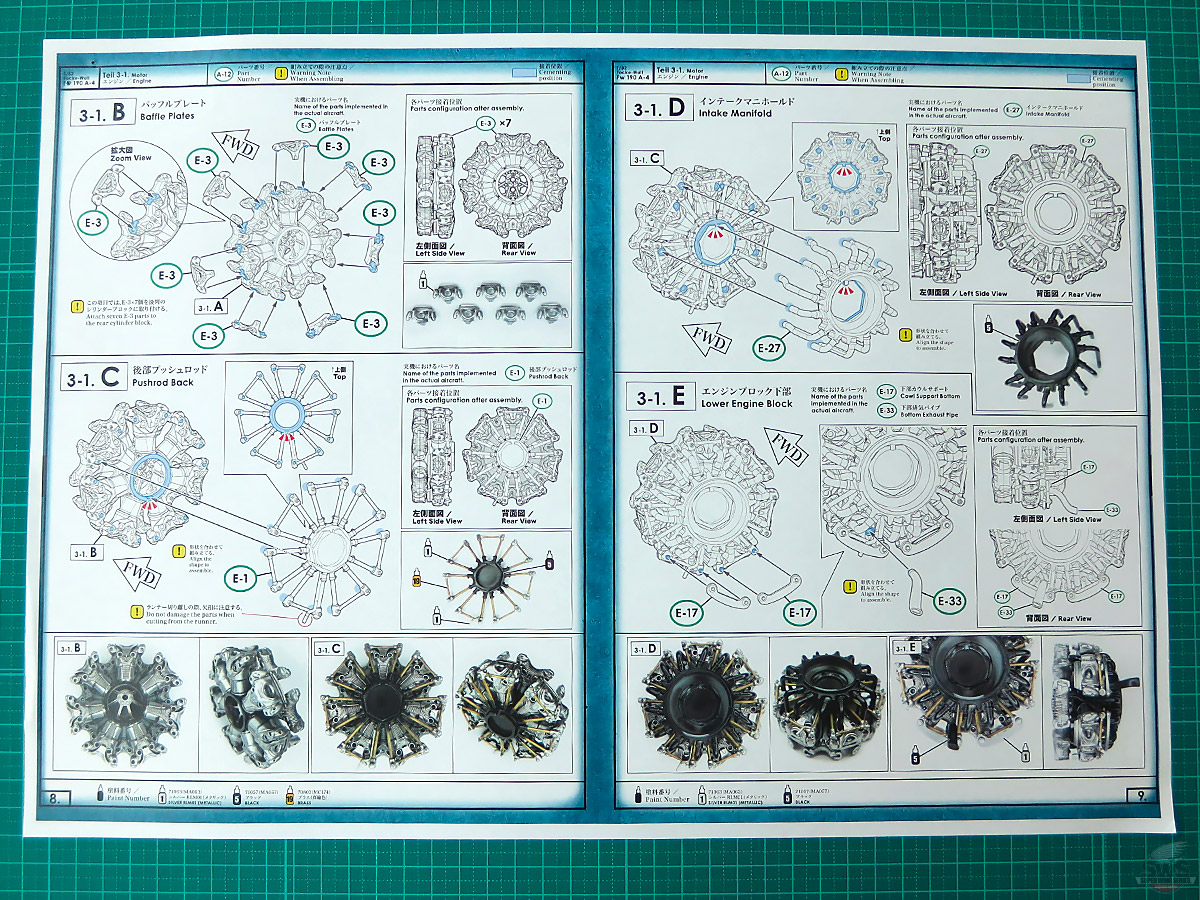
Now...it’s time to start assembling the BMW 801 engine! The instruction manual is very detailed, but as usual, there are many similar parts such as the front and rear cylinders, various auxiliaries, etc. To avoid mistakes, do not cut out all the similar parts at the same time. Cut as you go and keep them separately in small plates, etc.
▋Now, the real work begins! The assembly of the BMW 801 D-2 engine. First, we start with assembling the parts with the familiar SWS kit watchword, the cylinder and connecting rods stamped on them. You need to pay attention here. The joints are very small. If you make a mistake here, the size of the engine will be incorrect and it may not fit in the cowling. It is a bit troublesome, but please check the positions before gluing the parts together.
▋For the experienced modelers, it a series of simple tasks. But keep up your patience and perseverance in everything, believing that God is in the details.
For those of you who are new to the SWS kits, please note that this engine is a key point weather you will succeed or regret down the road. I hope you will enjoy this rare opportunity to assemble the BMW 801, even though it is small.
In this blog, I will show you the work progresses without painting the parts, so it will be done in a short period of time. In the actual work, you are going to paint them. Please take plenty of time to finish the work beautifully.
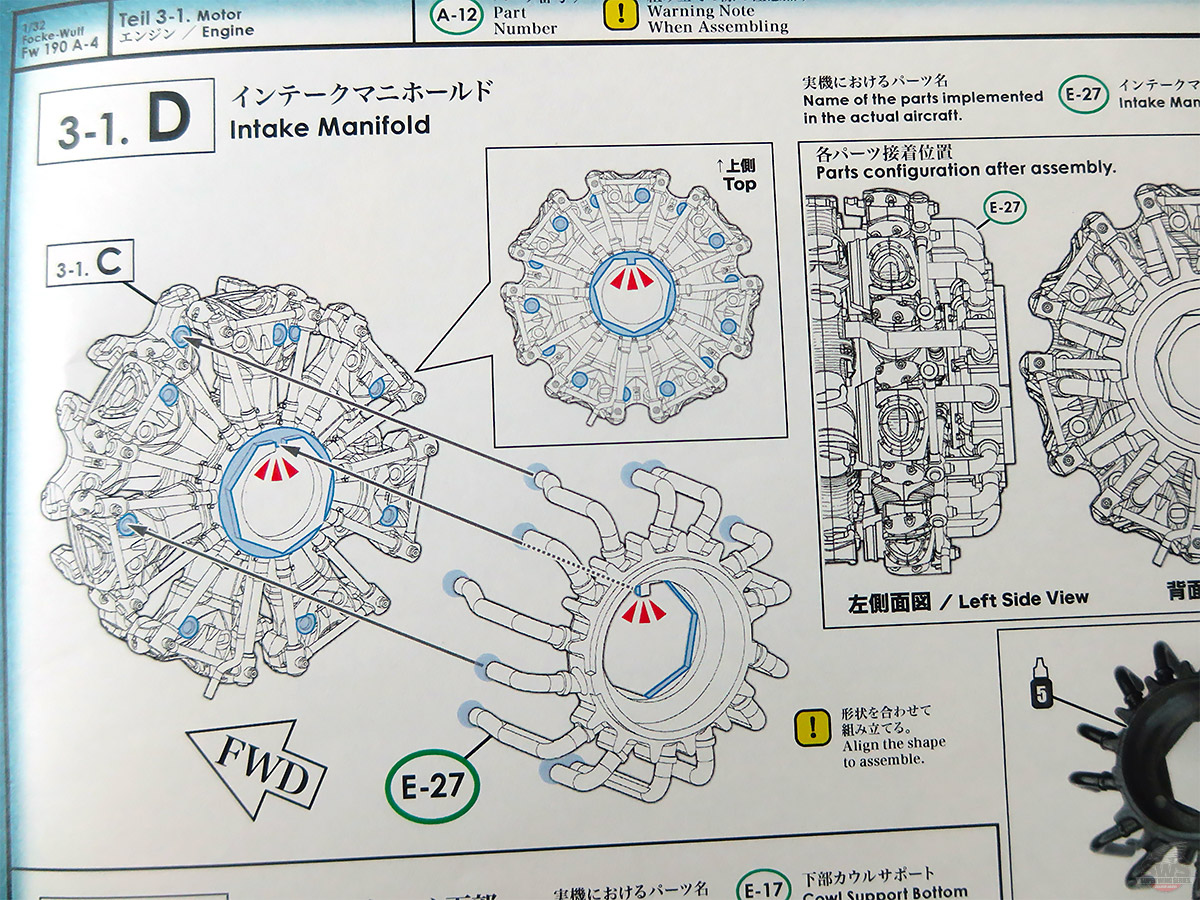
▋Installing the “intake pipe" and "exhaust pipe". For a secure installation to the tab positions, please try some temporary assemblies for accuracy.
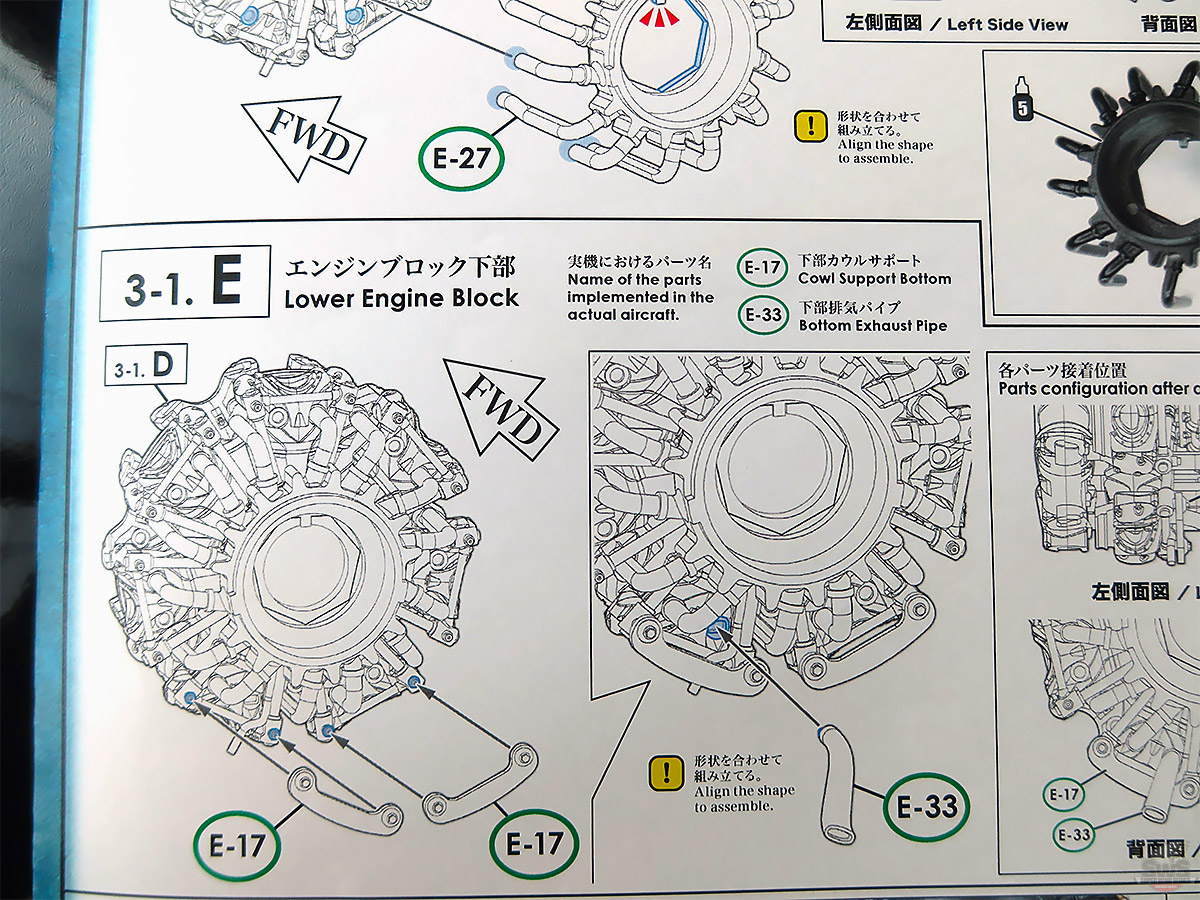
▋Is your "E-17" cowl support glued in parallel when viewed from the side of the engine?
Also, pay attention to the position and angle of "Part E-33". Always check the photos in the instruction manual while assembling. You can use it as a temporary assembly and fix it in the final process.
Note the complex shape and subtle curvature of the exhaust pipes, and how they are arranged and skillfully installed. The engine is assembled with the high quality that only SWS kit can do. Unfortunately, you cannot see much of the engine once it is assembled, but we hope you will enjoy the privilege of modeler's work to your heart's content.
You may be able to modify the engine so that it can be removable. Please give it a try.
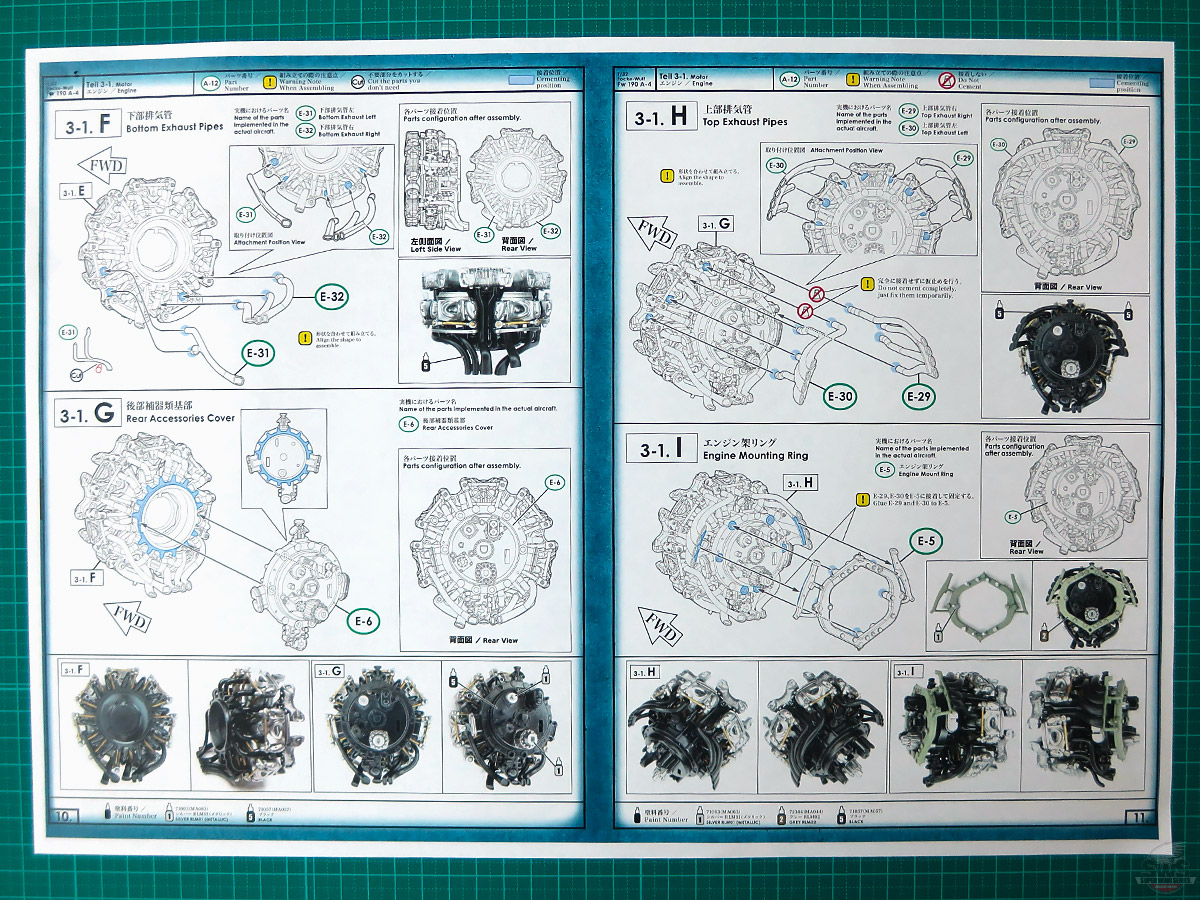
▋Now comes the most difficult part of this engine construction. Check the instruction manual carefully and repeatedly since it is important to understand how and where to place and glue each exhaust pipe.
Also, do not cut out all the parts at once. You will lose track of which one is what. In Japanese, we call it "ato no matsuri” (too late to regret).

▋The construction itself is simple and not very difficult. However, you must pay enough attention to the measurement of the finished engine.
If it is inaccurate or distorted, or if the exhaust pipe is bigger that it should be, after installation, the cowling will not fit neatly. If you are planning to have your engine cover open, there will be no problem, but if you want the cover is to be completely closed, the work here might cause some problems later, such as gaps. If that happens, no worries. Leave it as the fully open cover version and buy another kit. We'll be waiting!

▋Ohhh, this is important. Do not glue part "E-29 and 30" at this point, just assemble them temporarily. This is because the parts can be perfectly attached to the main body of the aircraft later. If you accidentally glue them here, you may end up...... in tears.
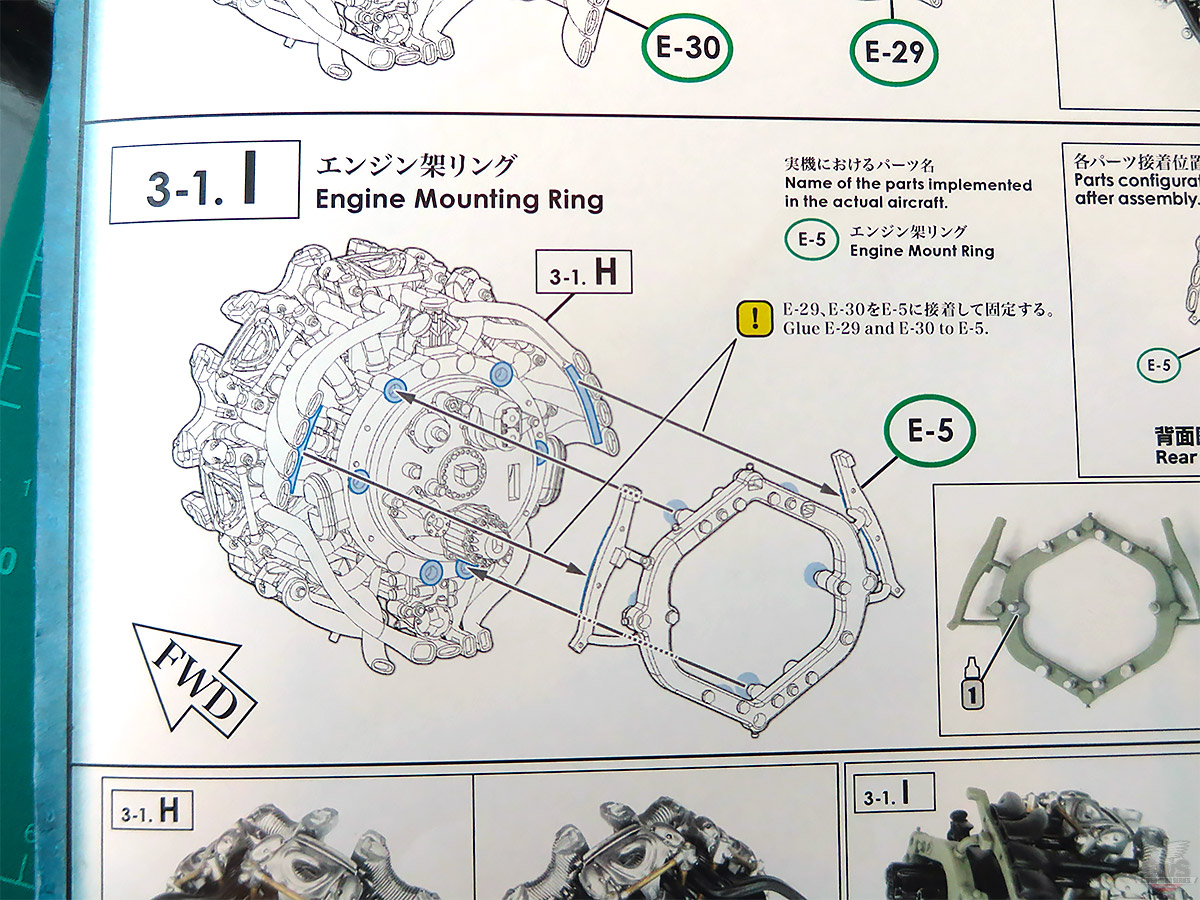
▋Part "E-5". In my case, I tried this engine rack ring in two ways, which are 1) glue it here like the instruction manual says, and 2) not glue it here, but glue it when attaching the engine to the engine rack that protrudes from the fuselage body. I found the latter worked well.
The rings were temporarily fixed, and finally fixed at the best point while checking the fit of the body, engine rack, and cowling. I enjoyed trying this and that.
What? Then, do we need to buy two kits? Yes, I think so. Glad that you noticed that! After assembling three kits, I got the hang of it.
Equipped with a supercharger, the Fw 190 was able to cope with the lack of power at high altitude. Despite its heavyweight of over one ton, the Fw 190 was able to become the world's best single-seat fighter, an all-purpose fighter, because of this engine and the high level of manufacturing technology. I realized again what a great technology the German aviation industry had at that time!
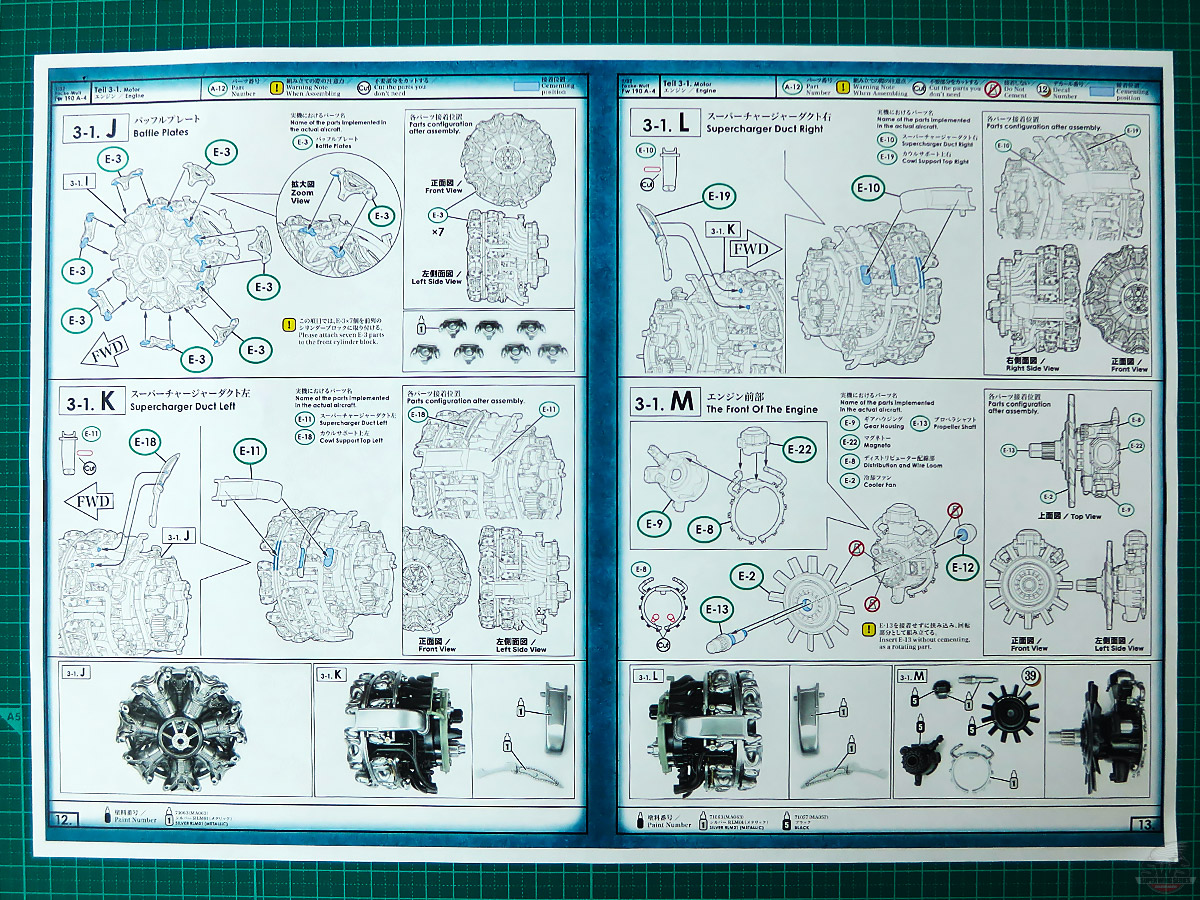
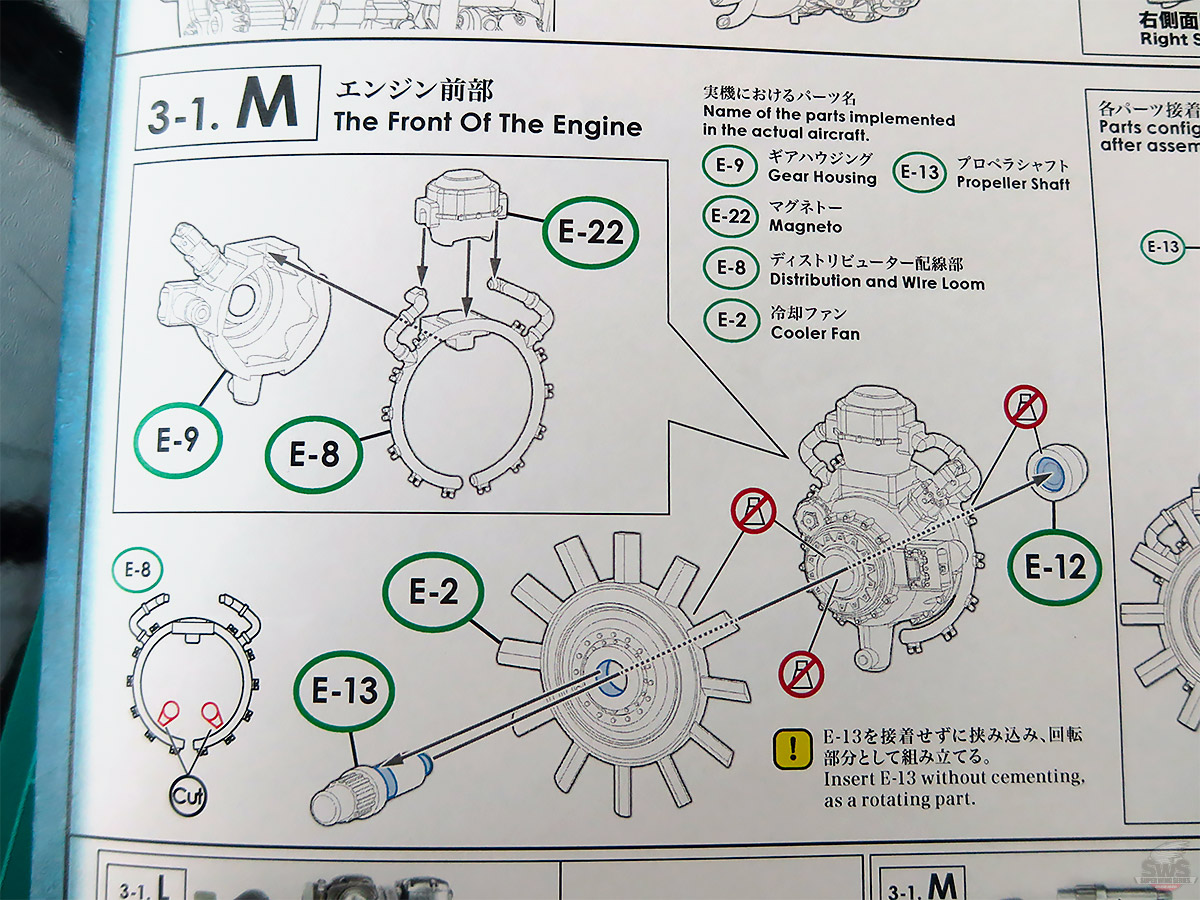
▋Up to this point, it has become a lot of fun to work on the engine. Especially when equipping the "forced cooling fan," you can imagine what the Fw 190 looked like, as if you were back in that time.
However, please make sure that part "E-13" and "E-12" are properly fitted. Otherwise, the fan rotation will be uneven.
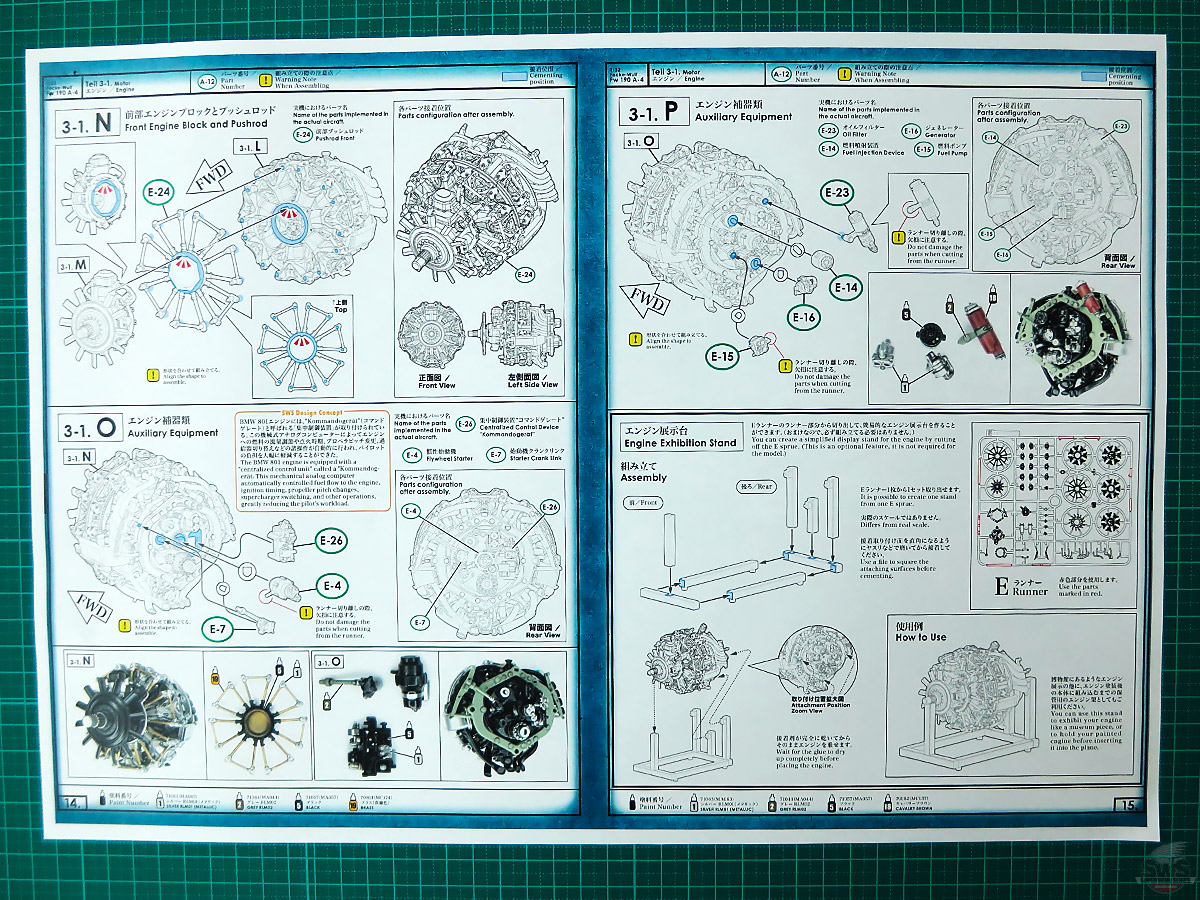
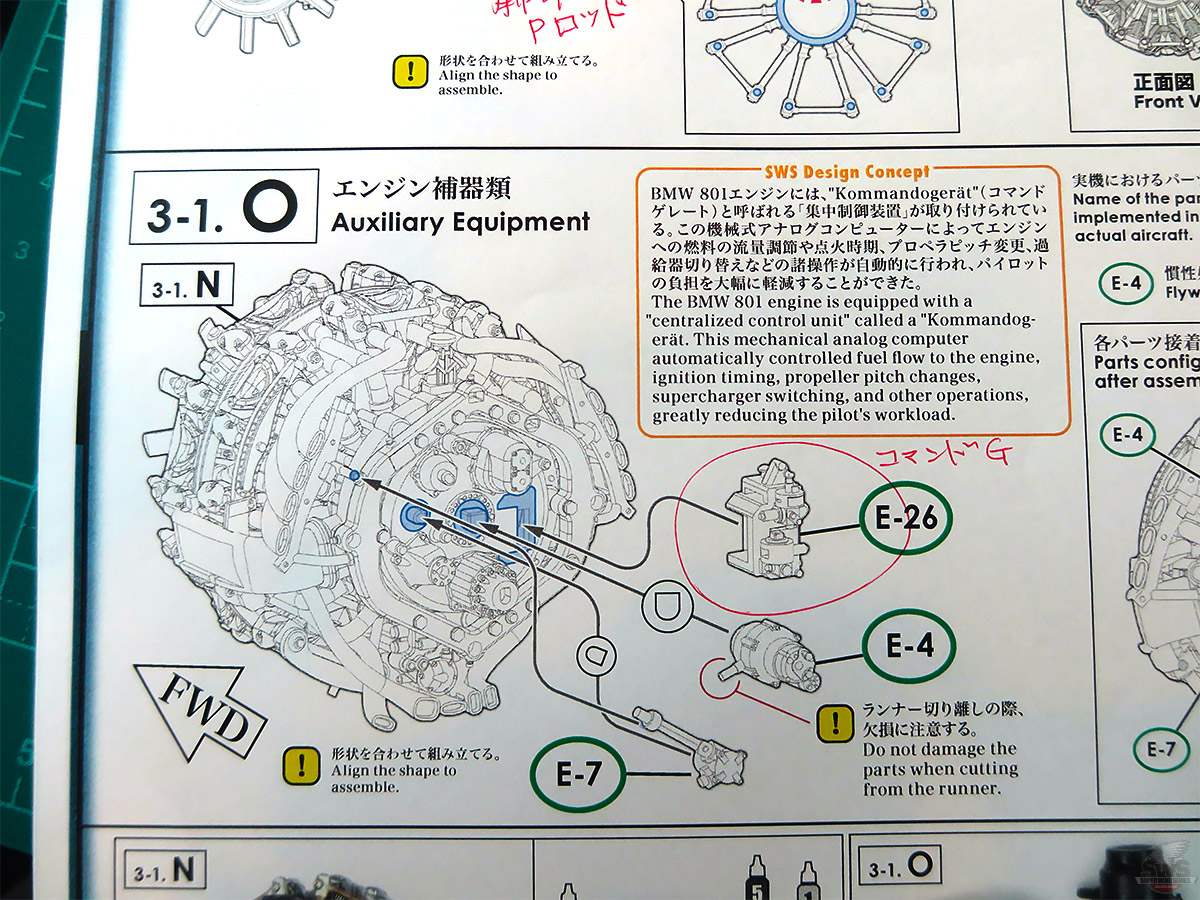
▋Though being so tiny like the size of a pea, "Command Gelate" has been reproduced. It is a device that allows the aircraft to stay in the air as long as possible, to conserve fuel during takeoff and landing, and to control the BMW engines at full power for optimum performance during air combat. It is indeed an astonishing accomplishment that such equipment was invented 80 years ago and was installed in fighter planes.
What do you think? The BMW 801 engine is one of the highlights of this kit and really a worthwhile part to build. It is like building another model kit, and the impact is so great that you can enjoy it twice.
If you add piping, etc. to this engine with reference to your book, it may look like a piece of artwork that can be displayed as an engine by itself.
Speaking of the Fw 190 engine, we must not forget the "Command Geläte" analog computer. It helped a lot to reduce the pilot’s workload, such as the fuel injection, engine speed, propeller pitch, supercharger, and ignition timing, etc. and served as a powerful shadow partner in operational actions.
For your reference, I did not glue the engine rack ring to the rear of the engine as shown in "Part No. E5" on page 11 of the instruction manual. Instead, I proceeded by aligning it with the engine rack body of the fuselage that will come out later.
If the engine rack ring is glued to the rear of the engine, it is difficult to see the tip of the engine rack protruding from the fuselage as well as the glued part of the engine rack ring, and for some reason, this causes some confusion.
We recommend that you should not glue the engine rack rings until you have a good understanding of the structure of the engine rack rings and the engine rack body. It’s better to take your time and try some temporary assemblies and proceed.
In the next episode, we will be working on the cockpit of the Fw 190.
It is a truly outstanding recreation of a pilot's workplace, with Kurt Tank's visionary design and skillful incorporation of the essential elements of a fighter plane.
About the supplemental instruction manual for the SWS "1/32 Fw 190 A-4 "Siegfried Schnell”
Next Issue
Please look forward to the SWS kit "Building the cockpit of the Fw 190"!
Hideyuki Shigeta
President, Zoukei-Mura
![]()

 Old Man Blog No.127
For the first time in three years! Zoukei-Mura participated in IPMS Texas San Marcos in the U.S.!
Old Man Blog No.127
For the first time in three years! Zoukei-Mura participated in IPMS Texas San Marcos in the U.S.!
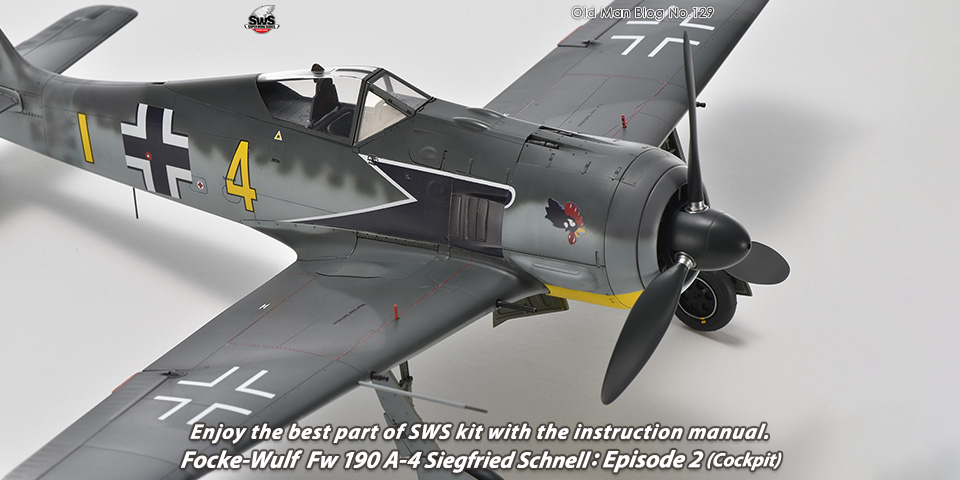 Old Man Blog No.129
Enjoy the best part of SWS kit with the instruction manual. Focke-Wulf Fw 190 A-4 Siegfried Schnell: Episode 2 (Cockpit)
Old Man Blog No.129
Enjoy the best part of SWS kit with the instruction manual. Focke-Wulf Fw 190 A-4 Siegfried Schnell: Episode 2 (Cockpit)