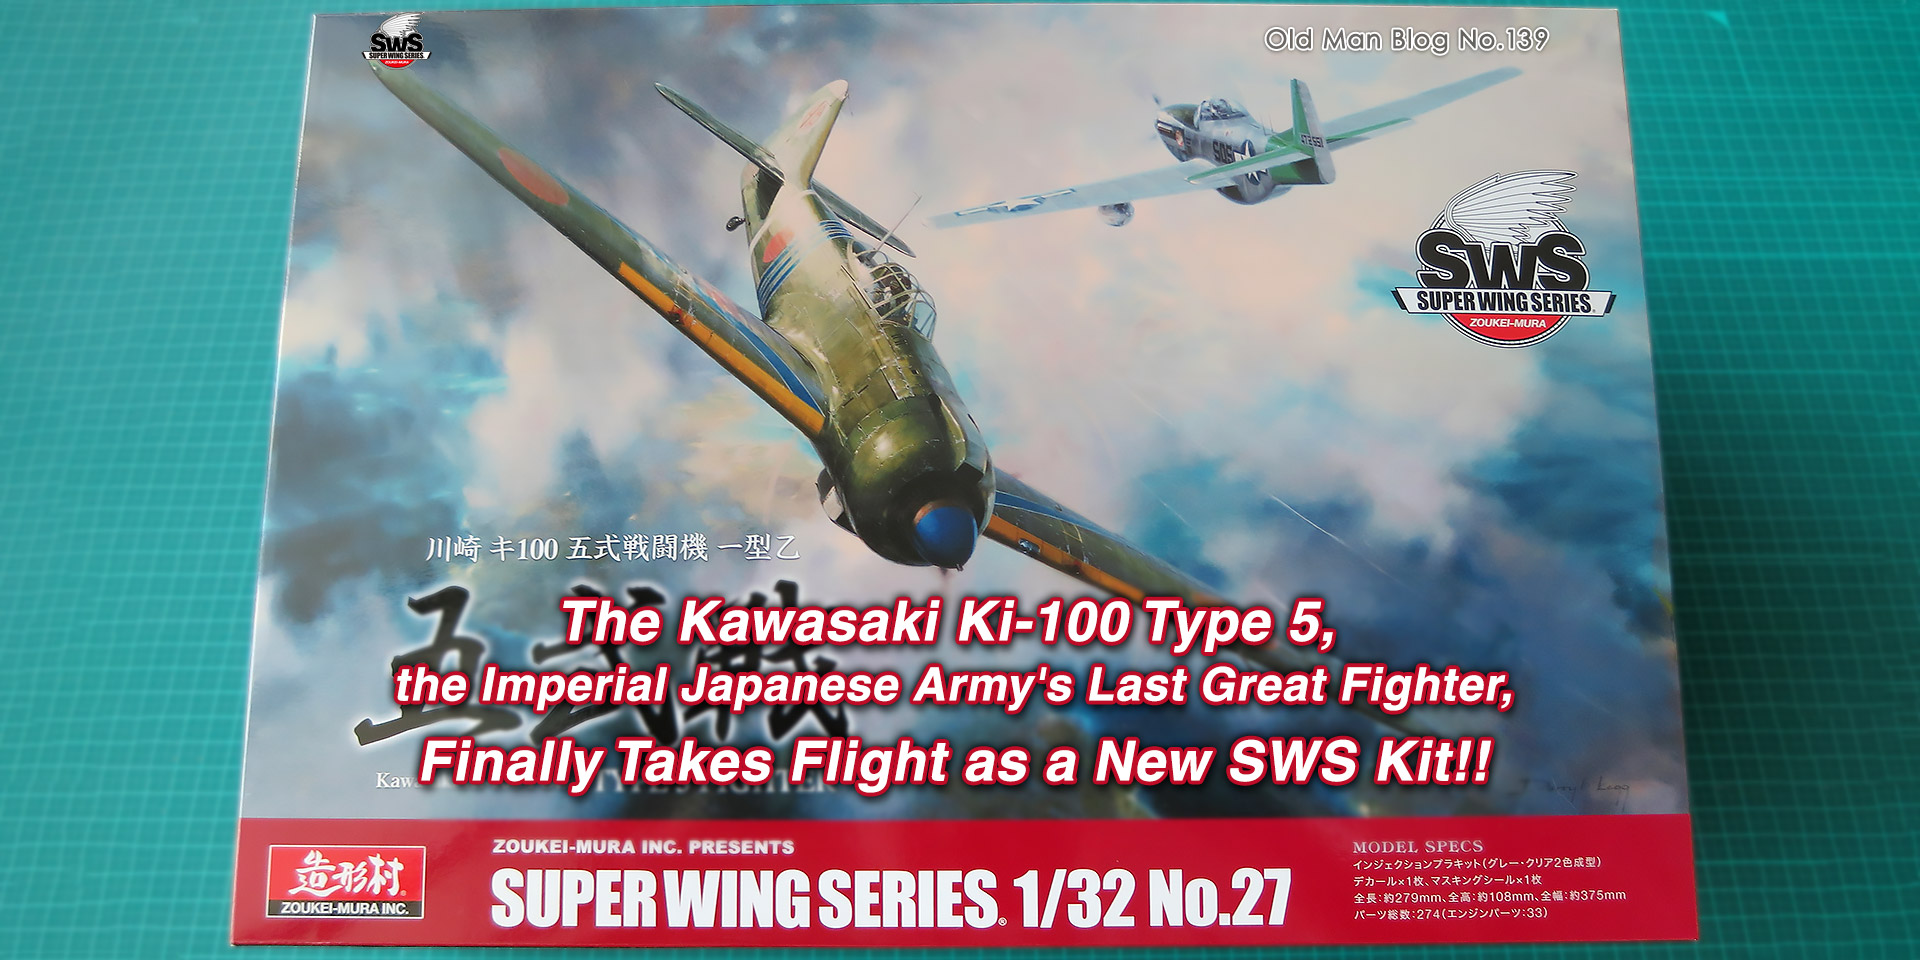

Hello, SWS Brothers around the world~~!! I hope all of you are doing well.
A record-breaking heat wave is sweeping across the Northern Hemisphere. Here in Japan, temperatures have been climbing above body temperature day after day. To all our SWS Brothers, please take care of yourselves, stay cool, and enjoy some relaxing time in the wonderful world of scale modeling. From the skies of Japan, I wish you comfort and good health.
Now then! Before the release of the legendary Ki-100 Type 5, one of the final masterpieces among Imperial Japanese Army fighters, let us begin our introduction to this long-awaited new SWS kit, starting with the instruction manual and then taking a closer look at the parts themselves.
But before we do, I have some exciting news to share with all SWS Brothers around the world!
SWS 1/32 Ki-100 Type 5
The Japanese release date is set for August 8, 2026. Customers who have placed reservations will begin receiving their kits from that date.
And here's even more exciting news!
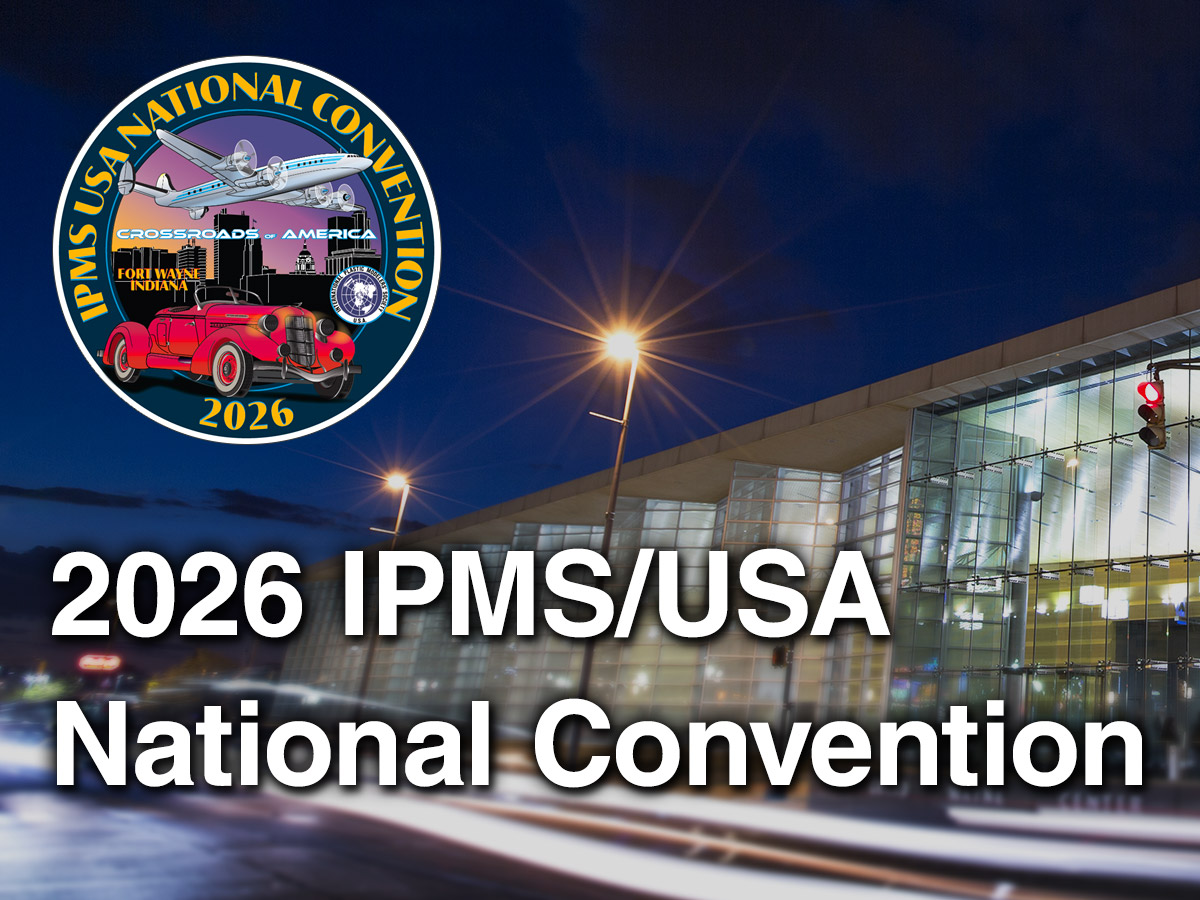
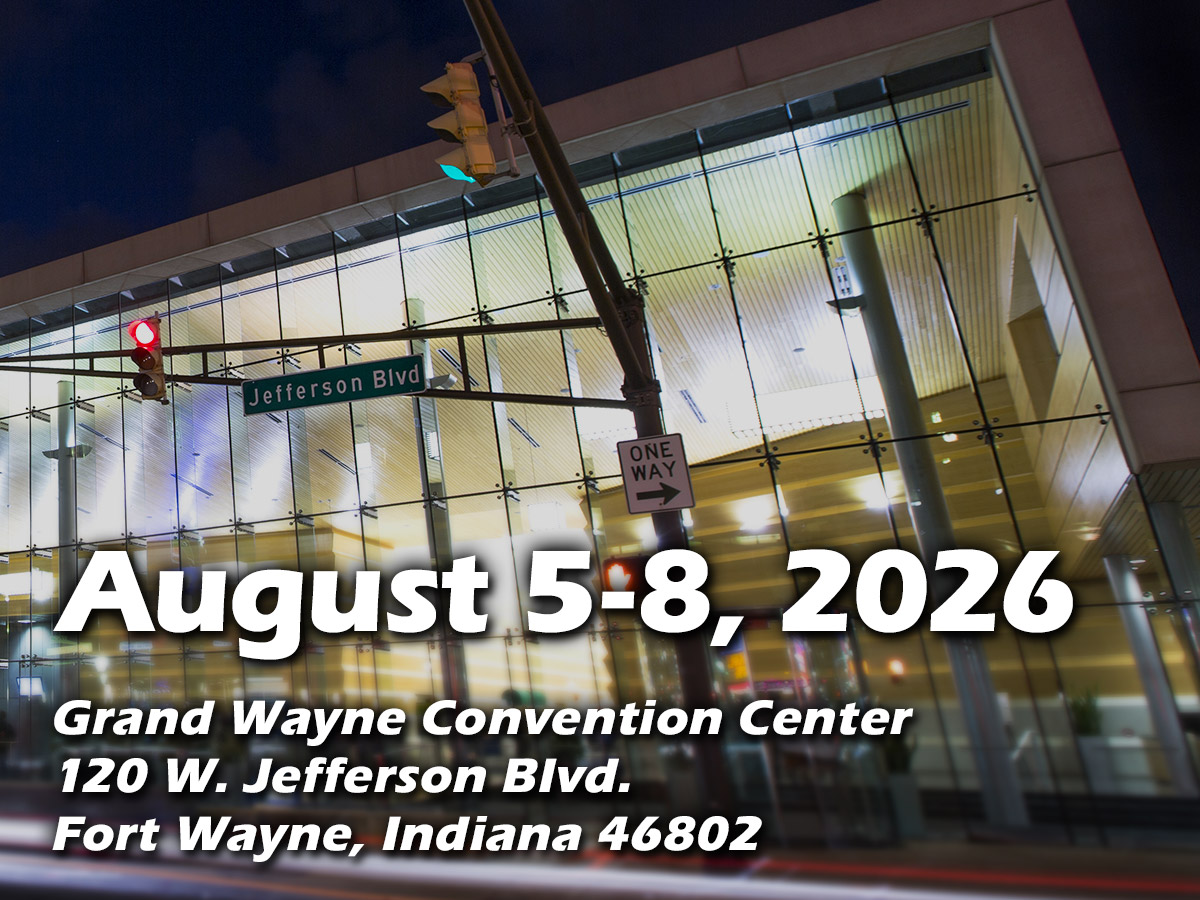
An advance release has also been confirmed at the Zoukei-Mura booth during the IPMS Nationals in Fort Wayne, Indiana, USA, beginning on August 5.
Because the kits will be air-shipped to the show shortly before it opens, only a limited quantity will be available. However, this will be the very first opportunity anywhere in the world to get your hands on a kit of this legendary aircraft.
To all SWS Brothers planning to attend the event, I hope you'll take this rare opportunity to add the Ki-100 Type 5 to your collection!
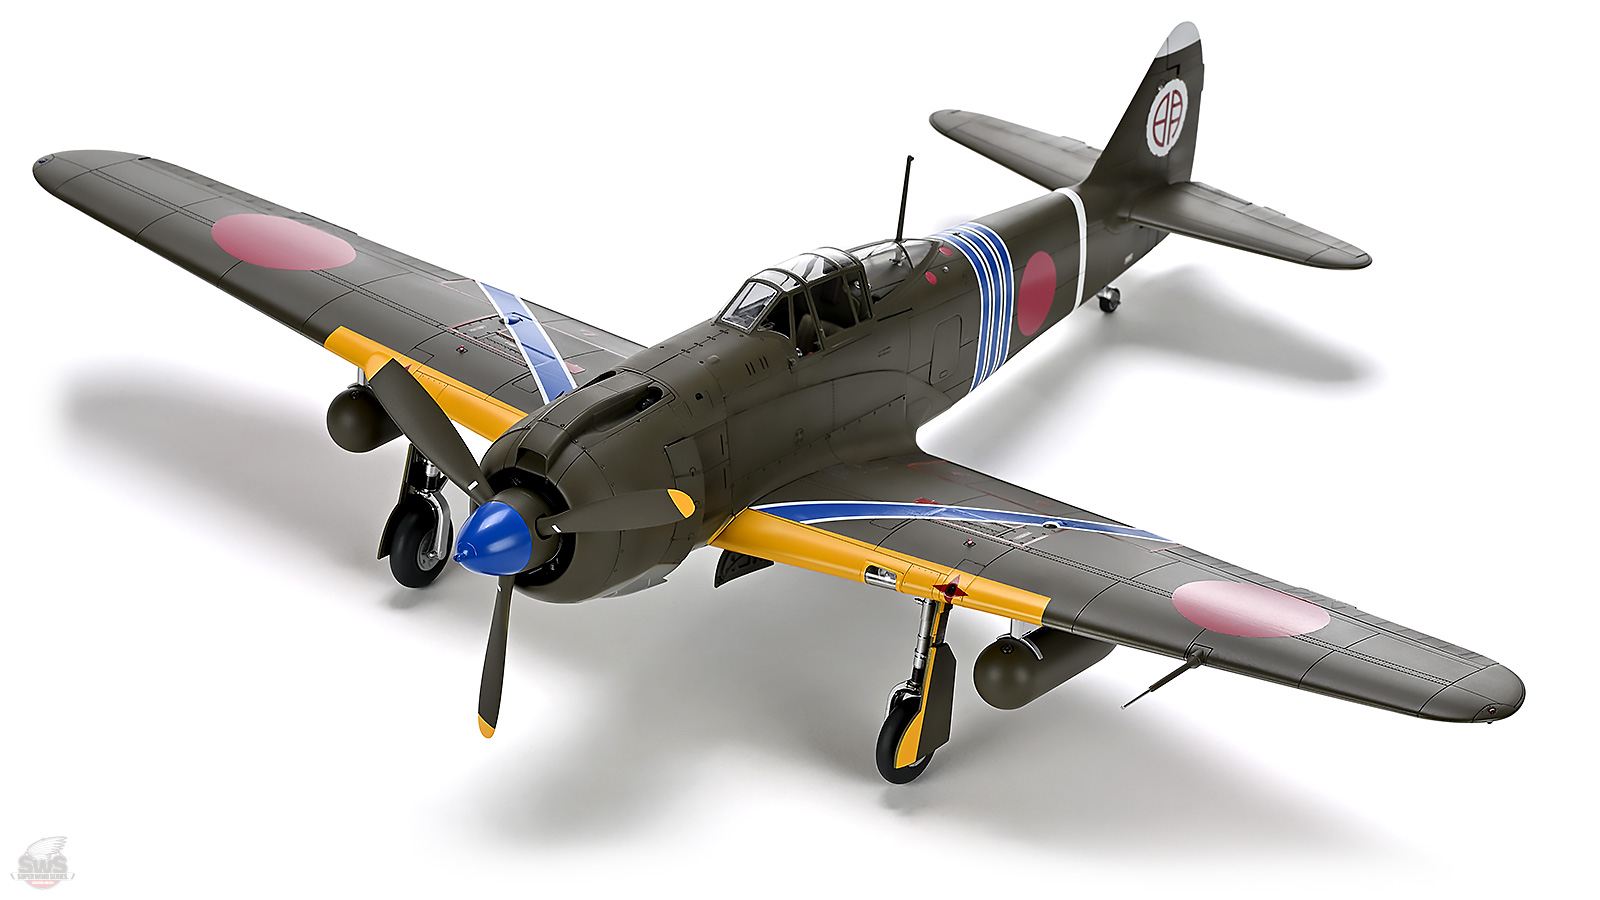
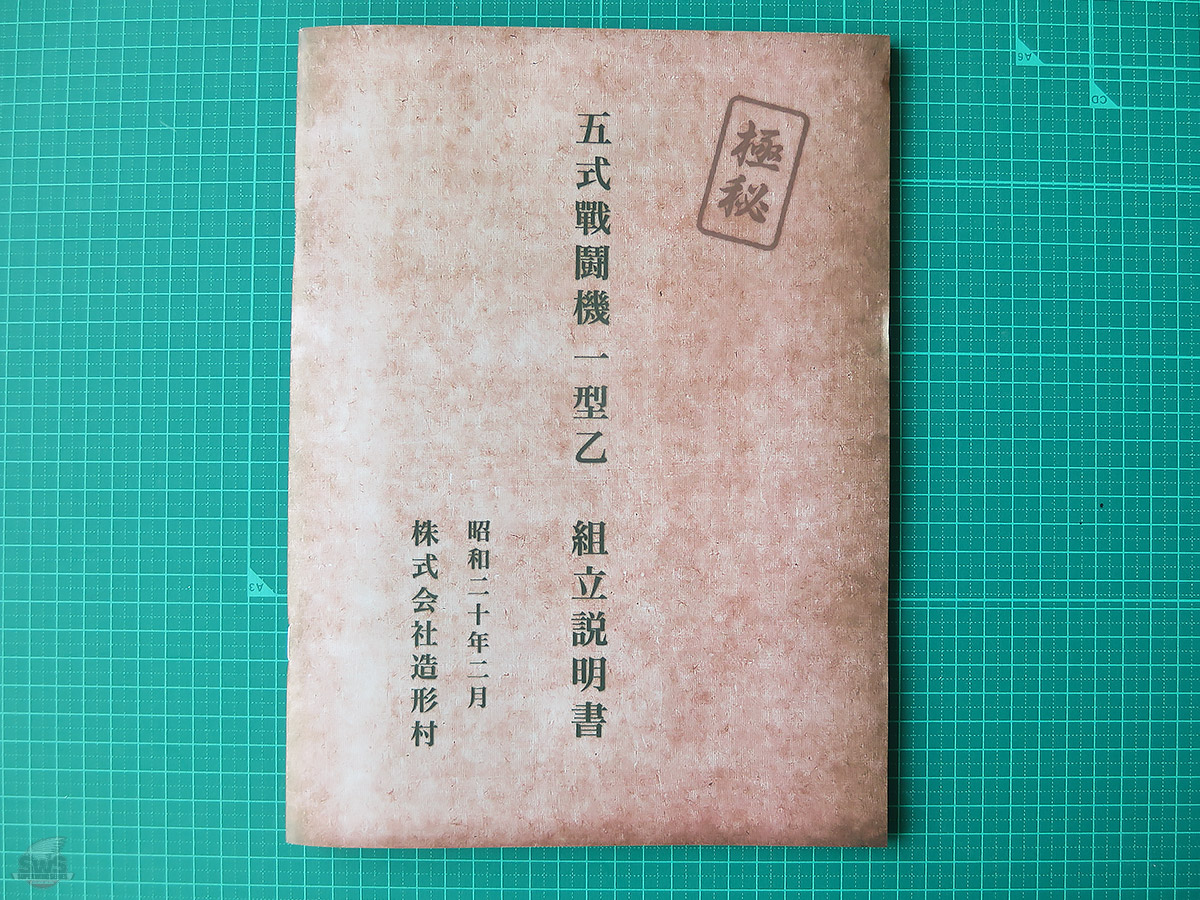
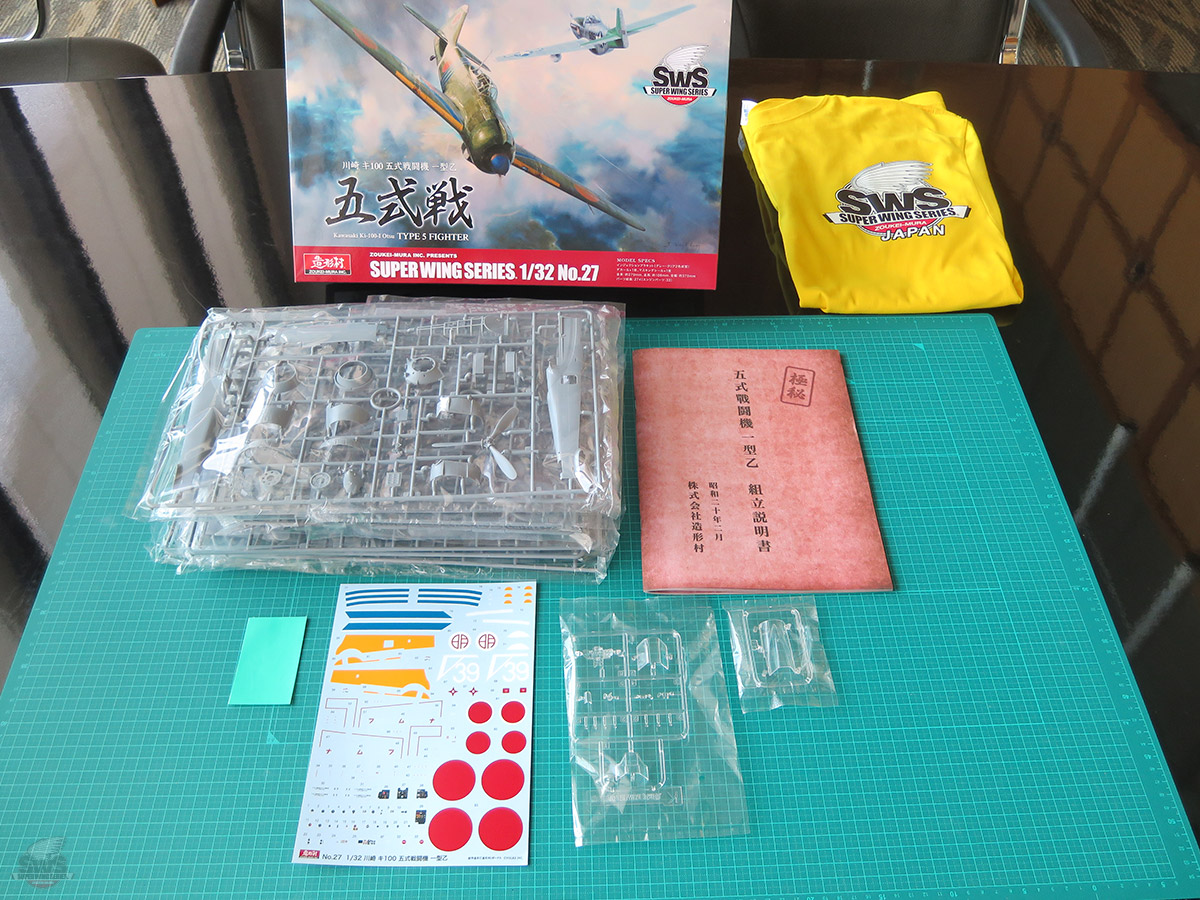
SWS No.27 "Ki-100 Type 5" consists of 274 parts and includes decals and canopy masking seals. It is the latest masterpiece from the Zoukei-Mura Development Team.
Whether you have already reserved yours, are considering adding one to your collection, or are simply curious about the Ki-100, I hope you will look forward to seeing the proud final single-seat fighter of the Imperial Japanese Army faithfully brought to life in SWS form.
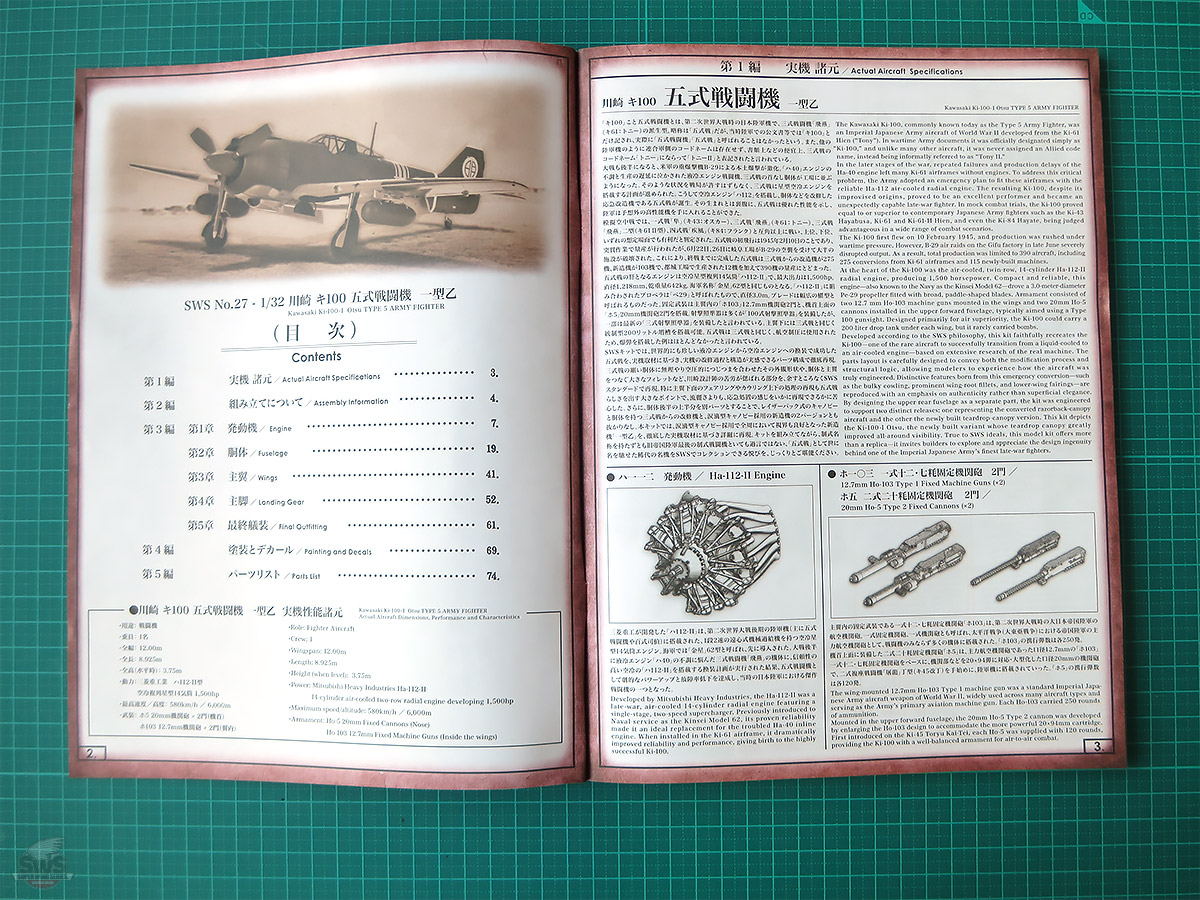
▋Now Then, Let's Begin the Ki-100 Type 5 Instruction Manual Walkthrough!
As many of you know, the Ki-100 Type 5 was born in 1944 during the final stage of World War II as a desperate solution devised by the Imperial Japanese Army Air Headquarters. As a result, numerous modifications and adaptations from the Ki-61 Hien can be found throughout the aircraft.
Furthermore, the only surviving Ki-100 Type 5 on display today contains restored sections and even parts borrowed from other aircraft. You can imagine how much trouble that caused us when developing this kit.
As you read along, I hope you'll also get a sense of some of the challenges the development team faced behind the scenes while bringing this fighter to life as an SWS kit.
First, the instruction manual introduces the fascinating story behind the birth of the Ki-100 Type 5. Be sure not to miss the section explaining the Ha-112 engine, the very powerplant that became one of the key reasons behind the aircraft's unexpectedly impressive performance.
And yet, what still amazes me is that, amid the chaos of the final months of the war, despite the destruction of Kawasaki's factories and many other production facilities by relentless air raids, and despite the decline in manufacturing capability caused by the loss of veteran workers to military service, aircraft like the Ki-100 were still able to reach the front lines.
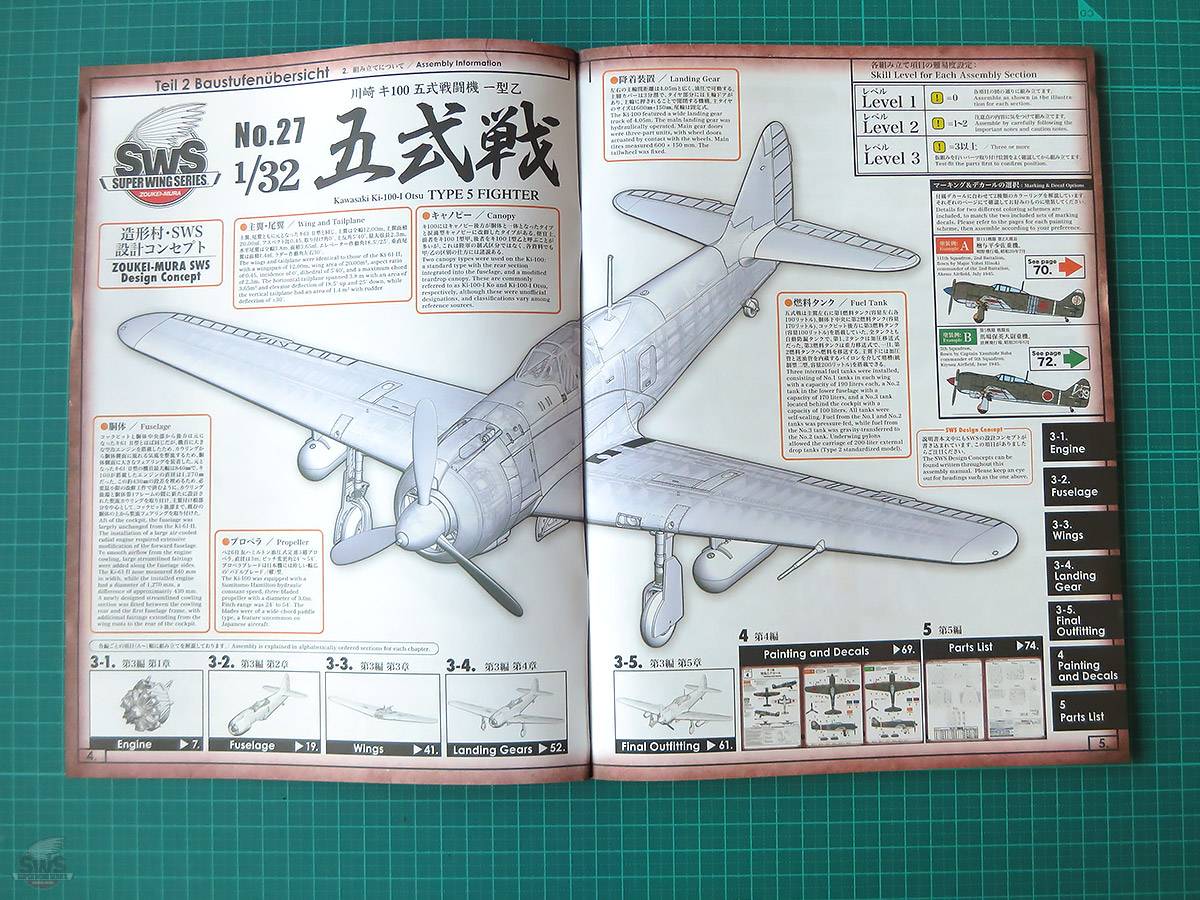
▋Here you can see the key elements the Zoukei-Mura Development Team focused on when creating the Ki-100 Type 5 kit.
First, the faithful reproduction of the aircraft's accurate and beautiful form.
Next, the recreation of its structure and mechanisms in a way that allows you to assemble the model much like the real aircraft itself.
And finally, the creation of an instruction manual that lets you learn about the Ki-100 Type 5 while enjoying every step of the build from beginning to end.
That’s right. Although the parts may appear complex at first glance, with basic modeling tools and supplies, you will find yourself progressing through the build at a surprisingly enjoyable pace while discovering the fascinating design of this Imperial Japanese Army fighter.
However, this kit has been designed to reproduce the actual assembly process of the real aircraft as faithfully as possible.
For that reason, it is important to follow the assembly sequence outlined in the instruction manual.
Even if you are a veteran modeler with years of experience, please take the time to study the instructions carefully and follow the assembly sequence as shown in the manual.
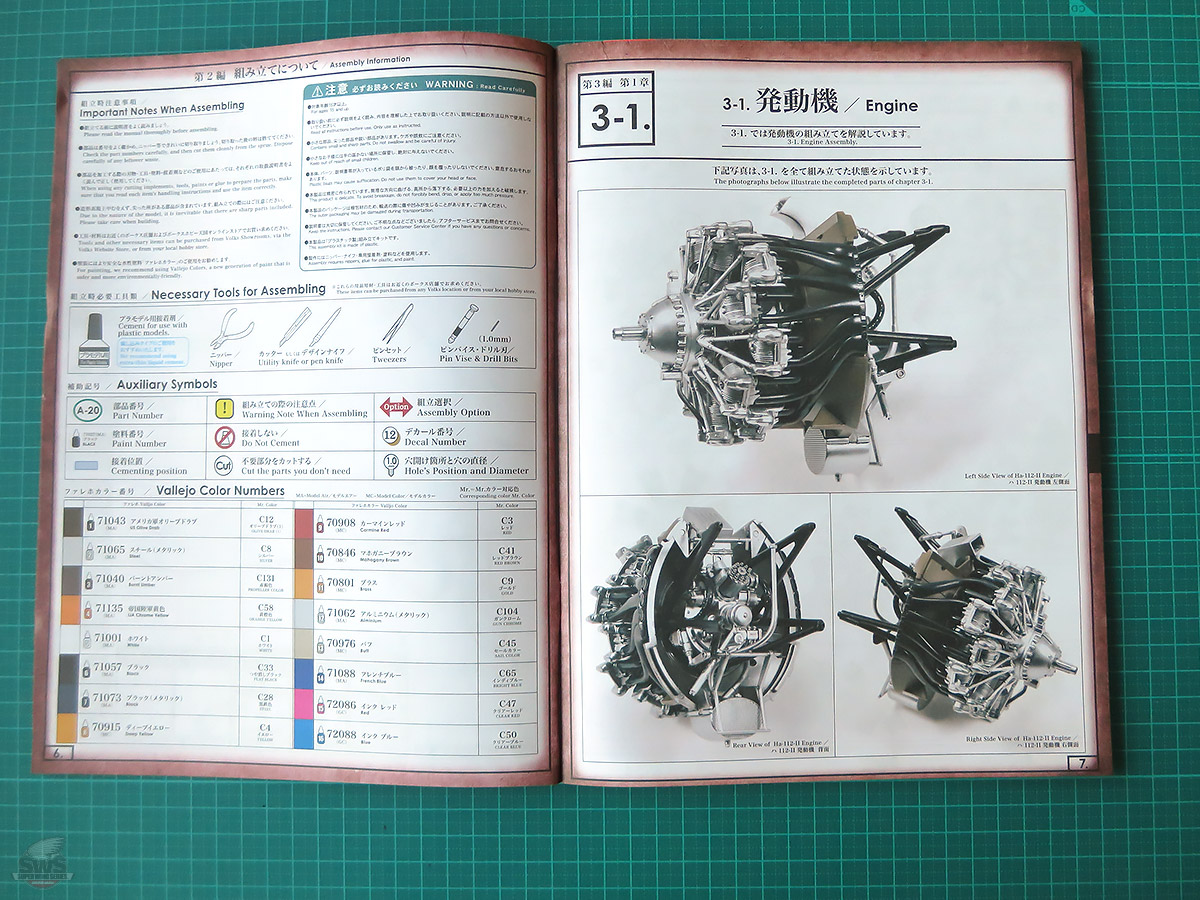
▋Assembly of the Ha-112 Engine
The installation of this engine was the very heart of the Ki-100 project, and it is also the area upon which the Zoukei-Mura Development Team placed the greatest emphasis when creating this SWS kit.
The Ha-112 was a Mitsubishi-built 14-cylinder twin-row radial engine producing up to 1,500 horsepower.
While it could not compete in outright power with the 2,000-horsepower-class engines equipping the latest Allied fighters of the day, replacing the liquid-cooled Daimler-Benz DB601 with this lighter and easier-to-maintain engine dramatically improved the aircraft's operational reliability.
As a result, the Ki-100 Type 5 would eventually earn the enthusiastic praise of many veteran pilots. In many ways, this engine became the driving force behind the aircraft's success.
As you follow the assembly process, take a little time to compare this engine with the BMW engine featured in our popular 1/32 Fw 190 kits and enjoy this stage of the build.
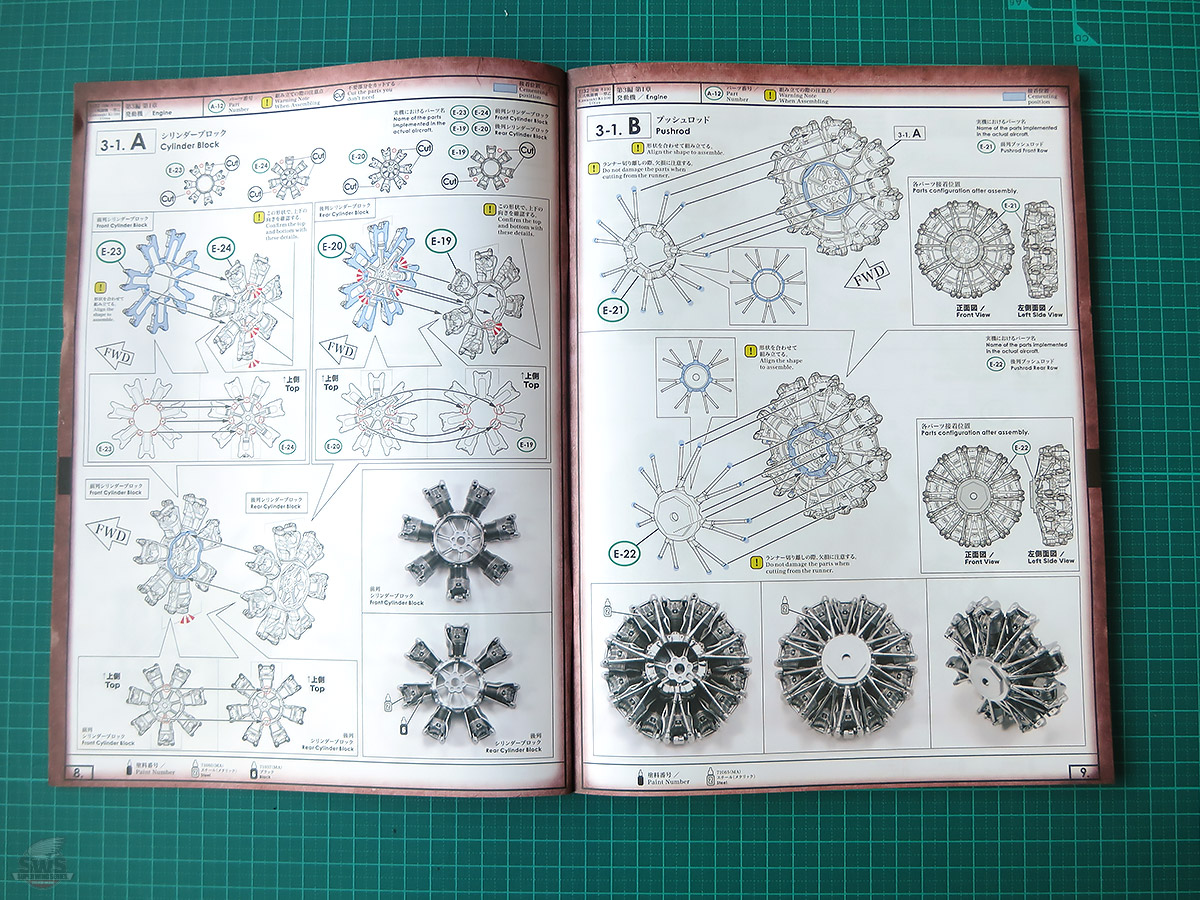
▋Many of These Parts Look Very Similar to One Another.
Do not rush to remove all the parts from the sprues at once.
Carefully check the front and rear, top and bottom, as well as the joint tabs several times before applying glue.
If you make a mistake here, correcting it later can be quite difficult and may require considerable repair work.
To tell you the truth, I make that mistake myself quite often. :’-(
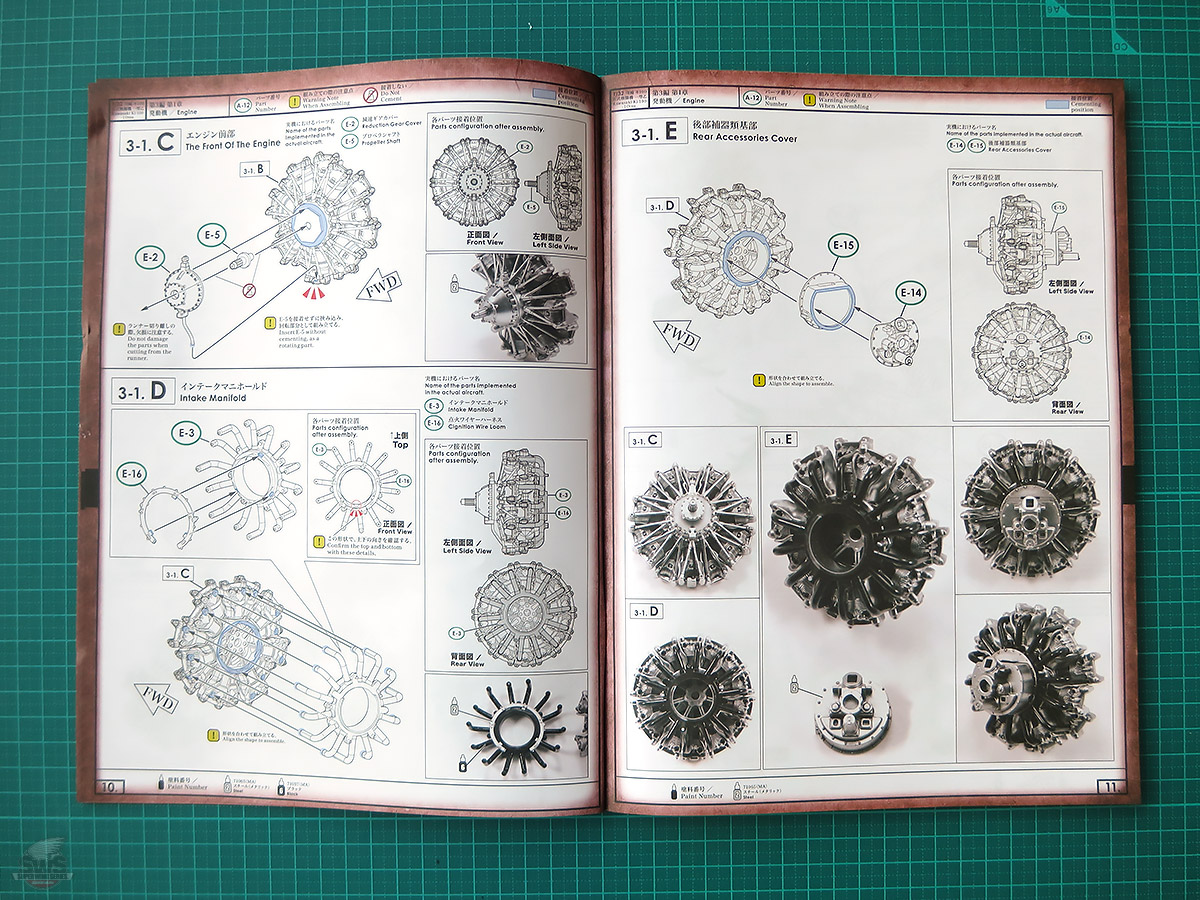
▋Pay Special Attention When Installing the Intake Pipes!
Make a mistake here, and you'll find yourself in trouble before you know it.
As the saying goes, a speeding car cannot stop on a dime. That's exactly the case here.
There's no need to hurry. Slow down, test-fit the parts, and check the instructions carefully first, Brothers!
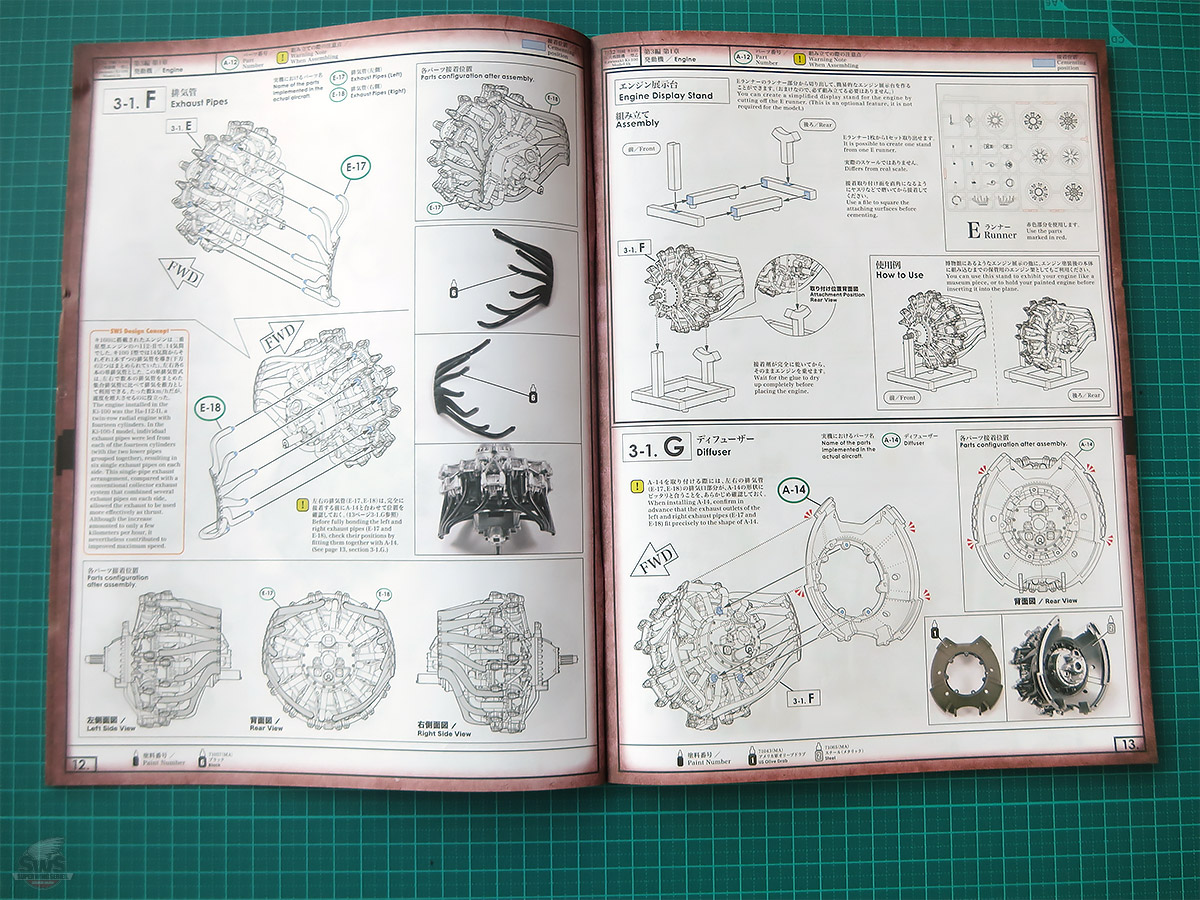
▋By this stage, the exhaust collector pipes on both sides should fit perfectly into position.
Hmm? Don't tell me they're not fitting? Well now... if they're not fitting, there's usually a reason for that.
Ideally, you could simply go back and start over from the beginning. Unfortunately, once the glue has cured, there is no easy way back. You may find yourself ordering replacement engine parts from the parts list at the end of the instruction manual.
To avoid such a situation, always remember: test-fit, test-fit, and test-fit again. Be sure to check the correct positioning of each part several times before applying glue. Our designers repeatedly built test assemblies while developing the molds in order to minimize the possibility of mistakes. However, recreating the complex structure of this twin-row radial engine inevitably results in a more demanding assembly process.
But when you finally complete this engine, all of that effort will be rewarded. Along with a tremendous sense of relief, you'll experience an equally tremendous sense of accomplishment and satisfaction. And before long, you'll find yourself admiring the beautiful mechanical elegance of the finished engine.
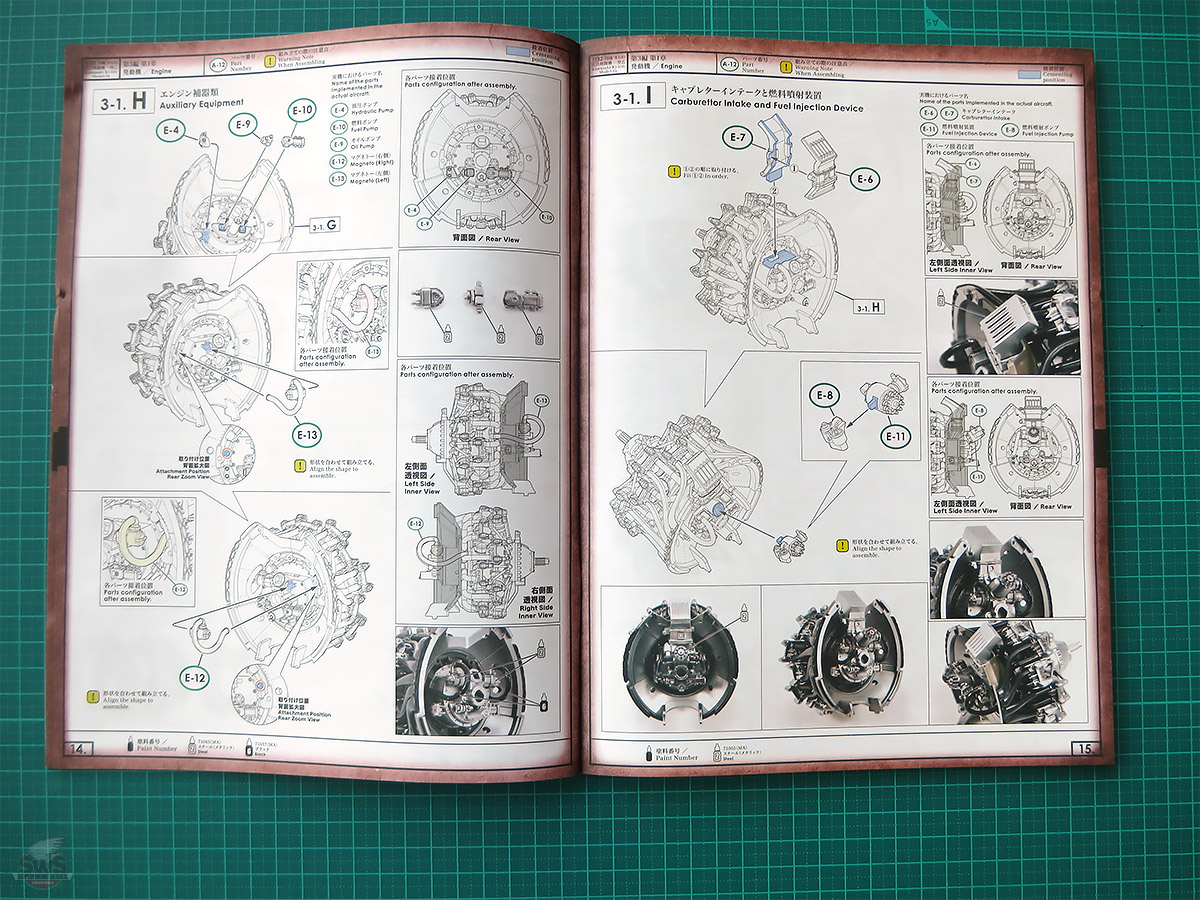
▋The Beautifully Completed Engine Now Receives Its Firewall and Accessories
Once the kit is finished, most of these parts and structures will be hidden from view. Yet as the builder who brought them together, you alone will carry a vivid memory of what lies beneath the surface.
This is also a good time to take photographs of your work so far. One of the great pleasures of an SWS kit is being able to enlarge those photos later and relive the satisfaction of the building process.
Oh? You're telling me, "I've been doing that all along."
Well then... I like a modeler with that kind of spirit!
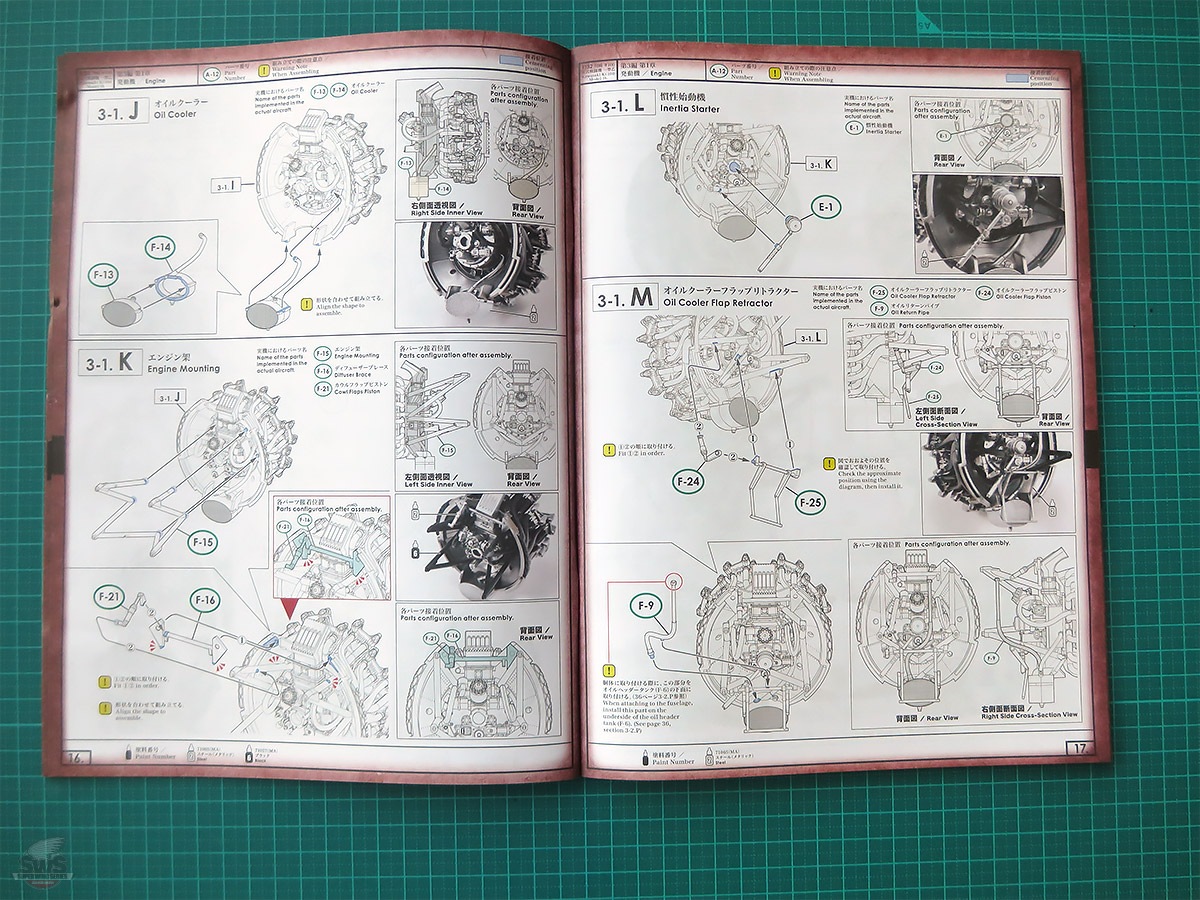
▋The Engine Build Continues...
We have now reached the stage where the engine mounting frame is installed. On the actual aircraft, this was a critical structure, designed to withstand both the weight of the engine and the forces generated by the rotating propeller. Of course, since it is made of plastic, you won't need to worry much about the weight. Even so, be sure to pay close attention to the position and angle of the mounting frame.
I would recommend leaving the engine mount unglued for now. It may be easier to attach it later, once the fuselage is complete and the fit of the cowling can be checked. Looking at it now, doesn't it remind you of the famous "headless" Ki-61 Hien, the predecessor of the Ki-100 Type 5?
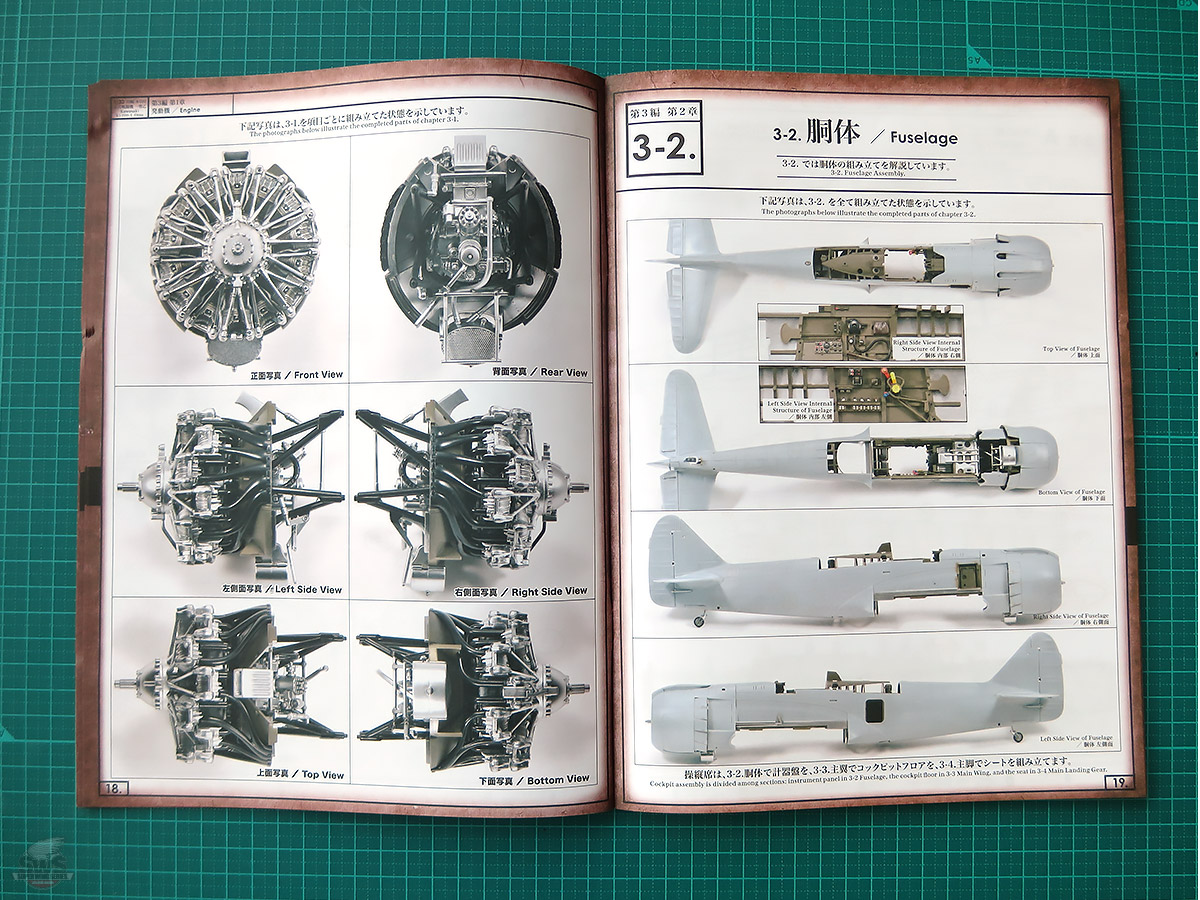
▋The Ha-112 Engine Is Complete
Congratulations on completing the build.
The combination of such a beautifully finished engine and the pleasant fatigue that comes with the work brings a sense of accomplishment that is difficult to describe.
"Well then, Brothers, perhaps it's time to celebrate and open a bottle of whisky!"
No, no... the real work is only just beginning.
The secrets behind how the Ki-100 was transformed from a troubles-plagued liquid-cooled fighter into one powered by a much larger air-cooled engine will soon be revealed. Please look forward to it~~~!!
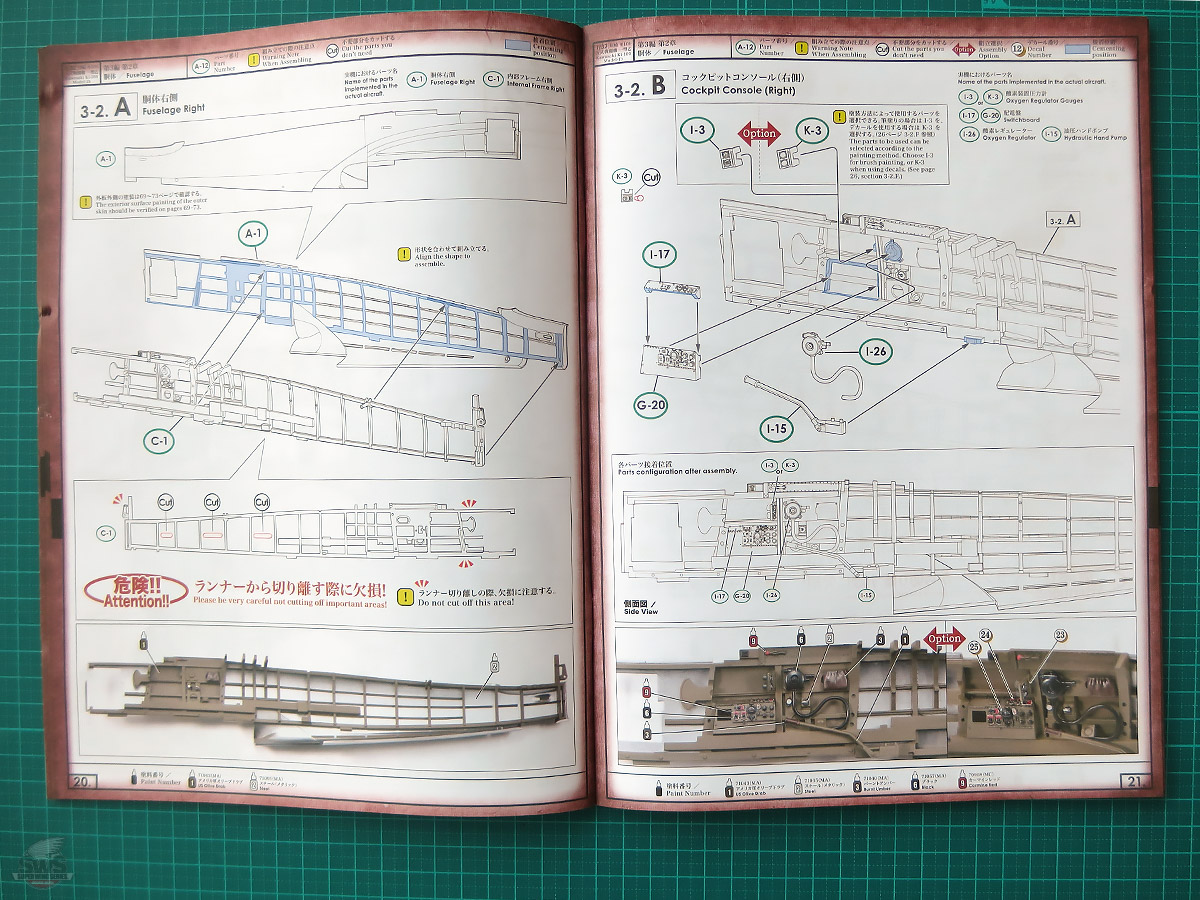
▋Now We Move on to the Fuselage
If you're an experienced modeler, I'm sure you'll have no trouble moving smoothly through these steps.
For now, simply enjoy following the assembly process as we go.
One thing, though. As I may have mentioned more than once already, don't forget to test-fit each part before gluing.
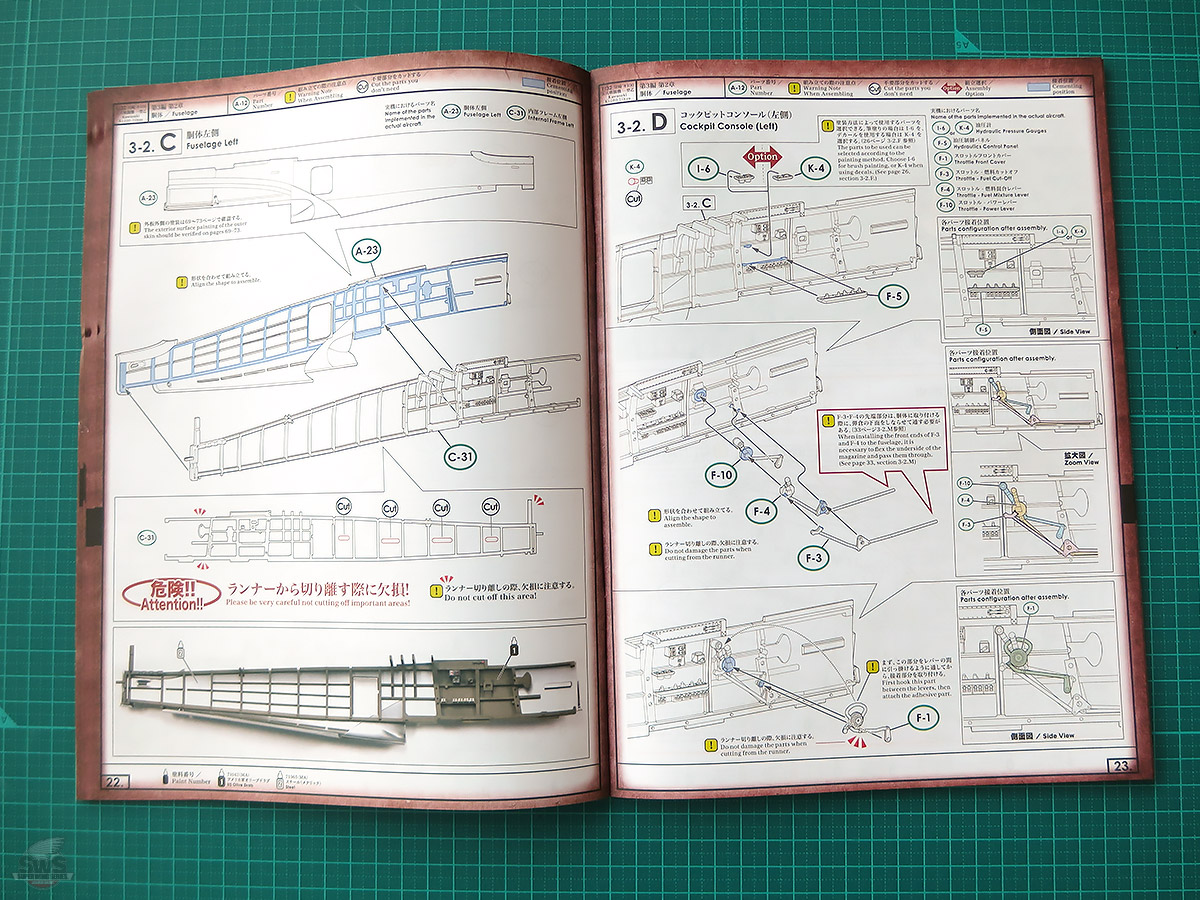
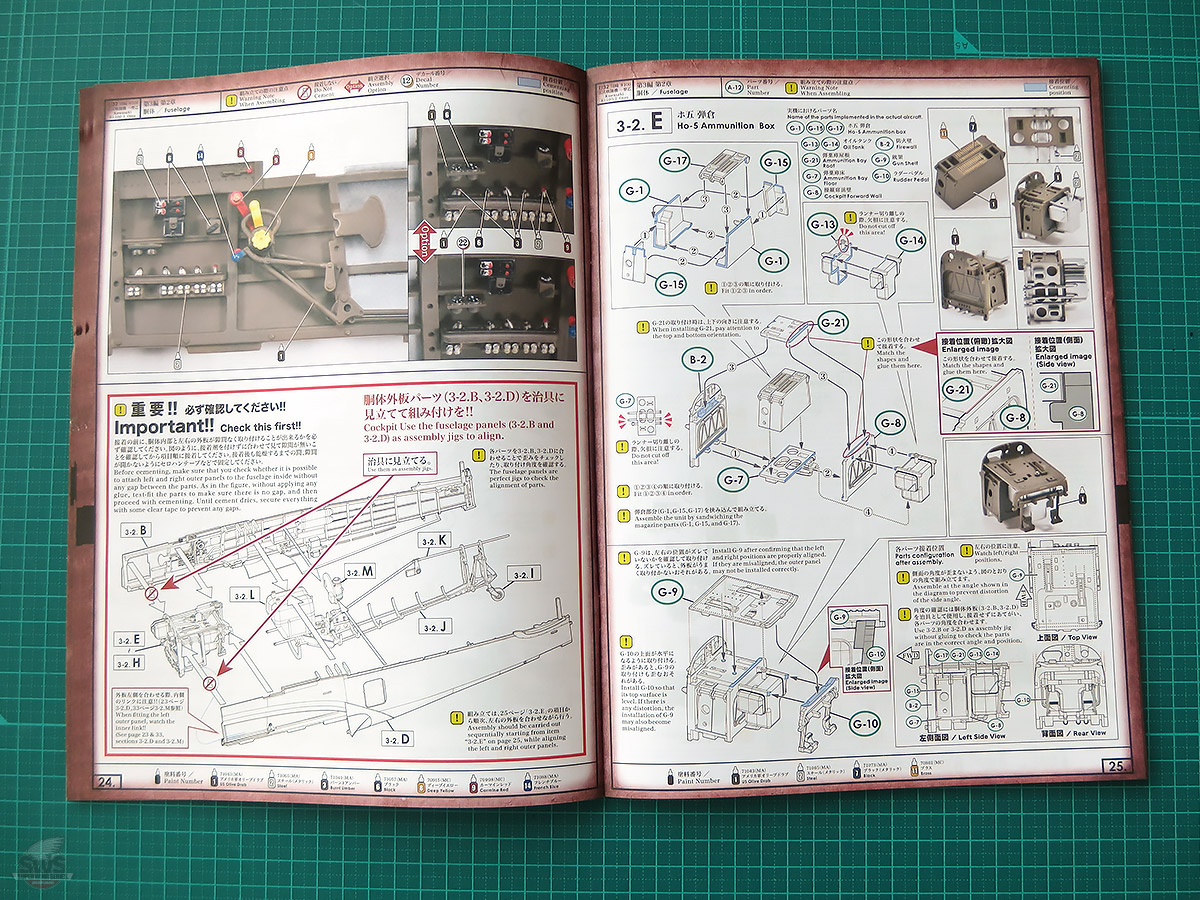
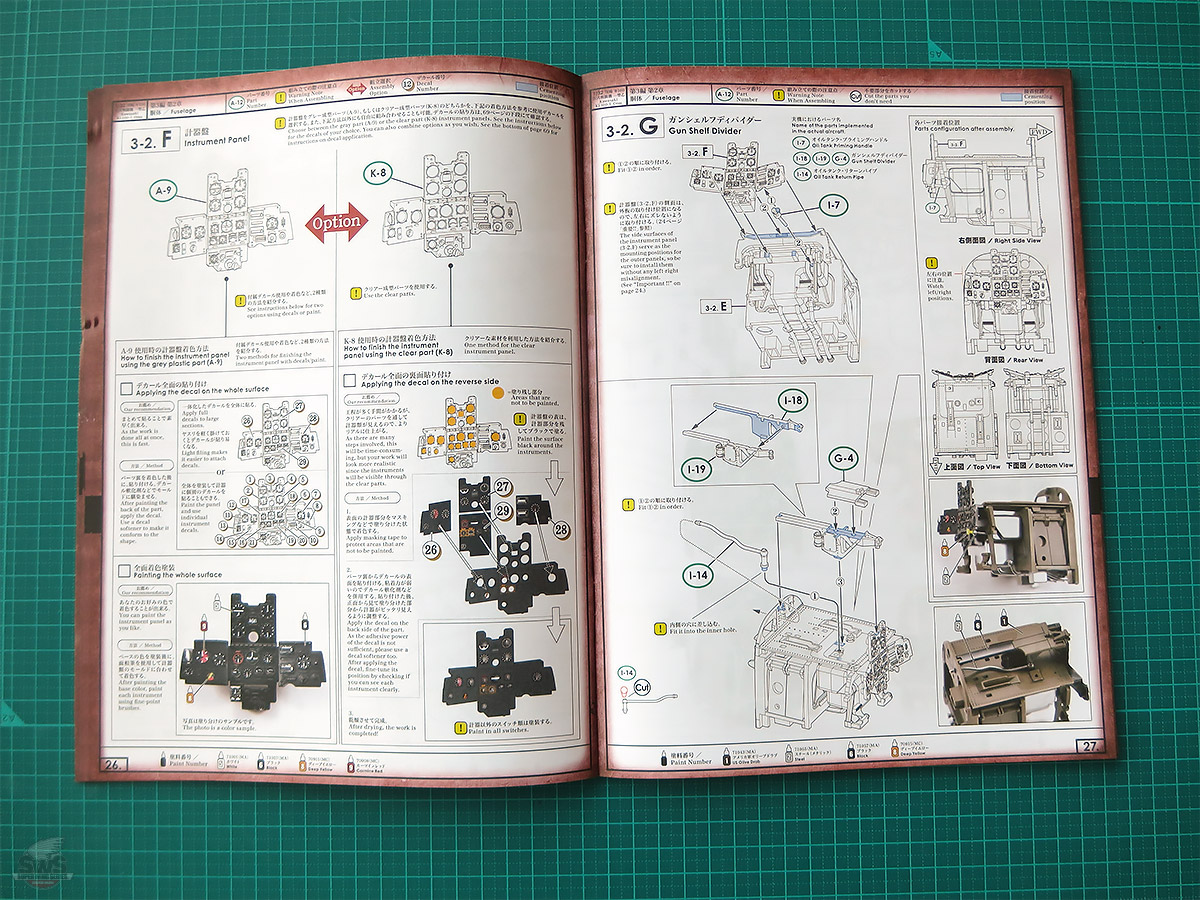
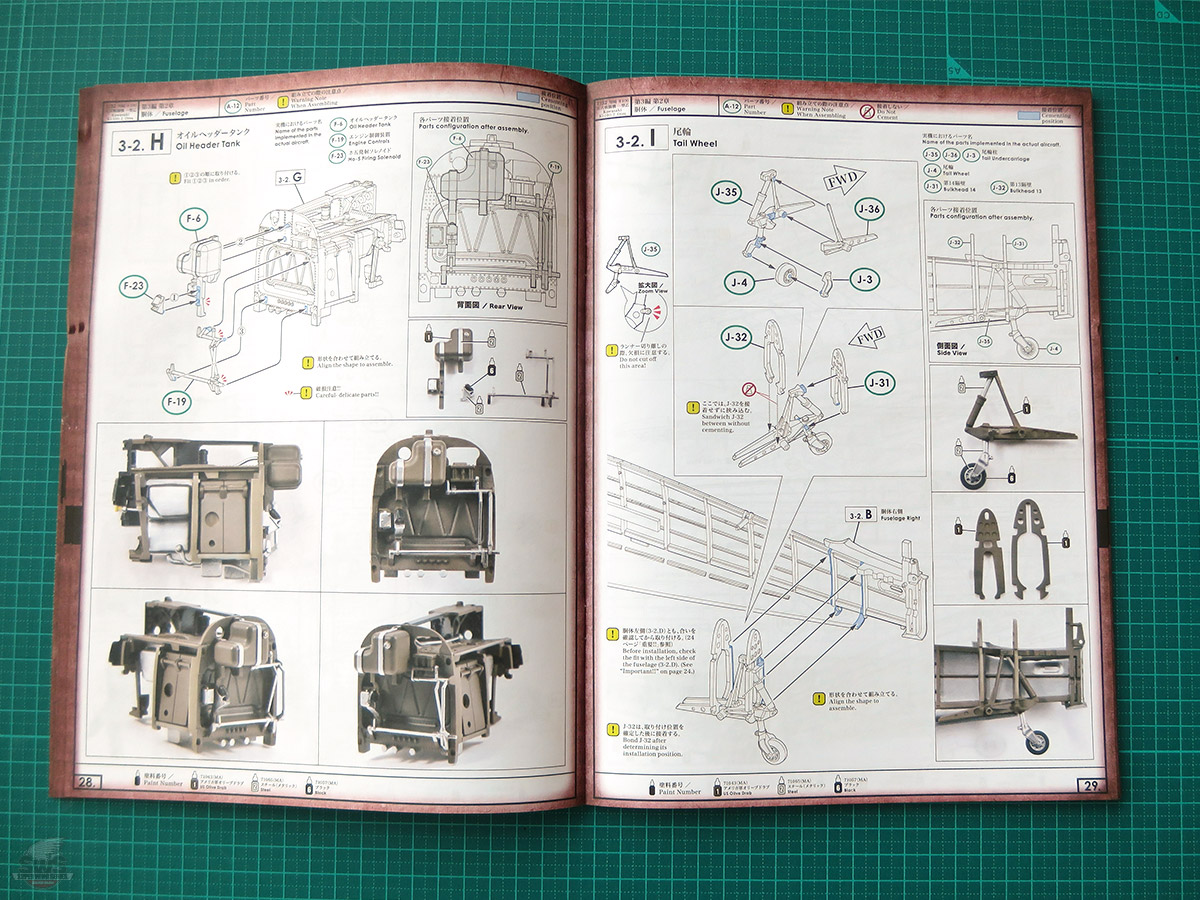
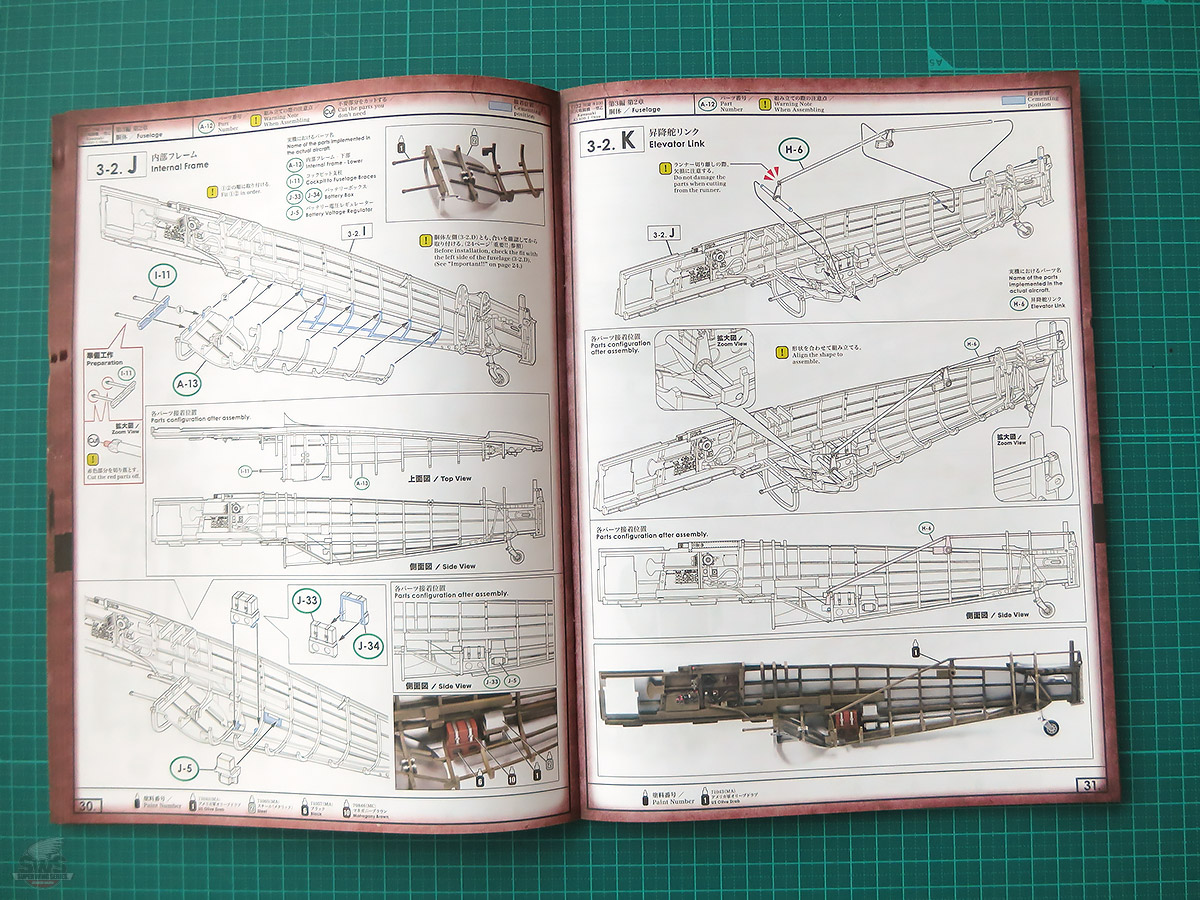
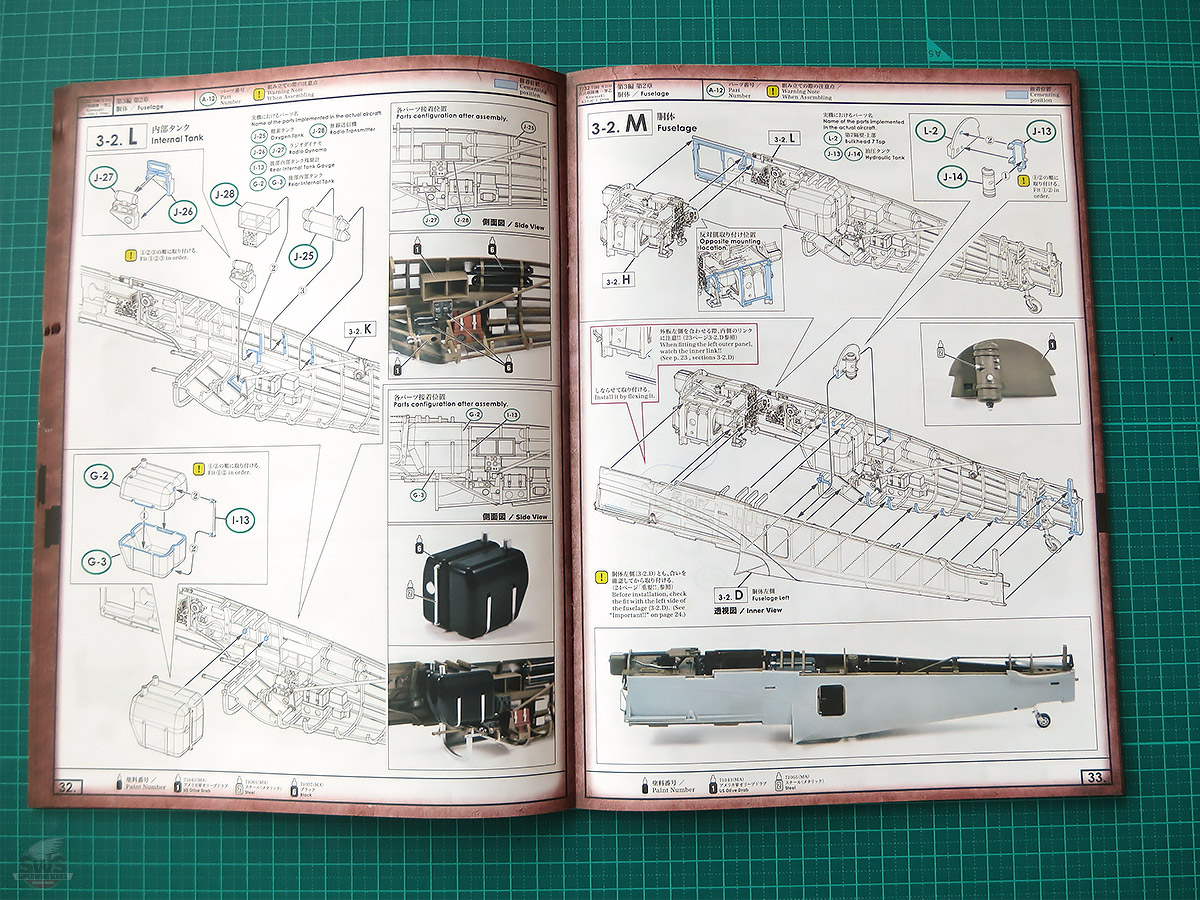
▋Now Then, We've Come This Far
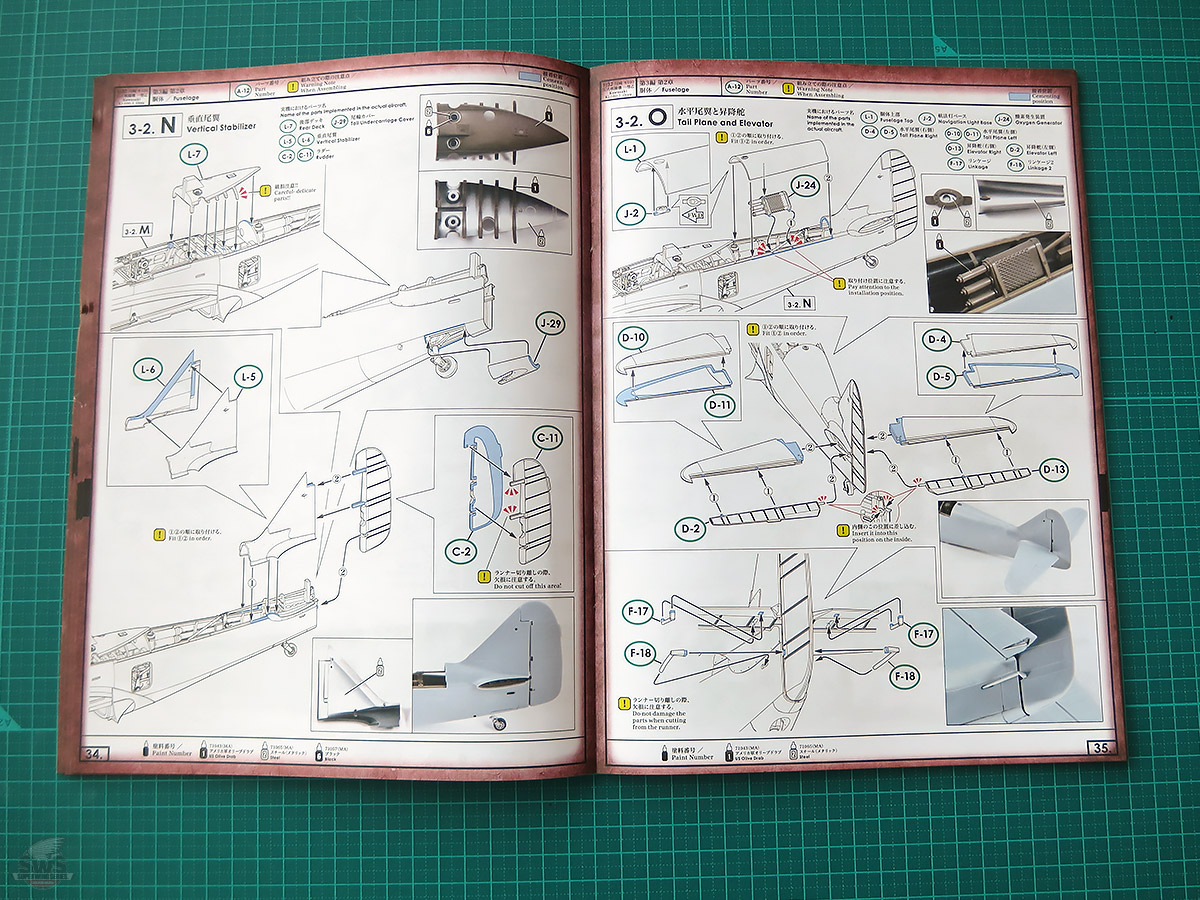
As befits a single-seat fighter, just about everything is packed into the fuselage.
Just like on the actual aircraft, this kit does not use the conventional "bathtub-style" cockpit assembly found in many model kits. Instead, the build follows a process much closer to the way the real aircraft was constructed at the Kawasaki factory.
When attaching the various components, don't rush to glue them to one fuselage half. Be sure to test-fit both fuselage halves together frequently, confirming the correct position of each part and making sure nothing interferes before moving on.
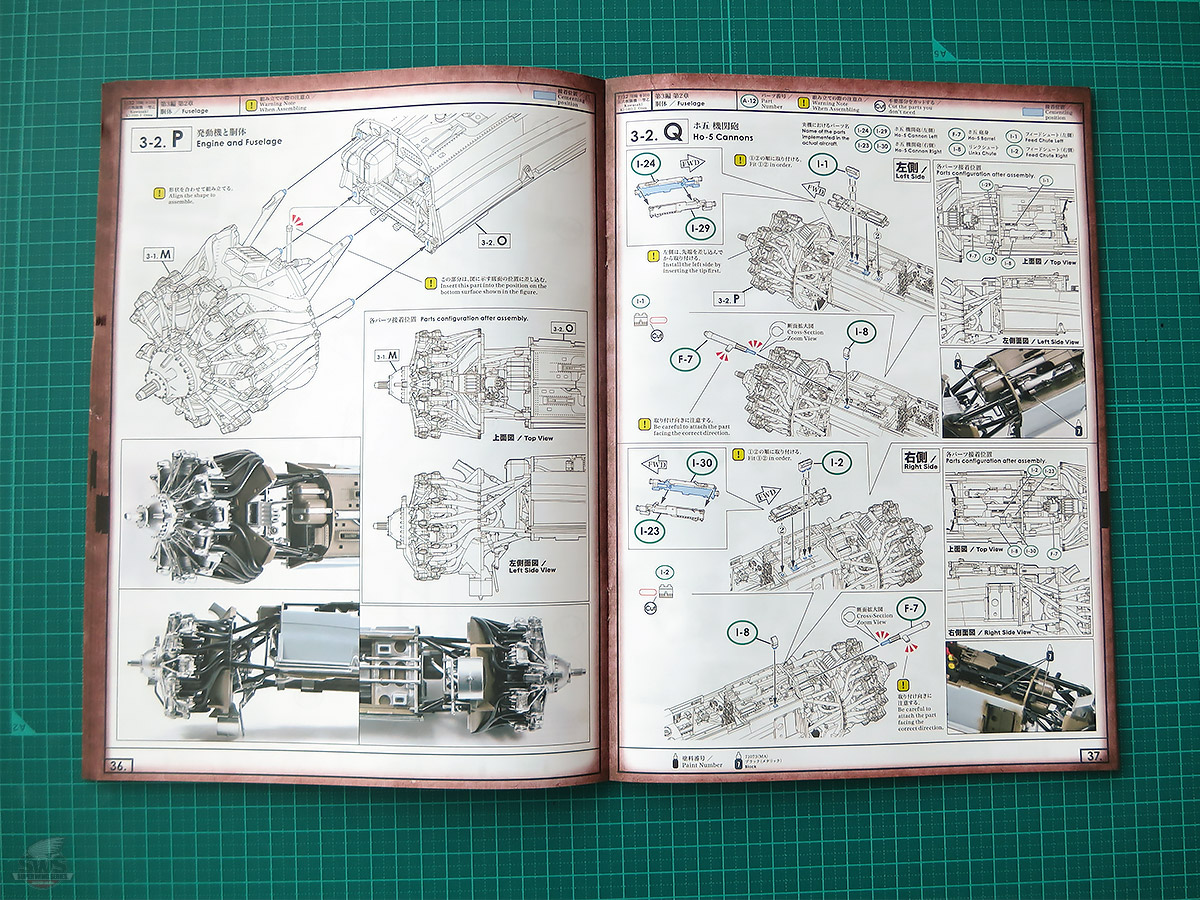
▋Installing the Engine and Engine Mount
If there is even the slightest error in the angle of the engine mount or in the glued joints, fitting the cowling and cover panels later may become quite difficult.
So take your time. Test-fit the engine mount carefully, and don't hesitate to temporarily position the cowling parts that follow as you go.
This is the key point, Brothers~~~!!
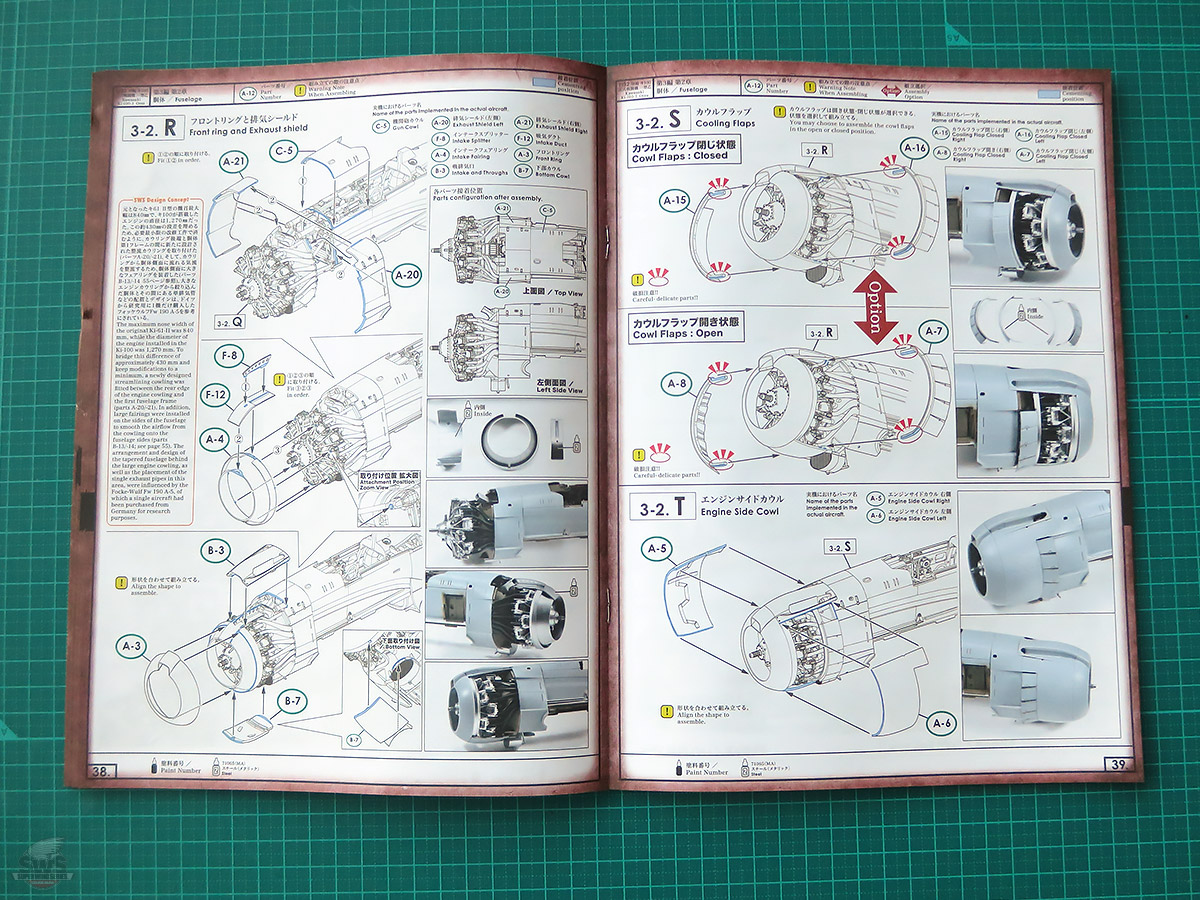
▋Look! The cowling, various access panels, and cowl flaps are now ready to be installed.
The key here is to make sure everything fits precisely through careful test-fitting. The expression and character of your Ki-100 Type 5 will be determined right here. So please don't rush. Work carefully and enjoy the build at a comfortable pace.
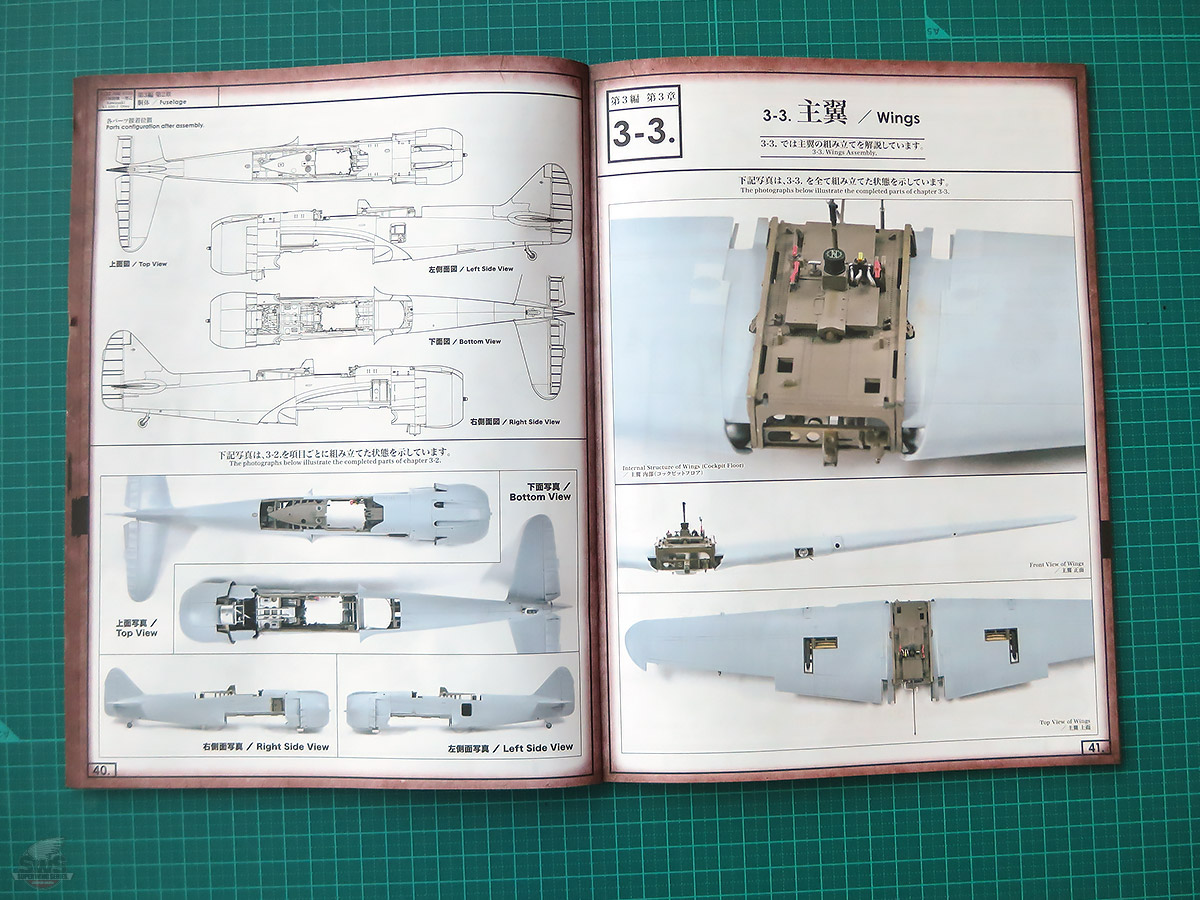
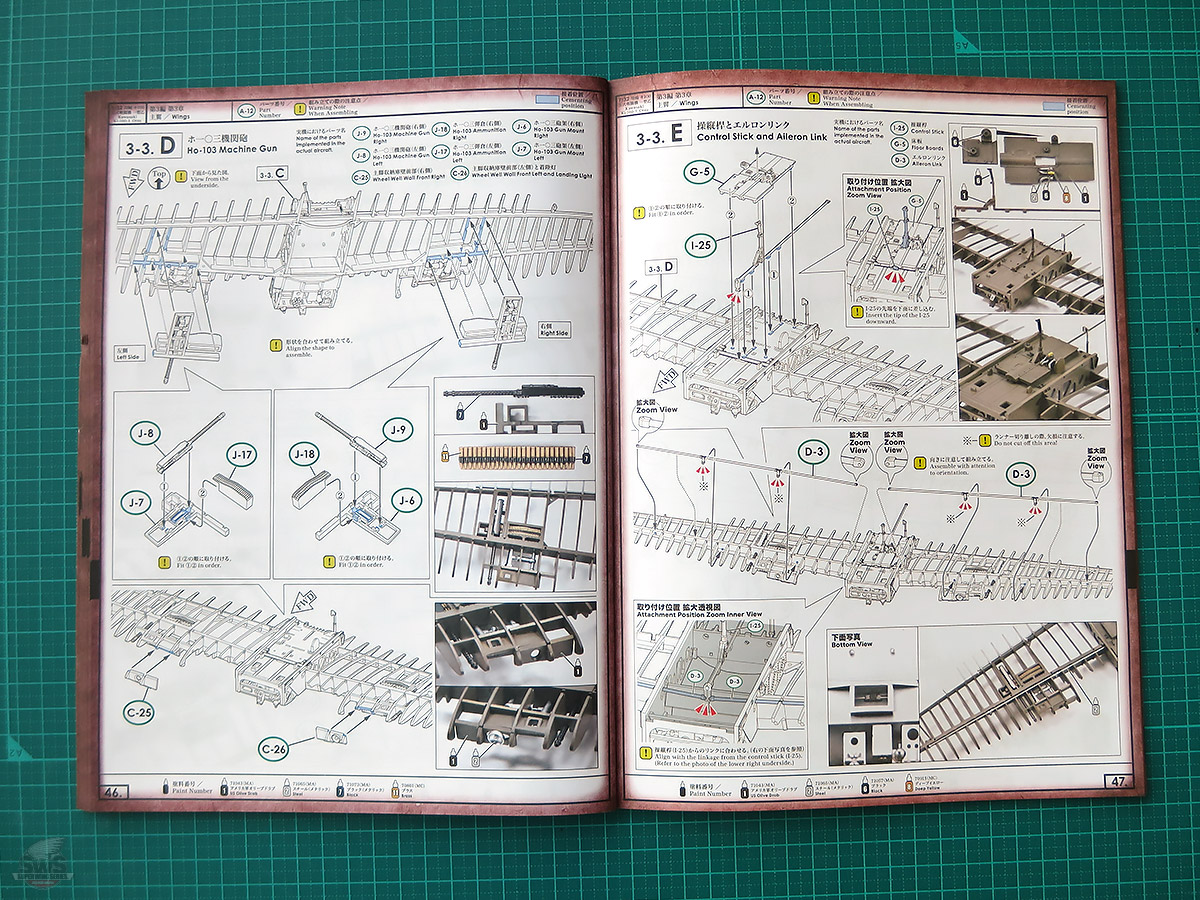
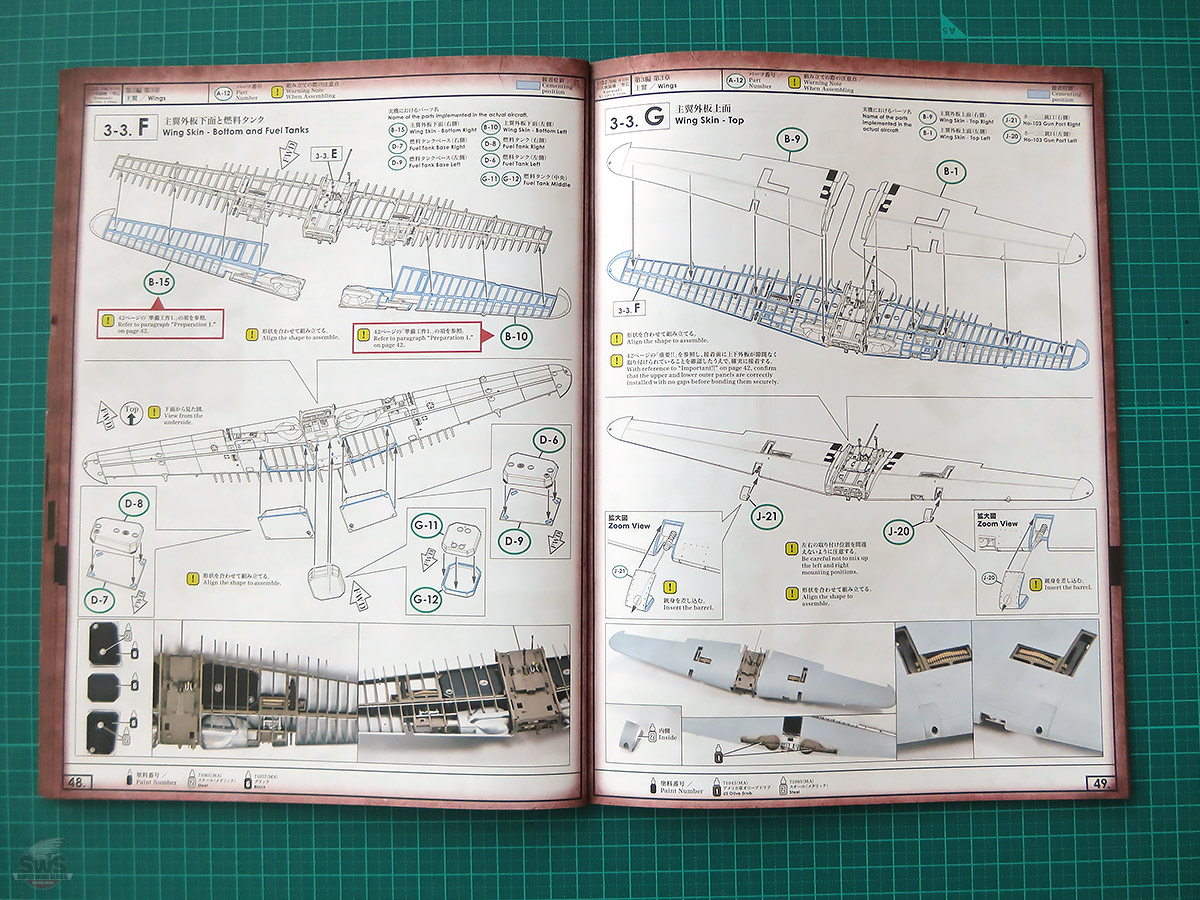
▋The Wing Assembly Begins
For a little while, simply enjoy following the photographs as the wing assembly progresses.
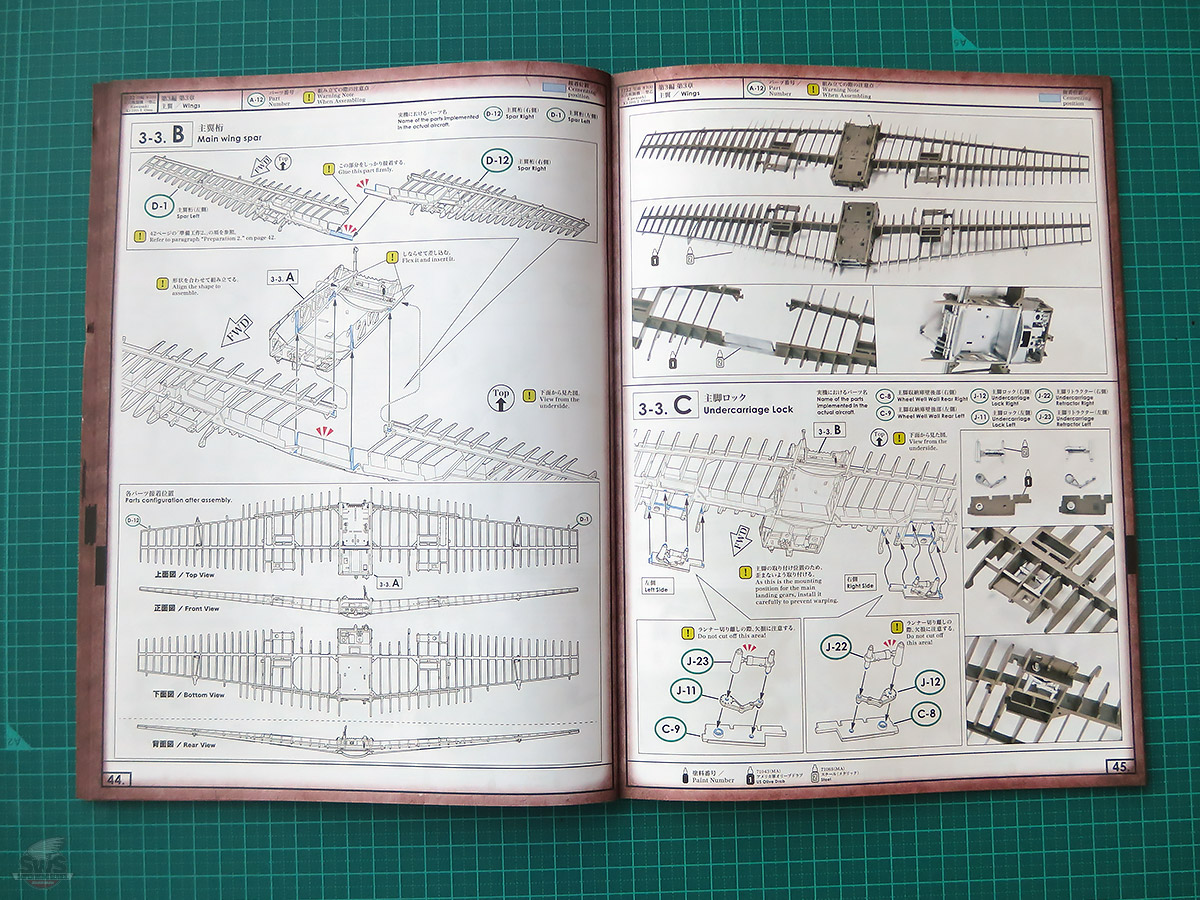
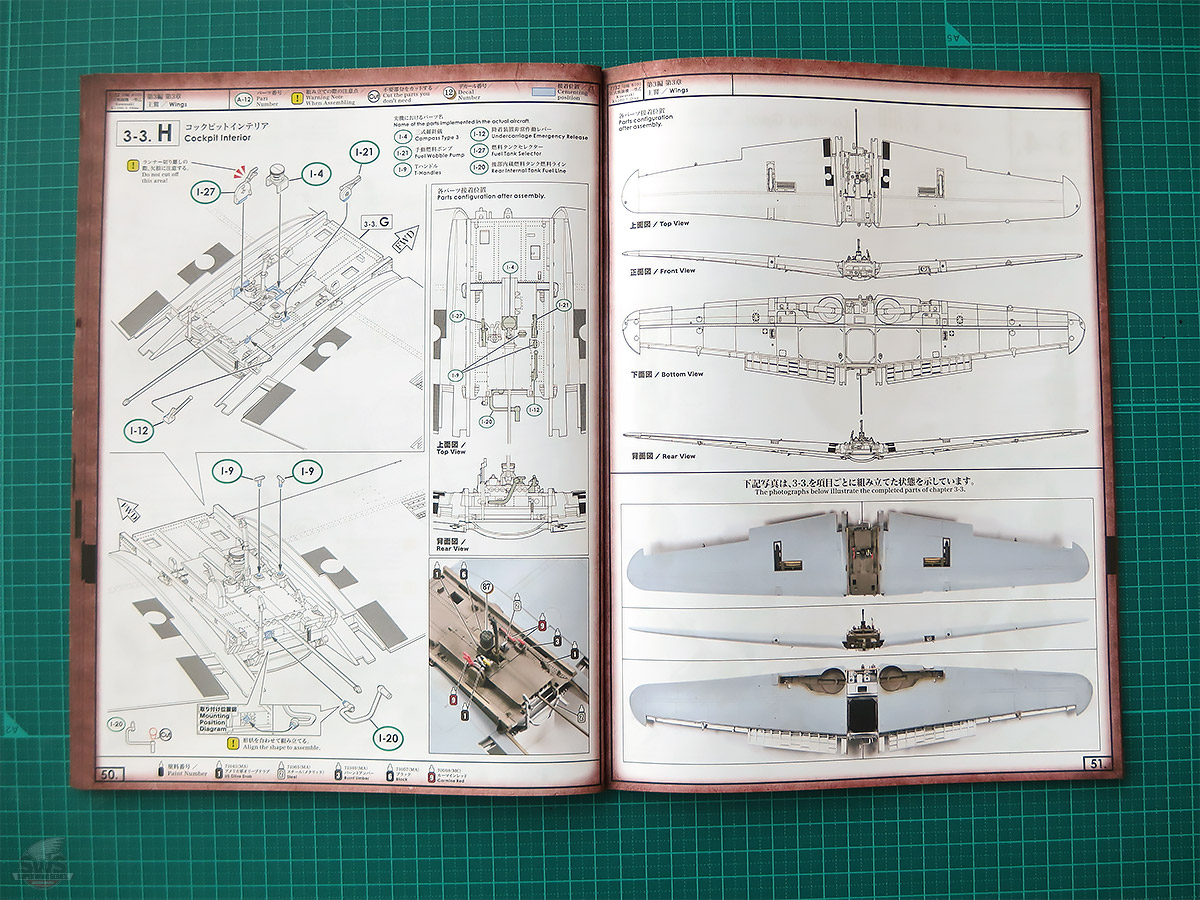
▋The Wing Armament and Cockpit Are Now Complete
Have you checked the wing dihedral? Are the upper and lower wing sections fitting together nicely?
These beautiful, sturdy wings are a proud inheritance from the Ki-61 Hien.
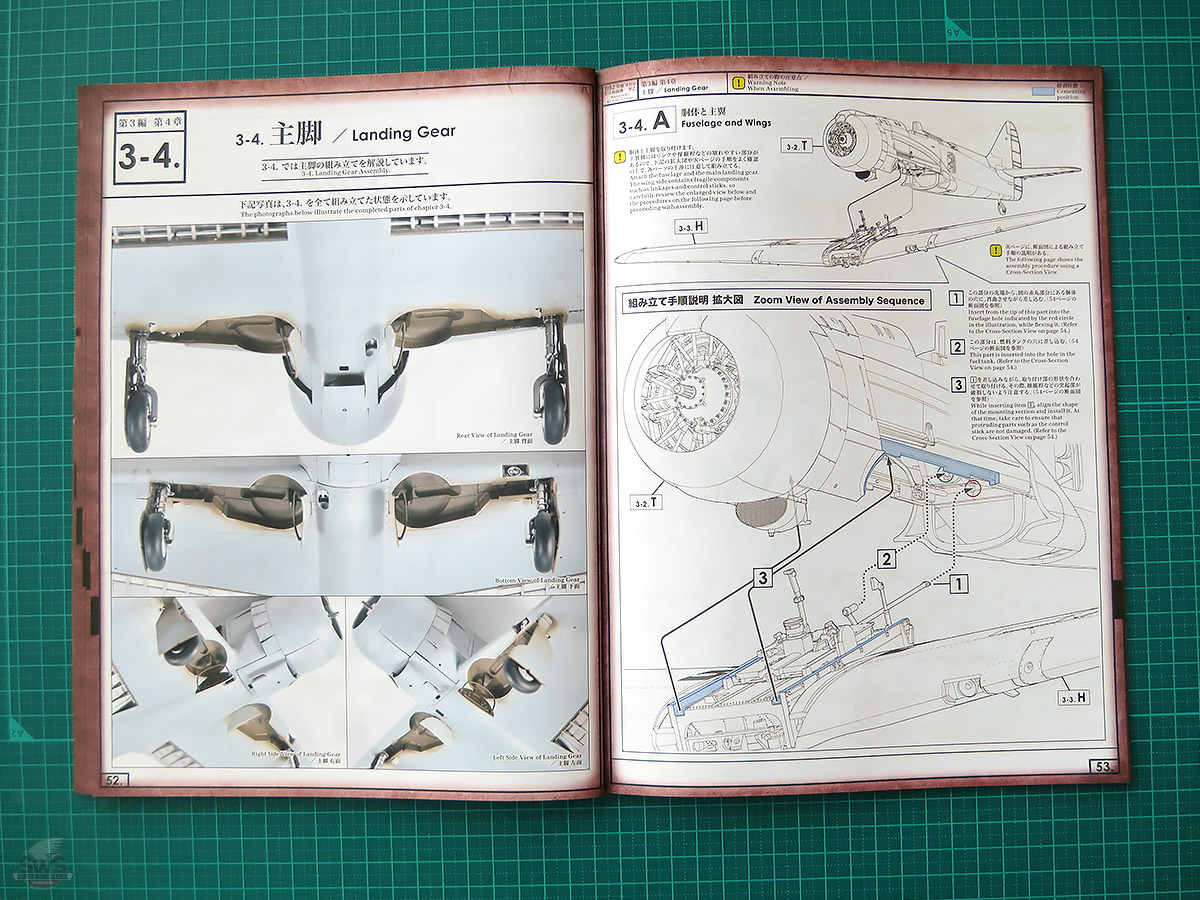
▋Now It's Time to Install the Landing Gear
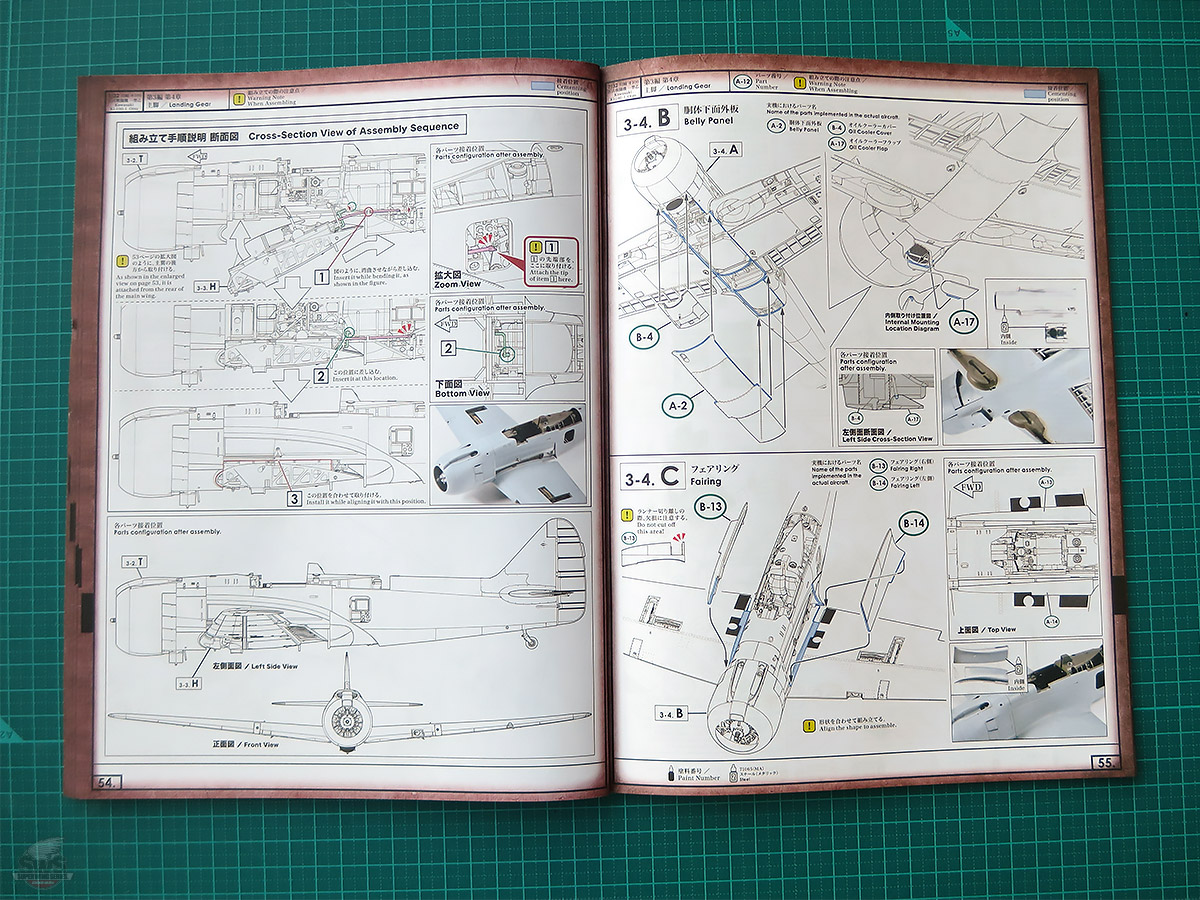
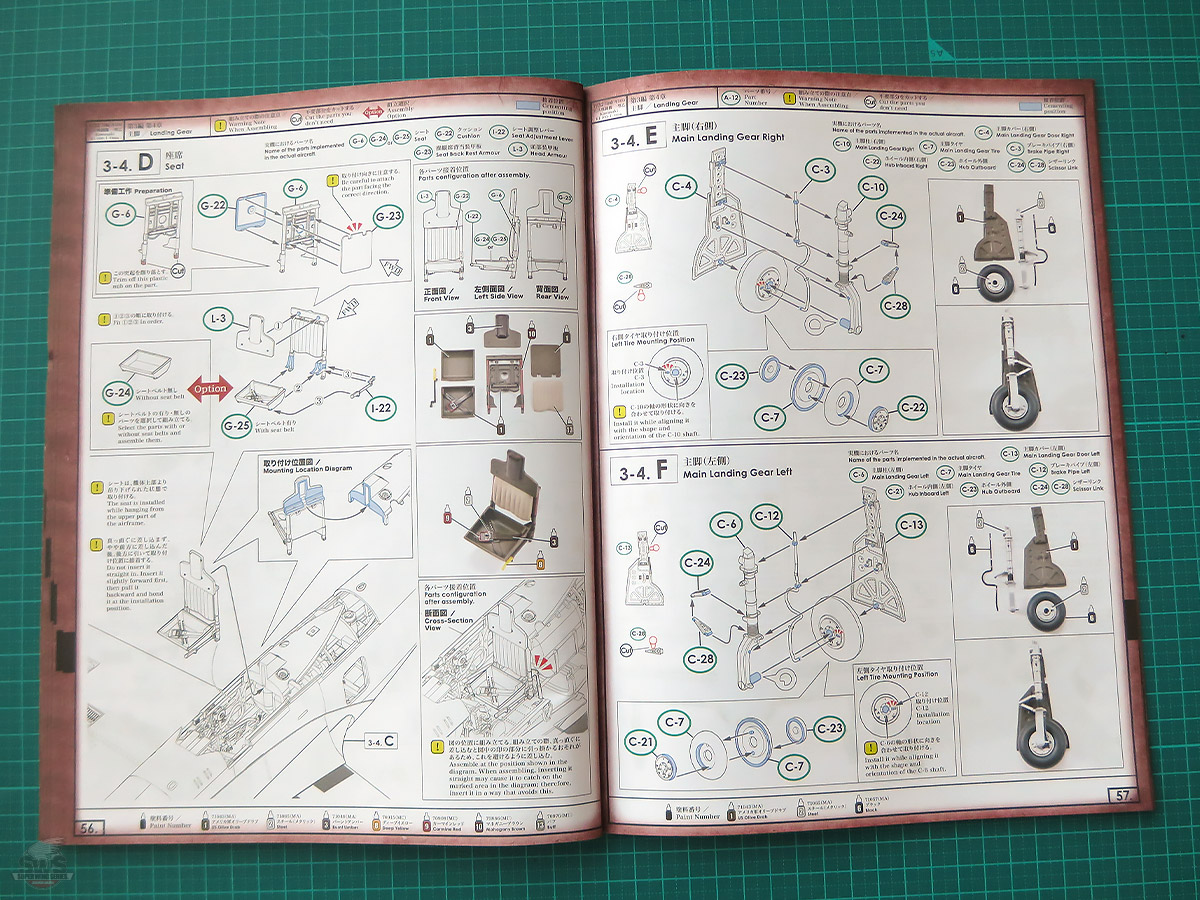
The wings and fuselage have come together beautifully. Be careful not to damage the control stick during the remaining assembly steps. Getting the wings to join the fuselage properly requires a bit of modeling acrobatics. I imagine the engineers who built the real aircraft may have felt much the same way. Please pay close attention when fitting the exterior panels around the wing roots and fuselage.
▋Now Then, It's Time to Install the Main Landing
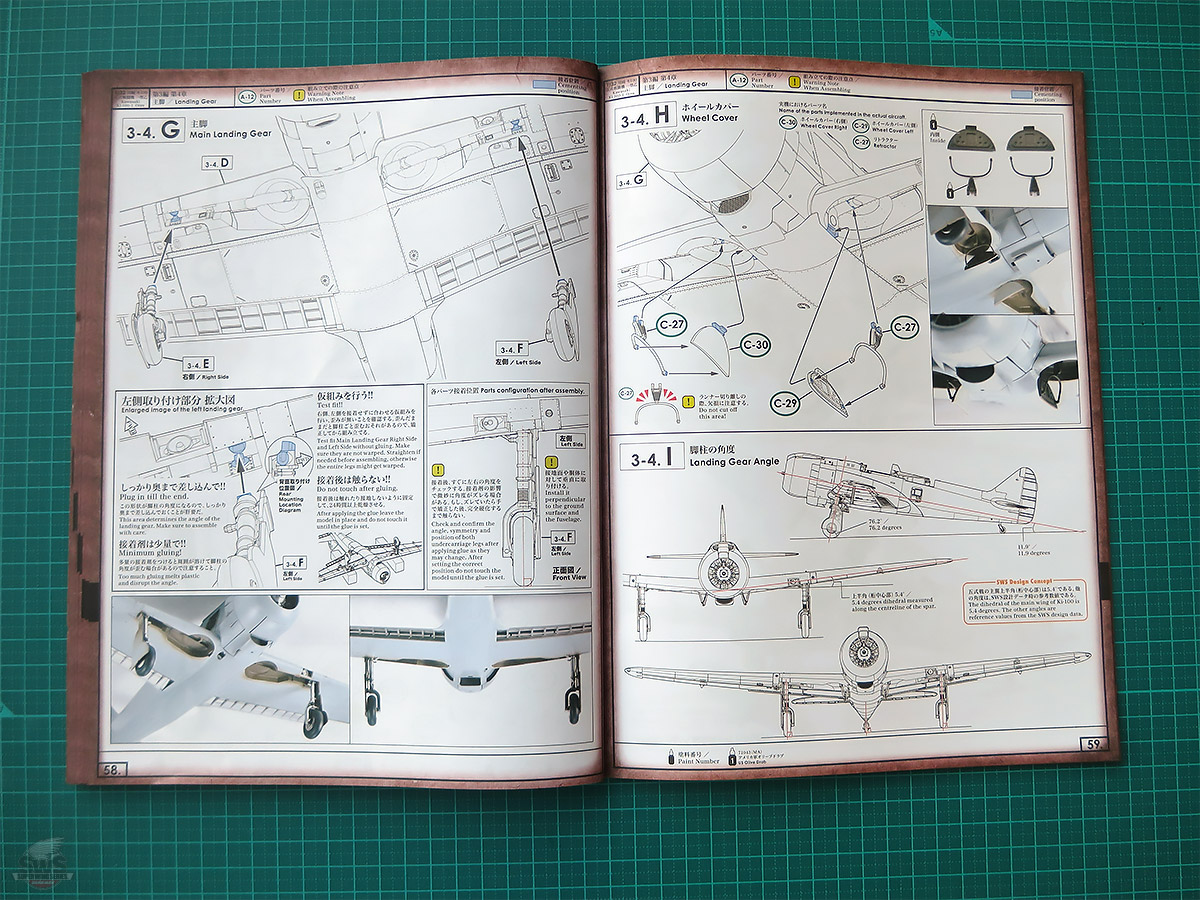
This is an important stage of the build. Be sure to check the angle of the landing gear, its strength, and whether the wheels are aligned properly with the fuselage.
As mentioned in the instruction manual, careful test-fitting, thorough checking, and secure attachment are essential. Depending on your preference, a set of metal struts may also be worth considering.
After all, it would be a shame if your beautifully completed Ki-100 started to sag a few days after it was finished.
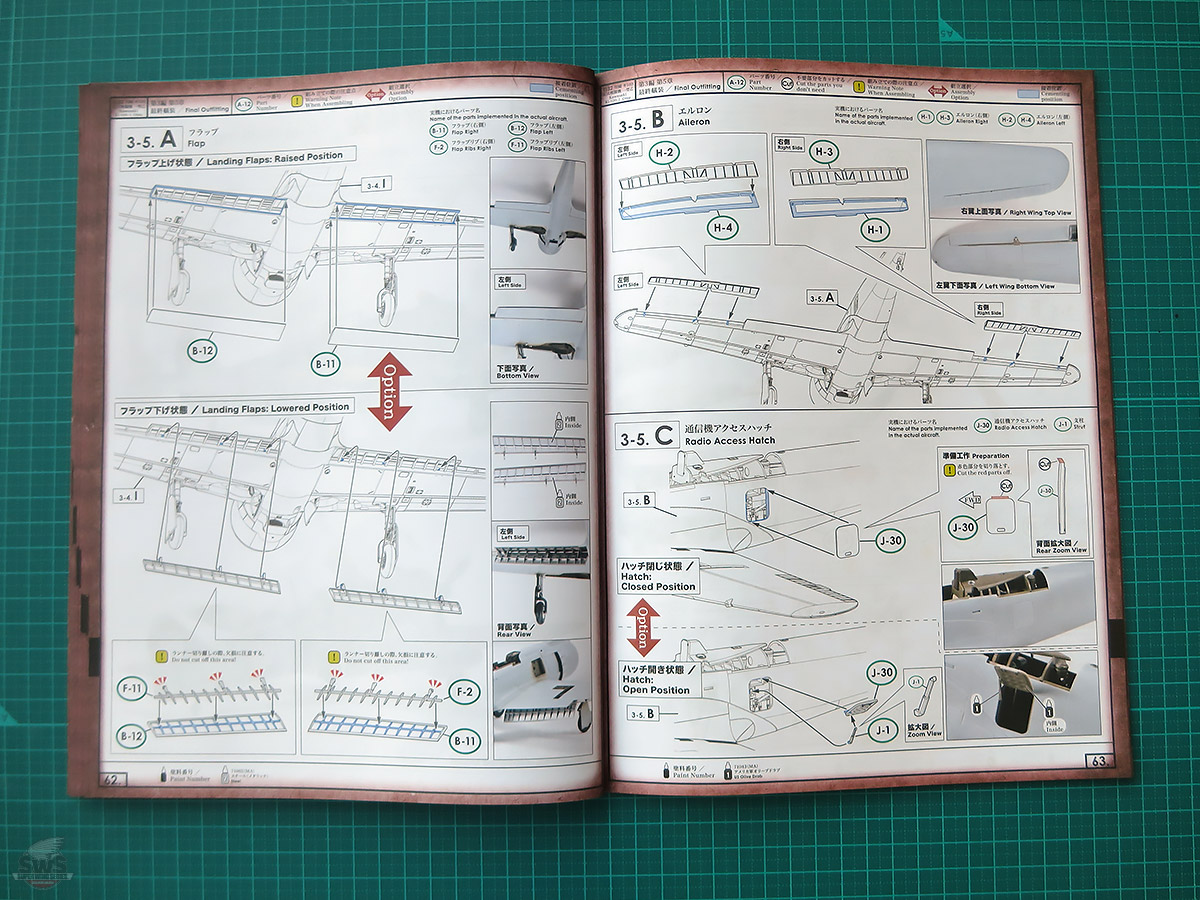
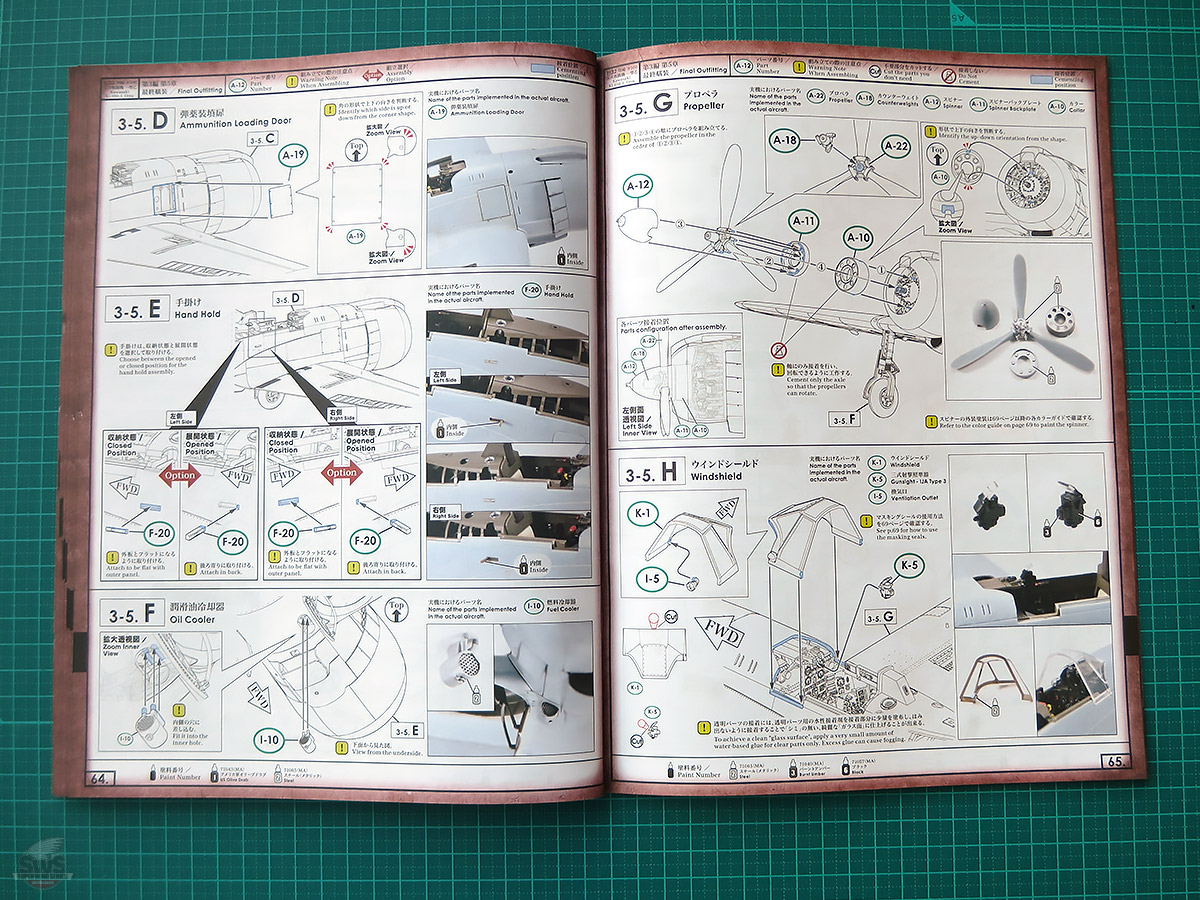
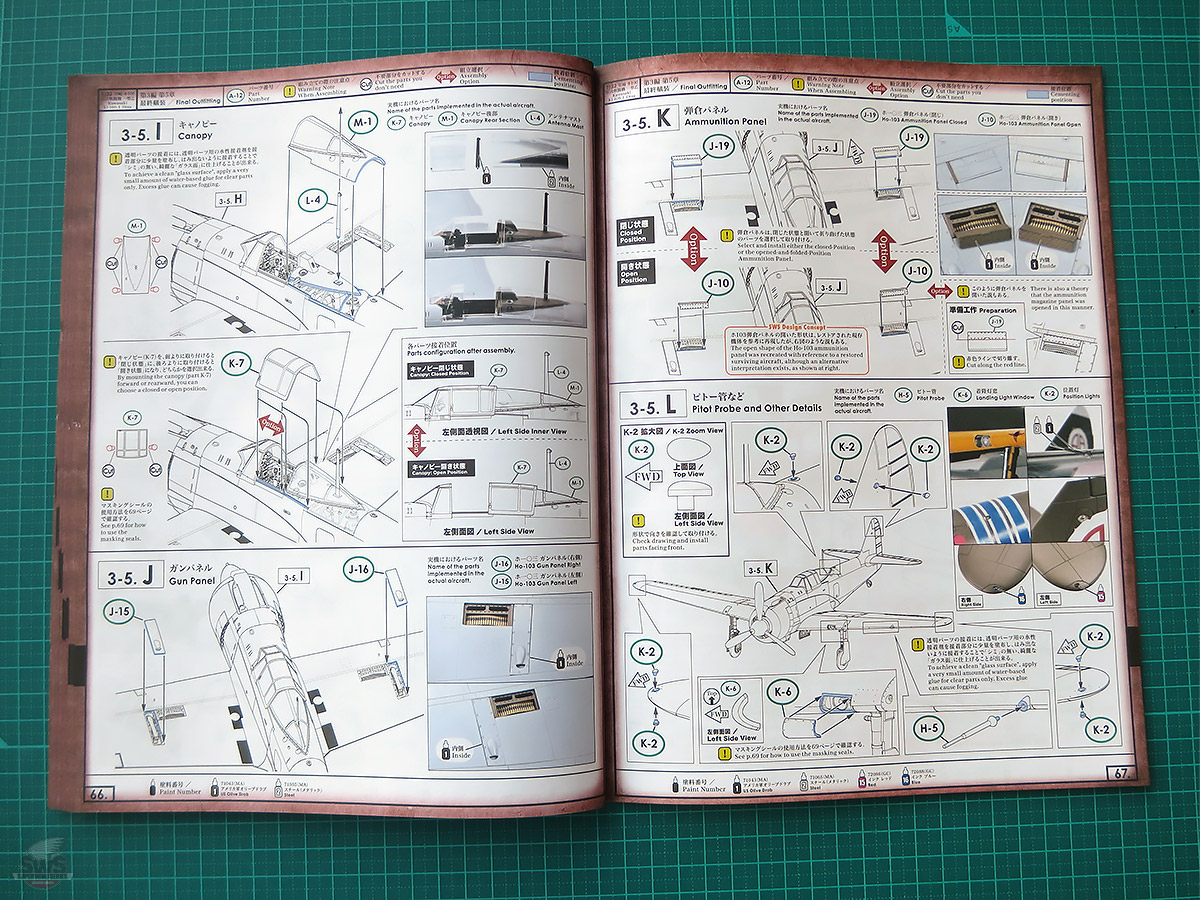
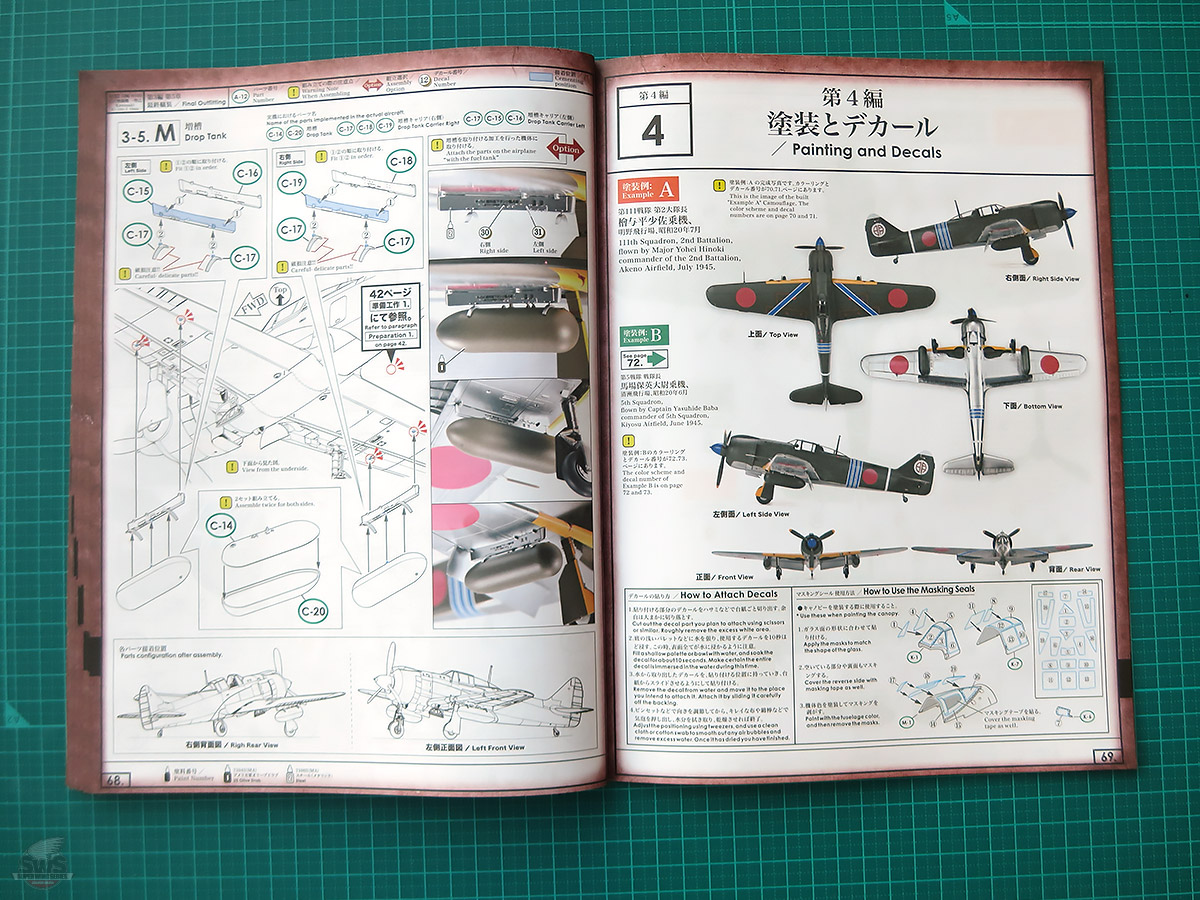
▋The Final Stage Begins!
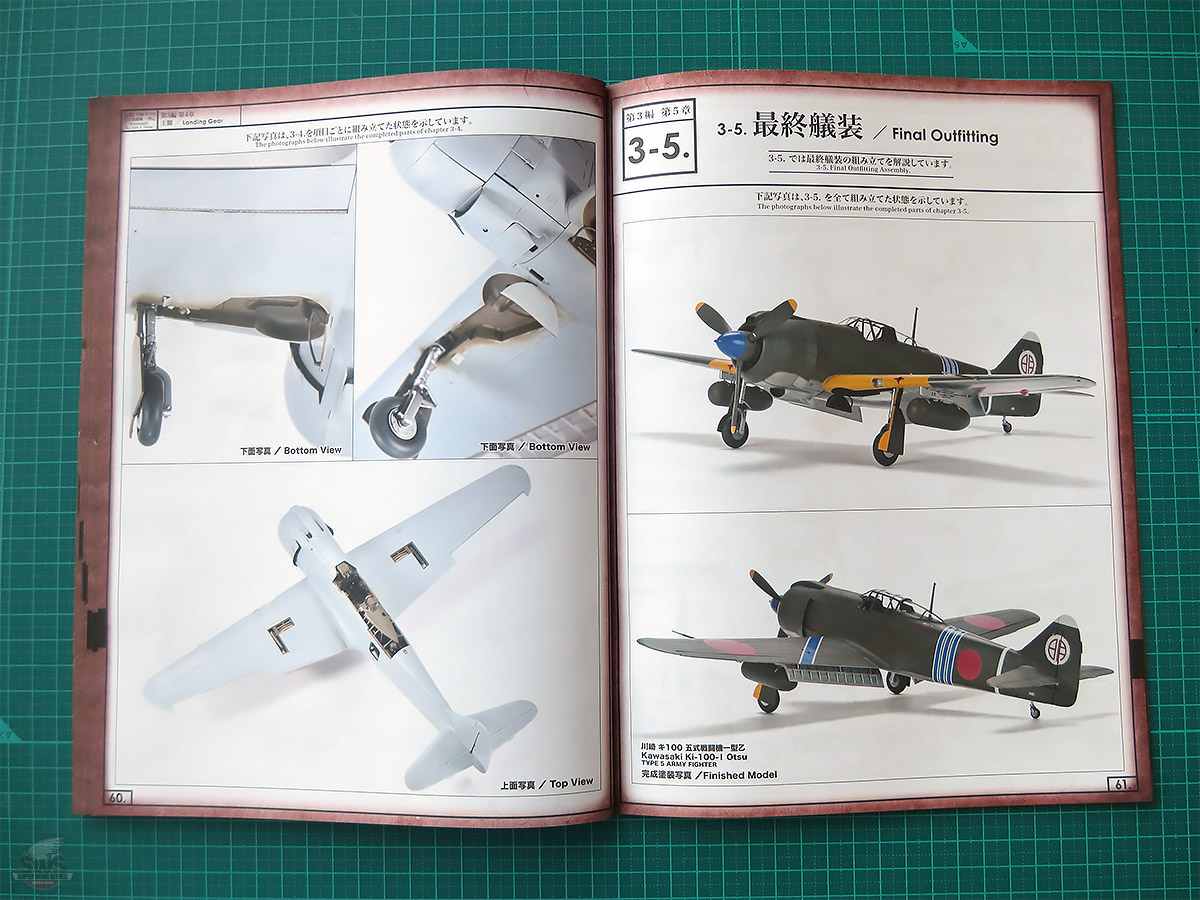
At last, we have reached the point where the distinctive shape of the Ki-100 Type 5 truly begins to emerge.
But this is no time to let your guard down. The extra care you give each part and the attention paid to the smallest details will make a tremendous difference to the finished model.
In particular, carefully refining the propeller and achieving a properly thin profile will greatly enhance the sharp appearance of the completed aircraft. Be sure to align the seams on the propeller spinner and canopy carefully as well.
Because this kit features the distinctive bubble canopy, both its best features and any imperfections will be clearly visible.
Keep in mind the old saying, "God is in the details." I'm looking forward to seeing you take your craftsmanship one step further.
▋At Last, We've Reached the End of the Ki-100 Build
Well done, everyone.
And to those of you who have followed this blog all the way to this point and are now saying, "All right! I'm going to build the Ki-100 myself!", I would like to offer my heartfelt thanks... and a big brotherly hug.
If you are a fan of Japanese aircraft, I believe you will appreciate the extraordinary value this kit represents. And even if Japanese aircraft have never particularly interested you, I hope that learning about the remarkable and often poignant history behind this fighter will leave a lasting impression on you.
In the summer skies of Japan in 1945, as the war drew inexorably toward its end, there appeared a new and unfamiliar fighter powered by a radial engine.
As the final fighter of the Imperial Japanese Army, the Ki-100 carried upon its wings the hopes and fortunes of a nation in its darkest hour.
We will not forget the men who flew and fought in these aircraft.
With all the passion and dedication of the Zoukei-Mura Development Team, we are proud to present the Ki-100 Type 5 to your aircraft collection.
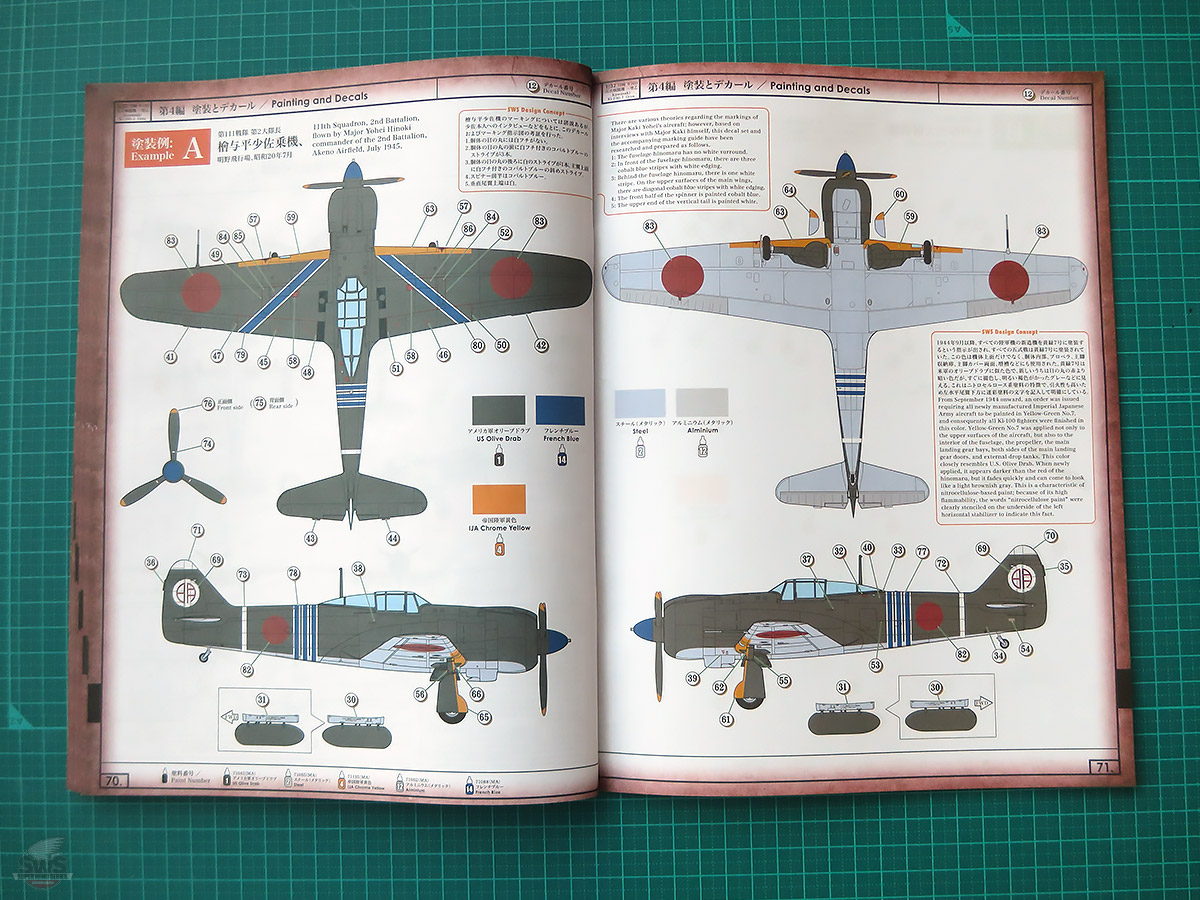
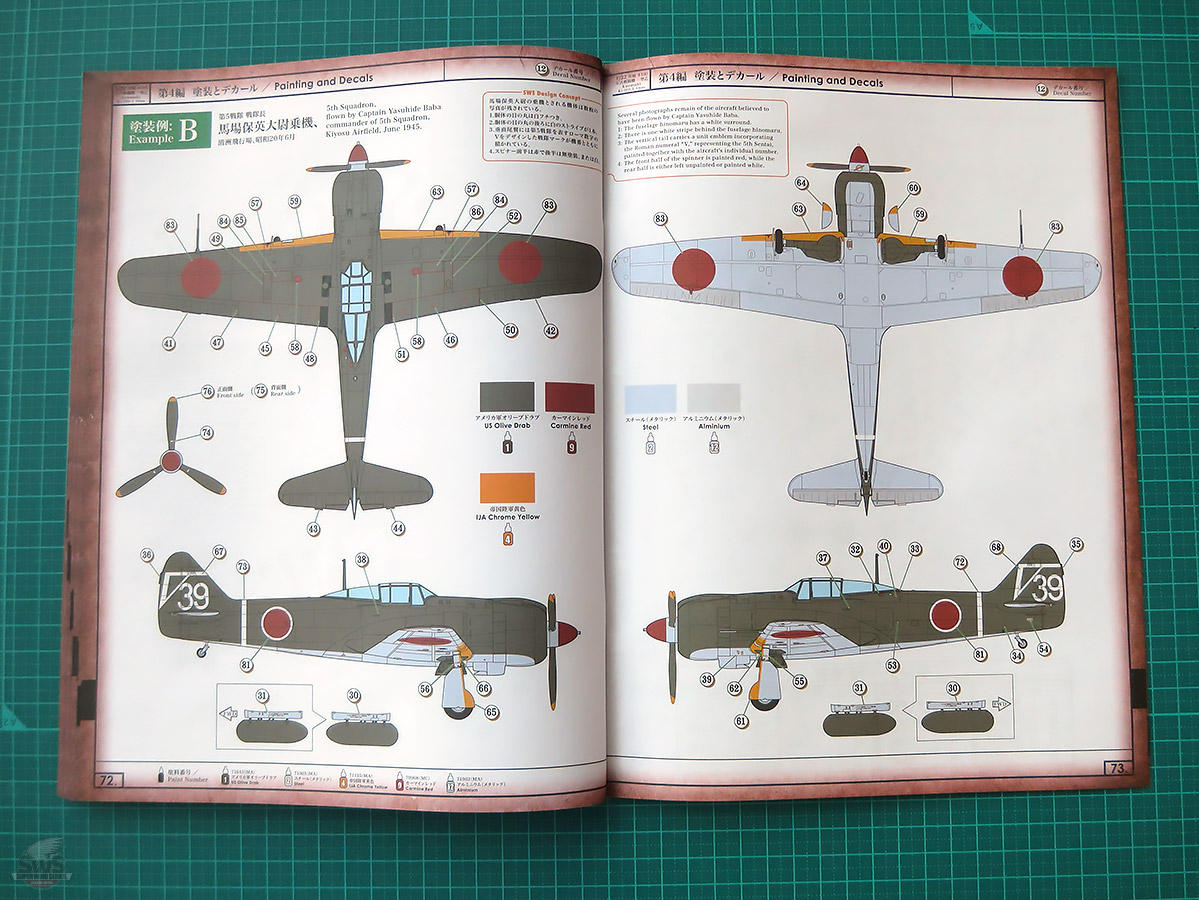
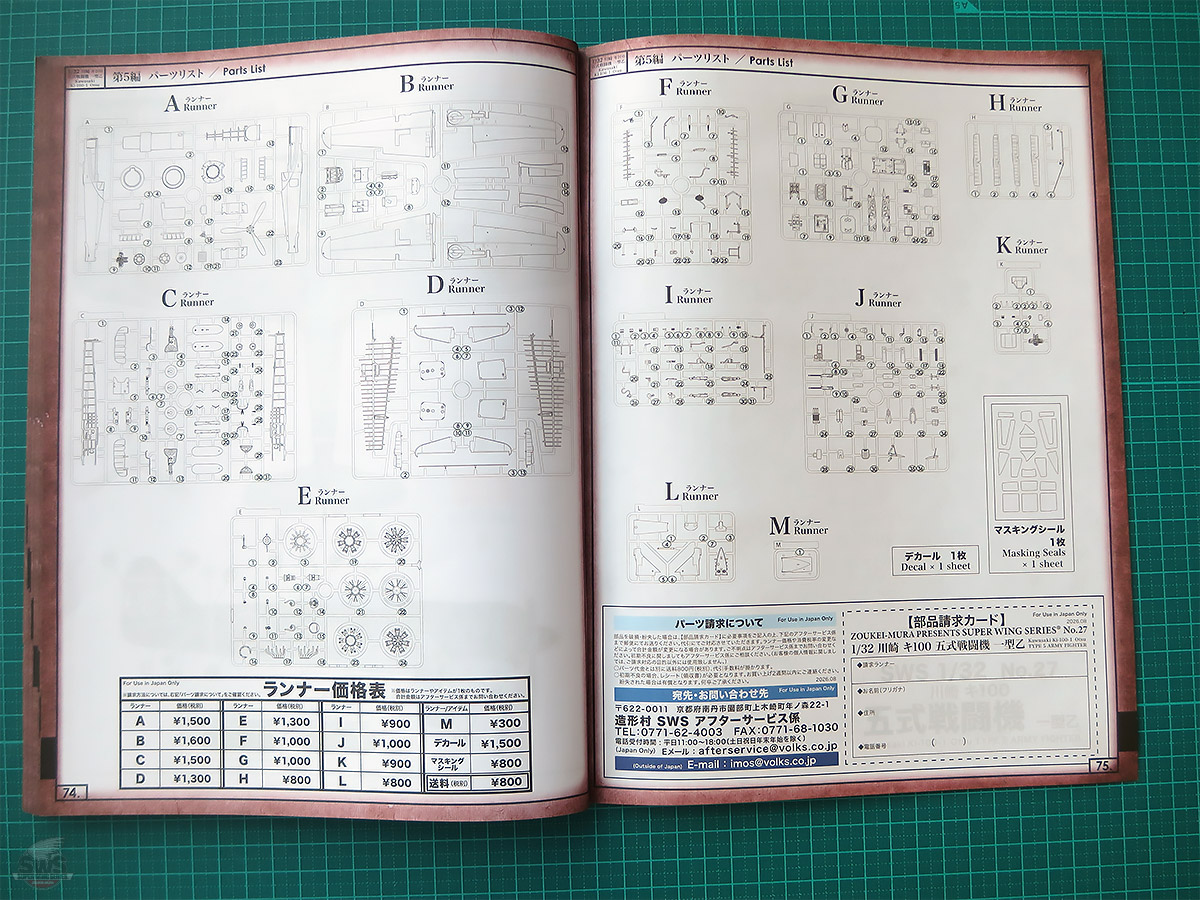
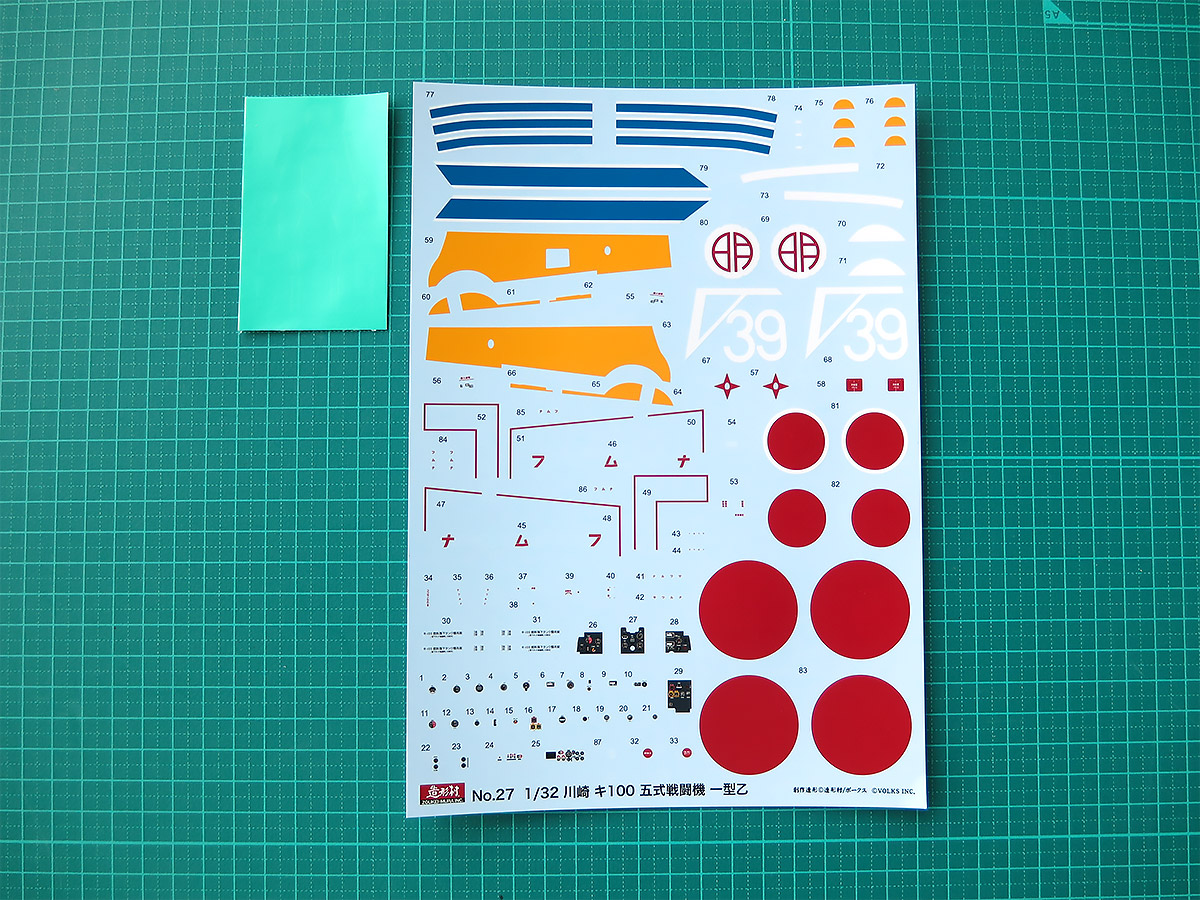
The Ki-100 Type 5 earned tremendous trust and admiration from the veteran Imperial Japanese Army fighter pilots who flew it into combat.
Facing the overwhelming tide of Allied air power, and particularly the latest American fighters, the Ki-100 never backed down, fighting with determination until the very end. Even today, many aviation enthusiasts cannot help but wonder:
"What if it had reached the front lines just a little earlier...?"
Carrying that unfulfilled dream upon its wings, this solitary fighter continued defending the skies of Japan through the final days of the war. And now, the day has finally come when we can bring this remarkable fighter to life as an SWS kit.
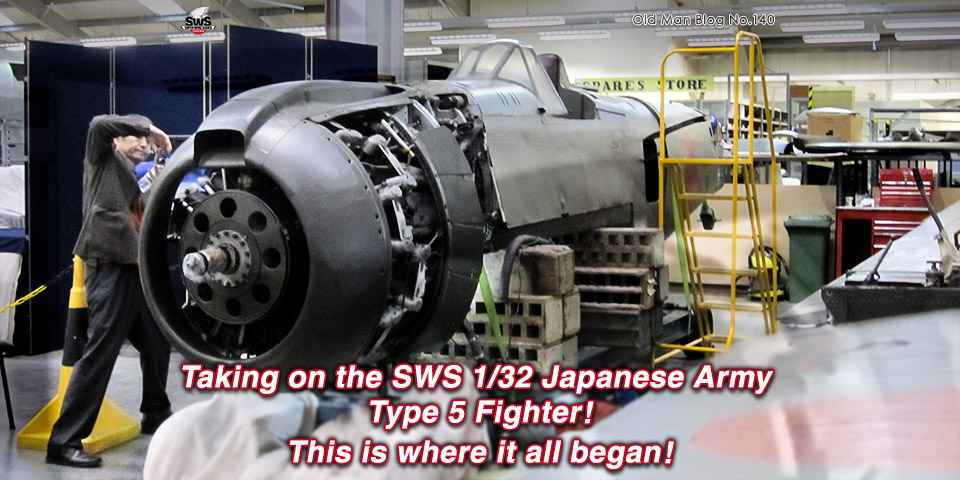
With the generous cooperation of the RAF Museum in the United Kingdom, the Zoukei-Mura Development Team conducted extensive research on the world's only surviving Ki-100. Through repeated visits and painstaking examination of the aircraft, every effort was made to capture even the finest details.
The result is an SWS kit that pushes 1/32 scale reproduction to its absolute limits. Quite simply, we do not believe it would have been possible to take it any further.
Born from extraordinary circumstances amid the chaos of the final days of World War II, the Ki-100 was a fighter unlike any other. We hope this kit allows you to experience not only its distinctive appearance, but also the excitement of witnessing the moments when this remarkable aircraft demonstrated capabilities few could have imagined.
In the next edition, I'll be taking a closer look at the kit parts themselves.
Please look forward to it~~~!!
Hideyuki Shigeta
President, Zoukei-Mura
Available in very limited quantities and on a first-come, first-served basis.
Be sure to get yours before they're gone!!!






































































































































































































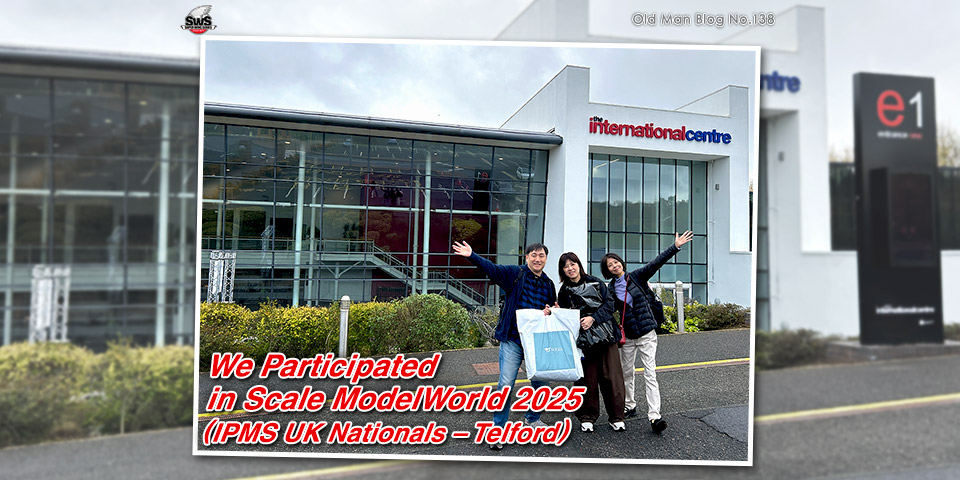 Old Man Blog No.138
We Participated in Scale ModelWorld 2025 (IPMS UK Nationals – Telford)
Old Man Blog No.138
We Participated in Scale ModelWorld 2025 (IPMS UK Nationals – Telford)
 Old Man Blog No.140
Taking on the SWS 1/32 Japanese Army Type 5 Fighter! This is where it all began!
Old Man Blog No.140
Taking on the SWS 1/32 Japanese Army Type 5 Fighter! This is where it all began!